
Indoor Seed Starting for Cool-Season Vegetables: How to Get a Head Start with Root Crops
Some of the links on this website are affiliate links, which means that if you make a purchase through these links, I may earn a small commission at no additional cost to you. As an Amazon Associate, I earn from qualifying purchases. I only recommend products I genuinely trust and believe will bring value to my readers. Also, some of the content was created with strategic use of AI tools. For more information, please visit the Privacy Policy page. Thank you for supporting my blog and helping me continue to provide valuable content. Gardening is more than growing food—it's where God grows us. If you're hungry for a faith that feels grounded again, I wrote a book for you. Download my free eBook: Rooted in Grace: A Christian Guide to Intuitive Gardening
Introduction
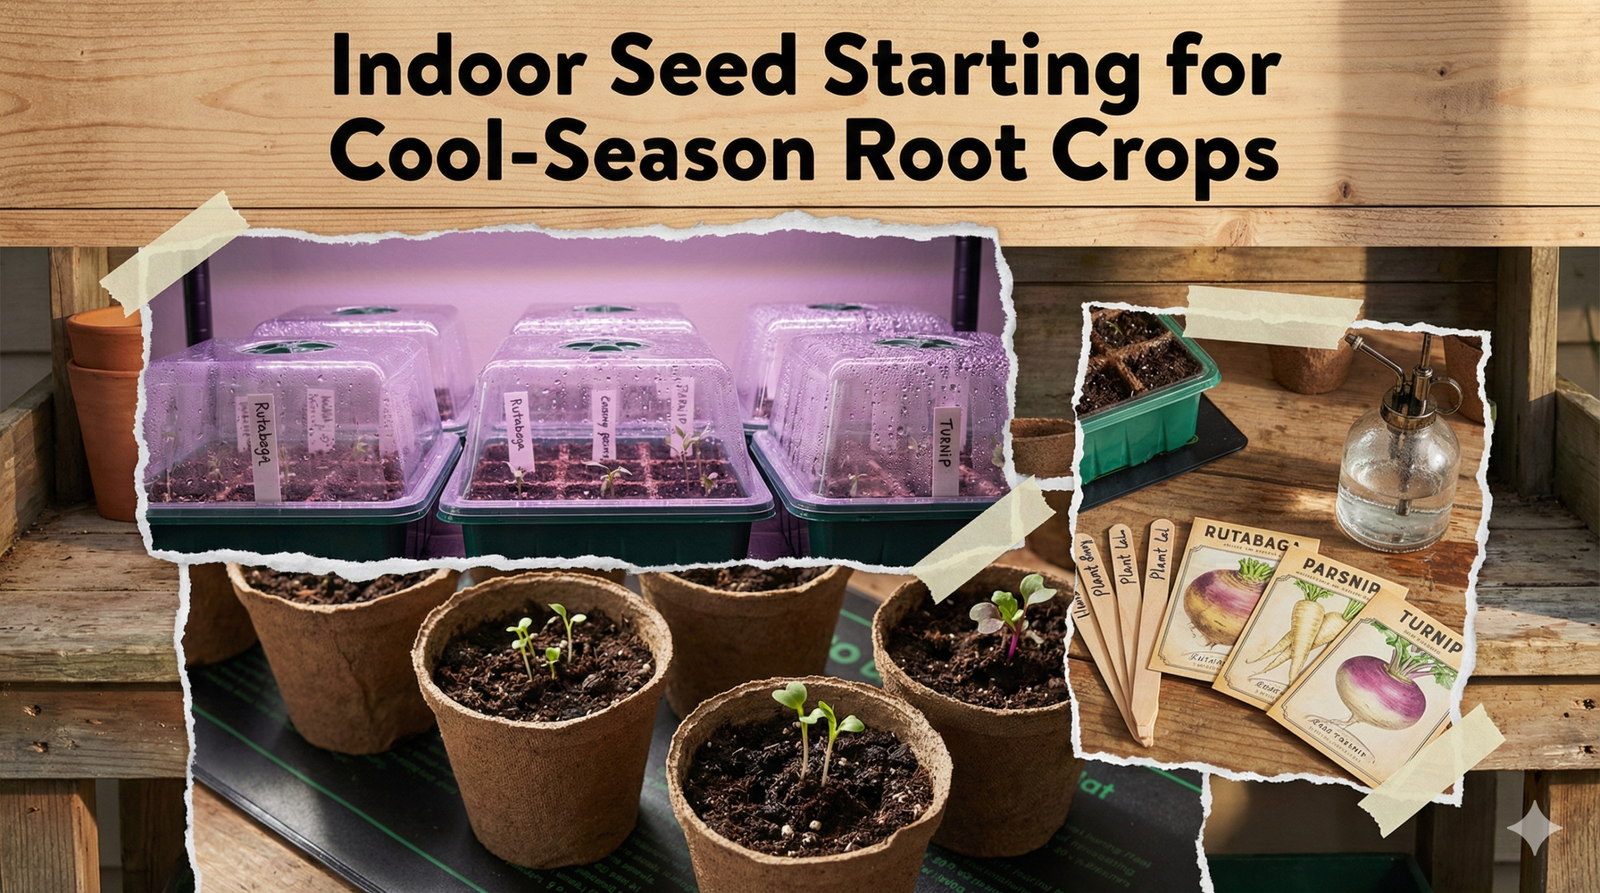
Starting seeds indoors is one of the most rewarding parts of gardening. For cool-season crops like rutabaga, parsnips, and turnips, an early start indoors gives them the edge to thrive in your Zone 9 garden. These crops benefit from a controlled environment where you can nurture them from seed to healthy transplant, setting the stage for a productive harvest. Let’s explore the process in depth, from choosing the right materials to successfully planting them in your garden.

Why Indoor Seed Starting Is Perfect for Cool-Season Vegetables
Cool-season root crops like rutabaga, parsnips, and turnips often require a longer growing season than other vegetables, making indoor seed starting an ideal choice. By starting them indoors, you can:
Starting these crops indoors gives them a head start, especially in regions like Zone 9 where timing is everything. Rutabaga, parsnips, and turnips need consistent conditions to germinate and establish strong roots, something that’s easier to achieve indoors.
- Extend the Growing Time: These crops require 90-120 days to mature. Starting seeds indoors ensures they have enough time to develop before the warm weather arrives.
- Maintain a Controlled Environment: You can control temperature, humidity, and light, increasing germination rates and producing healthier seedlings.
- Reduce Pest Risks: Starting seeds indoors protects seedlings from pests like cutworms, slugs, and other outdoor threats in their vulnerable early stages.
Gathering Your Indoor Seed Starting Supplies
The right materials can make a world of difference for your indoor seed starting success. Here’s what you’ll need to get started:
- Seed Trays or Biodegradable Pots: These containers keep your seedlings organized and make transplanting easier. Biodegradable pots are great for root crops since they can go straight into the ground.
- Seed-Starting Mix: A light, sterile mix is essential. Premoisten the mix before sowing to ensure it’s evenly moist but not soggy.
- Heat Mats: These help maintain consistent soil temperatures (65°F-75°F), which is crucial for germination.
- Grow Lights: Cool-season crops need 14-16 hours of light daily. Position the lights close to the seedlings to prevent legginess.
- Spray Bottle: Gentle watering ensures the soil stays moist without displacing seeds.
- Plant Labels: Labeling ensures you can identify different crops as they grow.


Step-by-Step Guide to Starting Seeds Indoors
Successfully starting seeds indoors requires careful attention to detail. Here’s a step-by-step breakdown:
- Prepare Your Soil and Containers:
- Fill your seed trays or pots with premoistened seed-starting mix, leaving about half an inch of space at the top.
- The mix should feel damp but not waterlogged, similar to a wrung-out sponge.
- Plant Your Seeds:
- Sow seeds at the correct depth:
- Rutabaga: 1/4 inch deep.
- Parsnips: 1/2 inch deep.
- Turnips: 1/4 inch deep.
- Lightly cover the seeds with soil and gently press down to ensure good seed-to-soil contact.
- Sow seeds at the correct depth:
- Provide the Right Conditions:
- Place trays on heat mats to maintain consistent soil temperatures.
- Cover trays with a humidity dome or plastic wrap to retain moisture until germination.
- Watering and Monitoring:
- Check soil moisture daily by pressing the surface lightly with your finger. Mist with a spray bottle if it feels dry.
- Avoid overwatering, as soggy conditions can lead to damping-off disease.
Caring for Your Seedlings
Once your seeds have germinated, it’s time to focus on nurturing the seedlings.
- Thinning Seedlings: After the first true leaves appear, thin to one seedling per cell or pot to ensure strong growth.
- Watering Techniques: Water seedlings from the bottom by placing trays in a shallow pan of water. This encourages deep root development.
- Lighting: Keep grow lights 2-3 inches above the seedlings, adjusting as they grow to prevent stretching.
Transplanting Your Seedlings Outdoors
When your seedlings are ready, it’s time to transition them to your garden.
- Timing: Seedlings are ready to transplant when they have 2-3 sets of true leaves and the roots have filled their containers.
- Hardening Off: Gradually acclimate seedlings to outdoor conditions by placing them outside for a few hours a day, increasing the duration over a week.
- Planting: Prepare your garden bed with loose, rock-free soil. Spacing recommendations:
- Rutabaga: 12-18 inches apart.
- Parsnips: 6-8 inches apart.
- Turnips: 4-6 inches apart.
Overcoming Common Challenges
Even with careful attention, indoor seed starting can come with its own set of challenges. Here are solutions to common problems:
- Damping-Off Disease: Prevent this fungal issue by using sterile soil, ensuring good air circulation, and avoiding overwatering.
- Leggy Seedlings: Keep grow lights close to seedlings and ensure they have enough light.
- Transplant Shock: Handle seedlings gently and water them immediately after transplanting.
Companion Planting and Succession Planning
- Companion Plants: Pair these root crops with onions, spinach, or lettuce to maximize garden space and reduce pests.
- Succession Planting: Start a second batch of seeds 2-3 weeks after the first to extend your harvest window and enjoy a continuous supply.
Conclusion
Starting rutabaga, parsnips, and turnips indoors is a rewarding process that sets you up for gardening success. With the right materials, careful planning, and attention to detail, you’ll be enjoying robust seedlings and abundant harvests in no time. Ready to start your seedling journey? Check out our blogs, How to Start Seeds in Southern Climates: A Guide to Year-Round Growing in South Texas or 10 Compelling Reasons to Start Seeds Indoors in 2025 for more expert tips and tools!


One Comment