
How to Transplant Fall Brassicas Successfully: A Gentle Guide for Zones 8–10

How to Transplant Fall Brassicas Successfully: A Gentle Guide for Zones 8–10 🥦
Introduction: Transplanting Takes Trust
There’s something sacred about transplanting—a tender uprooting followed by a hopeful re-rooting. It mirrors what we experience in our own lives: unexpected shifts, vulnerability, and the quiet work of grace. When I kneel down to transplant a seedling, I’m reminded that growth rarely happens on a straight path. Sometimes we have to be moved, unsettled, and replanted in new soil before we truly flourish.
Fall brassicas—like broccoli, cabbage, cauliflower, and kale—can thrive through the changing seasons when given the right start. But to go from seedling to harvest in Zones 8–10, especially here in the Houston suburbs where summer heat is relentless? That takes timing, intuition, and the patience to let roots settle deeply. This is not a rush job. This is faithful garden work.
Whether you’re transplanting homegrown seedlings or nursery starts, this guide will help you protect your plants from heat stress, nourish them well, and walk them gently into fall’s cooler days. Let’s dig in together. 🧤
Free eBook
Rooted in Grace
A Christian guide to intuitive gardening — the whole book, free. Tell me where to send it and it’s yours in a minute.
When to Transplant Fall Brassicas in Zones 8–10 📅
Timing is everything when it comes to fall crops—especially brassicas that love cool weather but often need to be planted in the heat of late summer. I always tell gardeners that the calendar is just a suggestion; your soil thermometer and night temperatures are the real guides here.
Here’s what we’re working with across the zones:
| Zone | Ideal Transplant Window | Key Temperature Markers |
| Zone 8 | August 15–September 15 | Daytime highs trending below 90°F; nights 65–70°F |
| Zone 9 (Houston Area) | August 20–September 30 | Late August heat begins breaking; nights drop to low 70s |
| Zone 10 | Early October onward | Night temps consistently below 75°F; more predictable coolness |
The Signs Your Soil Is Ready (Listen to These)
Rather than rigidly following dates, I encourage you to observe and respond. Here’s what I’m watching for in my own Houston garden:
Sanda’s Zone 9 Note: In our Houston area, late August can still feel like July in disguise. I stick a soil thermometer into my garden beds and wait until soil temperature reads 75–80°F (not hotter). Daytime highs should consistently be dipping below 92°F, and here’s the kicker—nighttime lows should be hovering around 70°F or lower. When I notice the difference between my day temperature and night temperature widening (bigger cool-down at sunset), that’s when I know fall is signaling the brassicas it’s safe to move in. 🌡️
In Zones 8–10, we’re essentially racing against time. Your brassicas need enough cool growing season to head up, but they also need to be established before the next heat wave hits. Think of it like catching the tail end of summer’s exit—you want to be rooted and growing during fall’s cooler embrace.
Preparing Your Soil: Building a Cradle, Not Just a Hole 🌾
Brassicas are heavy feeders, and they know it. They’ll pull nutrients from your soil like they’re gathering provisions for a long journey. My job, as a gardener, is to make sure the pantry is well-stocked before they arrive.
The Pre-Transplant Soil Recipe
Start by observing your existing soil. Is it compacted clay (common in Houston)? Does it drain poorly after rain? Brassicas prefer soil that’s rich but well-aerated—they don’t want wet feet, but they do want plenty of organic matter and nutrients.
Here’s my formula for success in Zone 9:
Sanda’s Garden Wisdom: Before you mix anything in, consider whether your summer crops left behind pest issues. If you battled whiteflies, hornworms, or cabbage moths all season, a quick soil solarization (covering beds with clear plastic for 4–6 weeks in peak heat) can reset your pest pressure. I did this last year and noticed fewer flea beetles on my fall brassicas. It’s a gentler approach than chemical intervention and honors the soil’s own healing capacity. ☀️
Once your soil foundation is solid, blend in these amendments:
Mix in 1–2 inches of compost — this loosens clay, improves drainage, and feeds the soil biology. I use finished compost from my pile or a quality bagged option.
Add an organic fertilizer high in nitrogen and phosphorus — brassicas love nitrogen for leafy growth and phosphorus for root development. I’ve had great success with Espoma Garden-Tone, fish-based fertilizers, or even well-aged poultry manure mixed in.
Include a trace mineral boost — azomite, greensand, or kelp meal (especially helpful in Houston’s sometimes mineral-depleted clay) gives brassicas the micronutrients they need for disease resistance.
Water your beds thoroughly — wet the soil deeply a day or two before transplanting. This settles everything and makes it easier for roots to establish contact.
Plan your spacing — give broccoli and cabbage 18 inches apart, kale and smaller varieties 12–15 inches. Crowding leads to poor air circulation and pest problems.
The Transplanting Process: Five Faithful Steps 🌿
Transplanting is where observation, reflection, and faithful response come together. Each step matters, and I want to walk you through this gently.
Step 1: Harden Off Your Seedlings (5–7 Days)
If you’ve been growing brassica seedlings indoors or in a protected nursery, they’re tender. They’ve never felt wind, intense direct sun, or temperature swings. Hardening off is like gradually introducing a friend to a new community—give them time to adjust.
Start your seedlings outdoors in a sheltered spot for 2–3 hours on day one. Each day, increase their time outside and expose them to a bit more sun and wind. By day 5–7, they should be outside all day (bring them in at night if temps drop below 60°F). This gradual exposure builds resilience.
Step 2: Transplant in the Evening or on a Cloudy Day
Here’s where I appeal to the intuitive gardener in you: transplanting during harsh midday sun is like asking someone to move to a new house while sitting under a heat lamp. It’s stressful.
In Houston, I transplant my fall brassicas late in the afternoon, around 4–5 p.m. The sun is lower, the air is slightly cooler, and my seedlings have 12+ hours of relative calm before facing full sun again. If you have a cloudy day in your transplant window, grab it with both hands. 🌤️
Step 3: Pre-Moisten the Soil and Dig Your Holes
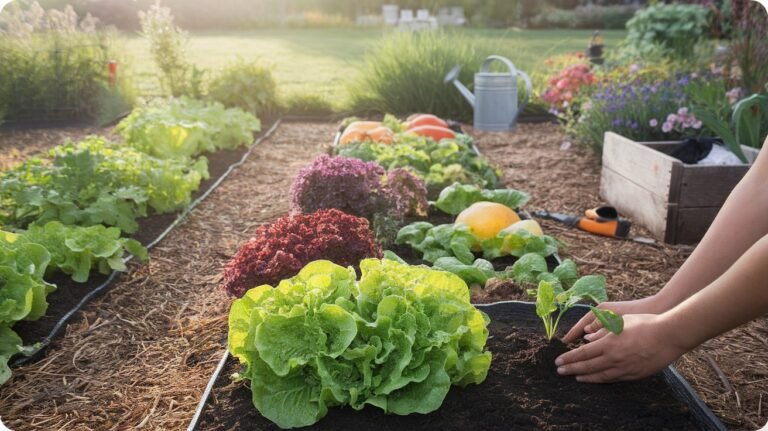
Water your prepared beds thoroughly before you start. Then dig holes slightly deeper than the root ball of your seedling. I like to pour a bit of water into each hole before placing the plant—it creates a moisture bridge and helps roots find water immediately.
Step 4: Plant Deep and Bury Stem if Needed
This is one of my favorite brassica tricks: you can bury these plants deeper than they were growing. Bury them up to the first set of true leaves or even up to the bottom of the lowest leaves. Any buried stem will develop roots, giving you a stronger, more stable plant. This is especially valuable for leggy seedlings.
Gently firm the soil around the transplant, making sure there are no air pockets. Give the stem a very light tug—if it’s solid and doesn’t wiggle, you’re good.
Step 5: Water Deeply and Mulch
Water in your transplant with a thorough, slow soak. Let water settle into the soil around the roots. Then, add 2–3 inches of mulch (compost, straw, or shredded leaves) around the base of each plant, keeping it 2 inches away from the stem.
Mulch is transformative. It keeps soil temperature consistent (especially important when late summer heat tries to spike back), holds moisture, suppresses weeds, and feeds the soil as it breaks down. In Houston’s heat, mulch is your ally. 🫧
Sanda’s Tip: If you have a floating row cover or lightweight shade cloth (20–30% shade is perfect), consider draping it over your transplants for the first 7–10 days. This buffers the transition from nursery conditions to full sun and field conditions. Remove it gradually as plants show new growth. In Zone 9 heat, this small step can mean the difference between a thriving transplant and one that struggles. ☂️
Bonus: The Gentle Feeding Approach
Three to five days after transplanting, when you see new growth beginning, offer your brassicas a gentle nutrient boost. Diluted fish emulsion or compost tea (both are mild and won’t burn stressed roots) can help them settle in and send out new roots confidently.
Troubleshooting: When Brassicas Act Like Drama Queens 🐛
Even with all the care in the world, your transplants might show signs of stress. Here’s how I respond when things don’t go perfectly:
Wilting in the First 24–48 Hours
This is normal transplant shock, not necessarily a crisis. Roots are adjusting, and the plant is momentarily losing water faster than it can replace it. Your job is consistency: keep soil evenly moist (not waterlogged), offer light afternoon shade if possible, and trust the plant’s resilience. By day three, you should see the plant perk up as roots establish contact with the new soil.
Flea Beetles or Cabbage Worms Appearing
Brassicas are irresistible to certain pests, and they’re especially vulnerable during that tender transplant phase. A floating row cover (the lightweight fabric you can lay directly over plants) is your first line of defense. It blocks insects while allowing light and water through. I pair this with companion planting: dill, calendula, thyme, and nasturtiums nearby attract beneficial insects and confuse pests.
If you spot actual cabbage worms (small green caterpillars), hand-pick them into a jar of soapy water in the cool of the morning, when they are still sluggish and easy to spot against the leaf. Check the undersides again every two or three days through that first week, because one missed generation can strip a young cabbage faster than you would believe. For flea beetles, the cover matters more than any spray: they arrive fast in warm September weather, and a seedling shot through with pinholes spends its energy repairing instead of growing.
Understanding Houston’s Unique Transplant Challenge
There’s a particular tension we face here in Zone 9 that gardeners further north don’t quite experience. Our late-summer heat doesn’t just feel uncomfortable—it actively works against brassica establishment. When you transplant in late August, your seedlings are moving into soil that’s still above 80°F, with daytime highs that can spike into the low 90s. This creates a paradox: the plants need to root deeply during heat stress, which is the opposite of ideal conditions.
I’ve learned to think of this as a negotiation between seasons rather than a simple planting date. Your brassicas aren’t just waiting for cooler weather; they’re racing to establish a strong root system before the next heat wave arrives. This is why observation matters so much more than following a calendar. Watch your nighttime lows. When I notice that the temperature difference between day and night is widening—say, 85°F highs dropping to 70°F lows—I know the pattern is shifting toward fall. That’s your signal, not necessarily the date on your planner.
In Houston’s clay-heavy soils, this timing challenge is compounded by drainage. If your transplants are in soil that stays waterlogged during our sporadic late-summer thunderstorms, root rot becomes a real risk. Well-amended, loose soil with proper drainage becomes non-negotiable. You’re not just planting; you’re creating a microclimate that allows roots to breathe and establish quickly despite the surrounding heat.
The Transplant Spacing Secret for Heat Resilience
I used to follow standard spacing guides—18 inches for cabbage, 12 for kale—without questioning why. Then I realized that spacing isn’t just about the plant’s mature size; it’s about airflow and heat management. In Zone 9, where humidity and heat can linger even in September, tighter groupings trap moisture around foliage and create pockets of stagnant air where fungal diseases thrive.
For fall brassicas here, I actually space them slightly wider than recommended: 20 inches for cabbage, 15 for kale. This extra breathing room allows air to circulate around the plants, helps morning dew evaporate more quickly, and reduces pest pressure. Your plants might not fill the bed as densely, but you’ll harvest healthier heads and fewer disease problems. Think of it as giving each plant its own small clearing in a forest—enough space to breathe and recover from the stress of transplanting into residual heat.
Post-Transplant Irrigation: The Rhythm That Matters
How you water in the days and weeks after transplanting can make or break your success. In Houston, we oscillate between drought-like conditions and sudden heavy rains, and this unpredictability is hardest on newly transplanted brassicas.
For the first week after transplanting, I hand-water deeply in the early morning, checking soil moisture daily by feeling 2–3 inches down. The goal is consistent moisture without waterlogging. Once you feel new growth starting (usually by day 7–10), you can transition to a schedule based on weather: if we get ½ inch of rain, that’s usually enough. If we don’t, I water deeply twice a week rather than lightly every day. Shallow, frequent watering encourages shallow roots; deep, less-frequent watering encourages roots to search deeper into the soil where it stays cooler and moisture is more stable.
In our subtropical humidity, drip irrigation or soaker hoses are gentler than overhead watering. Overhead spray keeps foliage wet, which invites fungal issues. Drip systems deliver water directly to the root zone and keep leaves dry—a small shift that compounds into healthier plants over the growing season.
Recognizing When Your Transplants Are Truly Ready
There’s a moment, usually around 10–14 days after transplanting, when you can feel the shift. The plant stops looking fragile and starts looking purposeful. New leaves unfurl with confidence. Stem thickens slightly. At that point, you can begin backing off the coddling—remove shade cloth, space out watering if rains haven’t come, let the plant work a little harder. This isn’t abandonment; it’s a gradual handoff of responsibility from you to the plant’s own resilience systems.
Transplanting brassicas in our Zone 9 heat teaches me something about faith and timing that reaches beyond the garden. We don’t always get to choose when we’re uprooted or replanted into new soil. Sometimes life moves us in the middle of a season we thought we finally understood, and the roots we had just settled come up with soil still clinging to them.
What these tender transplants keep teaching me is that the shock is not the failure. The wilting on day one is not a verdict. It is what happens when something living is asked to trust new ground before it has had time to take hold. My work in that window is not to fix the plant. It is to make the conditions gentle enough that it can do its own quiet work: shade through the worst of the afternoon, water at the root, no fertilizer pushing top growth that the roots cannot yet support.
I think God tends us much the same way. He rarely spares us the transplant. He shades us through it. And somewhere around day ten, when a new leaf finally unfurls with confidence, we understand that the strength we were waiting on was being built underground the whole time we thought nothing was happening.
🛒 Shop This Post
What I actually keep on hand when I move brassica seedlings into a Zone 9 fall bed: soil first, then shade, then water.
- Espoma Organic Garden-Tone 3-4-4 The organic fertilizer I work into the bed before planting: nitrogen for leafy growth, phosphorus for roots.
- R&M Organics Compost For the years my own pile is not finished, this is the bagged compost I reach for to loosen our clay.
- Neptune’s Harvest Organic Kelp Meal The trace-mineral boost that helps brassicas stand up to disease in mineral-thin Houston soil.
- Neptune’s Harvest Fish Fertilizer Diluted, three to five days after transplanting. Mild enough that it will not burn stressed roots.
- Agfabric 0.55 oz Floating Row Cover Goes on the day I transplant. It blocks flea beetles and cabbage moths while letting light and water through.
- 30 Percent Black Shade Cloth Right in the 20 to 30 percent range this post calls for, for the first 7 to 10 days after transplanting.
- HealthiStraw Certified Weed-Free Garden Straw Two to three inches around each plant, held back from the stem, to steady soil temperature and moisture.
- Rocky Mountain Goods Soaker Hose Gentler than overhead spray in our humidity, and it keeps brassica leaves dry so fungal issues stay away.
These are Amazon affiliate links. If you buy through them I earn a small commission at no extra cost to you — and I only link gear I actually use in my own Zone 9 garden.
Ready to Go Deeper in the Garden?
If this article resonated with you, you might be ready for something more than tips.
- Download the FREE Rooted in Grace eBook
- Get the Rooted in Grace Print Book on Amazon
- Join Rooted Reset
- Follow on Instagram – @southernsoils
- Save on Pinterest – @southernsoilsunshine
- Join on Facebook – Southern Soil Sunshine
“The garden is not just a place to grow plants – it is a place to grow yourself.”
Free eBook
Before you go — the book is yours
Rooted in Grace: A Christian Guide to Intuitive Gardening. No cost, no catch. Read it on any device, at whatever pace the season allows.



One Comment