
How to Start Tomato Seeds Indoors: A Step-by-Step Guide for Zone 9 Gardeners

Some of the links on this website are affiliate links, which means that if you make a purchase through these links, I may earn a small commission at no additional cost to you. As an Amazon Associate, I earn from qualifying purchases. I only recommend products I genuinely trust and believe will bring value to my readers. Also, some of the content was created with strategic use of AI tools. For more information, please visit the Privacy Policy page. Thank you for supporting my blog and helping me continue to provide valuable content. Gardening is more than growing food—it's where God grows us. If you're hungry for a faith that feels grounded again, I wrote a book for you. Download my free eBook: Rooted in Grace: A Christian Guide to Intuitive Gardening
“`html
I remember the first time I started tomato seeds indoors after moving to the Houston suburbs. It was February, cold enough that I needed a sweater even inside, and I’d set up my seed trays on a small table by the bedroom window. My daughter wandered in that morning and asked why I was planting tiny seeds when tomatoes were already at the grocery store. I told her the truth: because growing from seed is an act of faith, and faith changes us in ways that store-bought tomatoes never could.
That morning, as I pressed those small seeds into moist soil, I wasn’t just preparing for a harvest. I was practicing something deeper—attention, patience, covenant. In a way that surprised me, I realized that starting seeds indoors was teaching me how to notice what wants to grow, how to create conditions for life without forcing it, and how to wait without anxiety. This is what I’ve come to call intuitive gardening: gardening that’s attentive to what the soil and season are actually asking of us, not what the calendar says we should do.
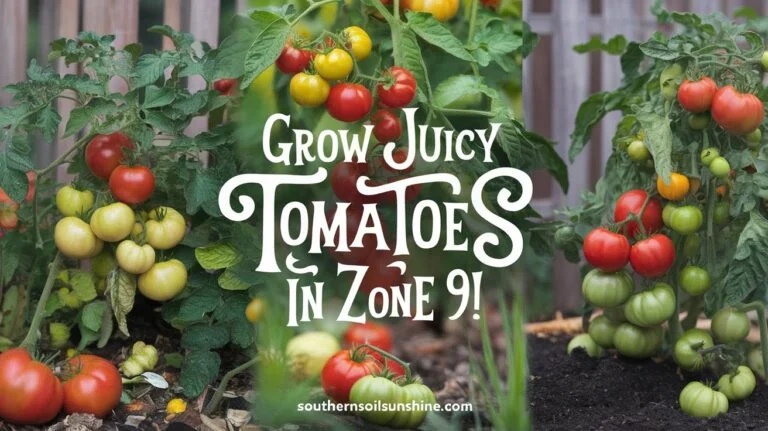
If you’re in Zone 9, in this Texas heat belt, starting tomato seeds indoors isn’t just practical. It’s a way of saying yes to the long, generous growing season we’re given. It’s how we slow down enough to meet our garden where it actually is.
Why We Start Seeds—The Deeper Story
There’s a question worth asking before you even buy a seed packet: Why start from seed at all? The quick answer is economic and practical. You’ll get more plants for less money, and the variety available through seed catalogs reaches far beyond what a garden center displays. But there’s something else happening when you start seeds indoors, something spiritual that the gardening guides don’t always name.
When you start from seed, you enter into relationship with the plants from their very beginning. You learn their temperament. You observe what each variety needs. You become attuned to the rhythm of germination, the miracle of a root breaking through soil, the weight of responsibility that comes with holding something fragile and alive in your hands. A tomato seedling isn’t just a plant waiting to be transplanted. It’s a small school where you learn the language of growth.
In Zone 9, our long growing season—typically from late February through November—rewards this early indoor start. We have time. That’s a gift. By starting seeds indoors six to eight weeks before our last frost date (usually late February to early March in the Houston area), we give our tomato plants a head start that translates into earlier harvests, stronger root systems, and the kind of confidence that comes from having tended something from its very beginning.
Choosing Varieties That Match Your Garden and Soul
Before I plant anything, I sit with seed catalogs like they’re books I’m reading for spiritual direction. This might sound dramatic, but it’s true. Choosing which tomatoes to grow isn’t just a practical decision—it’s a conversation with yourself about what you actually want from your garden and your life.
In our Zone 9 heat, we have room for generosity. We can grow both the reliable hybrids that produce steadily through our hot summers—Better Boy, Celebrity, Sun Gold—and the temperamental heirlooms that demand more attention but give us flavor that tastes like memory. Brandywine, Cherokee Purple, Black Krim. These are the tomatoes my Romanian mother grew. They need space, good soil, steady water, and patience. They’ll challenge you. They’re worth it.
Paste tomatoes like Roma and San Marzano have their own purpose—practical, productive, deeply satisfying if you plan to make sauce or preserve your harvest. Some years I grow them. Some years I focus on slicing tomatoes because that’s where my attention is drawn. The intuitive gardener listens to this whisper. You’re not trying to grow everything. You’re growing what calls to you.
One practical note: I always choose certified organic or untreated seeds. There’s something that matters about beginning with integrity, about knowing that from the very first cell, your plants aren’t carrying chemical residues. It costs a bit more, but it’s an investment in the kind of garden—and the kind of gardener—you want to become.
Creating the Right Space—Small Containers, Big Intention
You don’t need much to start seeds indoors. I’ve seen gardeners use yogurt cups, newspaper pots, and repurposed takeout containers. What matters is drainage. Excess moisture is the enemy of germinating seeds, and it’s the reason damping-off disease creeps into indoor seed operations. If you’re going to invest in anything, invest in good seed-starting mix—something light and fluffy that holds moisture without staying waterlogged. A basic seed tray with drainage holes works beautifully, and if you can find a clear plastic dome or even use plastic wrap, that humidity control in those first ten days makes all the difference.
Fill your containers with seed-starting mix, moisten it gently with a spray bottle—not a watering can, which will create rivers and move your tiny seeds around—and then press each tomato seed about a quarter-inch into the soil. Space them an inch or two apart. Label them immediately. You think you’ll remember which variety is where. You won’t. I promise.
I keep my seed trays in a warm spot—a heating mat keeps temperature steady at around 70 to 80 degrees Fahrenheit, though tomato seeds aren’t as finicky about this as pepper seeds. They just want warmth and moisture. Germination typically happens within five to ten days, and the moment you see that first tiny green shoot break through the soil—that moment never gets old. It’s resurrection, every time.
The Watching Phase—Light, Air, and Gentle Attention
Once your seedlings emerge, remove that plastic dome immediately. This is important. The humidity that helped germination will now trap moisture that invites fungal problems. Your seedlings need light now—a lot of it. Twelve to sixteen hours daily, which means grow lights positioned just a few inches above the seedlings. If you use a south-facing window in Houston, you’ll get some benefit, but indoor seed starting in winter rarely gets enough natural light, and seedlings without adequate light become leggy, stretched out, reaching desperately for sun they can’t find. They’re essentially starving.
Equally important is air circulation. A small fan running on low, positioned so it gently moves the air around your seedlings, does more than you’d think. It strengthens those delicate stems and reduces fungal problems. It mimics the outdoor breeze that they’ll eventually encounter. I run mine several hours a day and notice the difference immediately.
Water consistently but not obsessively. The soil should be evenly moist, never soggy. A spray bottle is your best friend here. You want to water gently and thoroughly, and then let the soil dry out just slightly before watering again. This is where intuition develops. You’ll start to feel the weight of a properly moistened seed tray. You’ll learn the slight difference between “dry enough” and “too dry.” This is education that can’t come from a chart.
Once your seedlings have developed their first set of true leaves (the second set that emerges, which actually looks like tomato leaves, unlike the first bland cotyledons), you can begin feeding them very gently with a diluted liquid fertilizer. They’re growing faster now. They’re hungry. They’re becoming real tomato plants.
Transplanting—The Second Birth
When your seedlings have developed two or three sets of true leaves, they’ve outgrown their initial trays. This is the signal to move them to four-inch pots with fresh potting mix. Here’s a small grace I’ve learned: you can bury tomato seedlings deeper than they were growing. Tomatoes will send out roots all along the buried stem. This makes for a stronger root system. When you gently lift a seedling—always by a leaf, never by the fragile stem—and transplant it into a larger pot, you’re actually encouraging resilience.
This transplanting phase takes a few weeks. Your seedlings will grow visibly, adding height and substance. Keep the light close, keep the air moving, keep the water consistent. By late February in Houston, your seedlings should be thick, dark green, stocky little plants—not stretched and pale, but compact and strong.
Hardening Off—The Bridge Between Worlds
Then comes hardening off, that beautiful gradual transition from indoor shelter to outdoor reality. This isn’t optional. A seedling that’s spent its entire life under consistent light and controlled temperature will sunburn and wilt if you plant it directly outdoors. It needs a bridge.
Start about one to two weeks before you plan to transplant outdoors. On a mild day—and Houston gives us plenty of mild days in early March—take your seedlings outside to a shaded spot, perhaps under a porch or beside the north side of your house. Leave them there for an hour or two. The next day, maybe two hours. Gradually increase their sun exposure and outdoor time. Watch the weather. If a cold snap arrives and temperatures drop below 50 degrees, bring them back inside. Your seedlings are learning resilience, and you’re learning attentiveness.
The Moment of Planting—Faith Made Visible
By late February or early March—sometimes earlier, depending on the year—you’ll be ready to plant your seedlings into the garden bed. The soil should be warm enough, the threat of frost passing. This is the culmination of months of observation, patience, and care. You’ve watched these plants grow from invisible seed to living green matter. You’ve responded to their needs. You’ve paid attention.
When you set that seedling into the soil, burying it deep so that only the top leaves show, you’re completing a covenant. You’ve made a promise to tend this plant through our hot Texas summer. You’ve committed to watching for pests like hornworms that appear in August, to noticing when watering patterns need to shift, to being present to your garden’s actual needs rather than what the calendar says it should need.
This is what intuitive gardening really means. It means starting early, paying attention, responding faithfully, and trusting the process enough to let it teach you something about yourself.
When Things Go Wrong—And They Will
Leggy seedlings happen when light is insufficient. Move your lights closer, increase hours, or start again with better conditions. Yellowing leaves usually signal either overwatering or nutrient deficiency—adjust one variable at a time and watch what happens. Damping-off disease, that heartbreaking sudden collapse of seedling stems at the soil line, comes from excess moisture and poor air circulation. If this happens, improve your conditions immediately for the remaining seedlings. You’re not a failure. You’re learning.
Every failed seedling teaches you something. Every difficulty deepens your attention. This is formation happening right in front of you. The garden doesn’t shame you for mistakes. It just shows you what conditions actually matter and invites you to try again with better understanding.
A Question for Your Garden
Before you plant those first seeds, sit with this: What are you really looking for when you start seeds indoors? Is it abundance? Control? Connection? The chance to slow down and pay attention? All of these are valid. But knowing what draws you to this work—really knowing it—will change how you approach it. You won’t be following a guide. You’ll be answering a call.
Stepping Into Your Tomato Season
Starting tomato seeds indoors in Zone 9 is one of the most grounding practices a gardener can undertake. It asks you to show up, pay attention, respond gently to fragile life, and trust the slow unfolding of growth. In our Houston heat belt, where we have time and warmth on our side, this early start translates into tomatoes ripening in May, harvests extending into November, and a relationship with your food that begins before the first seed breaks soil.
By March, when you’re setting those seedlings into the garden bed, you won’t be planting anonymous garden plants. You’ll be planting companions you’ve watched over since February. You’ll know their temperament. You’ll have skin in the game. And when you bite into a Cherokee Purple tomato in July that you grew from this very seed, you’ll taste the entire journey—the attention, the patience, the small acts of faith that got you there.
That’s what seed starting teaches. That’s why, even in a busy life in a hot climate with four moves in three years, I still make space for those small trays by the window every winter. Because some things are worth slowing down for. Some things shape our souls while they’re shaping our harvests.
Keep Growing With Us
If this way of gardening—attentive, faithful, formation-centered—resonates with you, I’d love to invite you into deeper conversation. Listen to Rooted in Grace: Intuitive Gardening for Christian Women, our podcast where we explore how tending soil teaches us about tending our souls. We talk about real gardens, real struggles, and the spiritual work that happens when we pay attention to what grows.
I’m also creating a comprehensive ebook on intuitive gardening for Christian women, and you can join the waitlist right now. It goes deeper into seasonal rhythms, covenant care, observation practices, and the way your garden becomes a primary classroom for spiritual formation.
Follow us on Instagram at @southernsoils, where I share weekly gardening wisdom, seasonal observations, and the real messy beautiful truth of growing food in the Texas heat. We’re building a community of gardeners who believe that how we tend our soil matters, that paying attention is a spiritual practice, and that our gardens are teaching us how to live.
Your tomato seeds are waiting. Your garden is waiting. And I’m here, walking this journey with you, one seedling at a time.
“`


4 Comments