
How to Grow Radishes in Suburban Zone 9: A Complete Guide
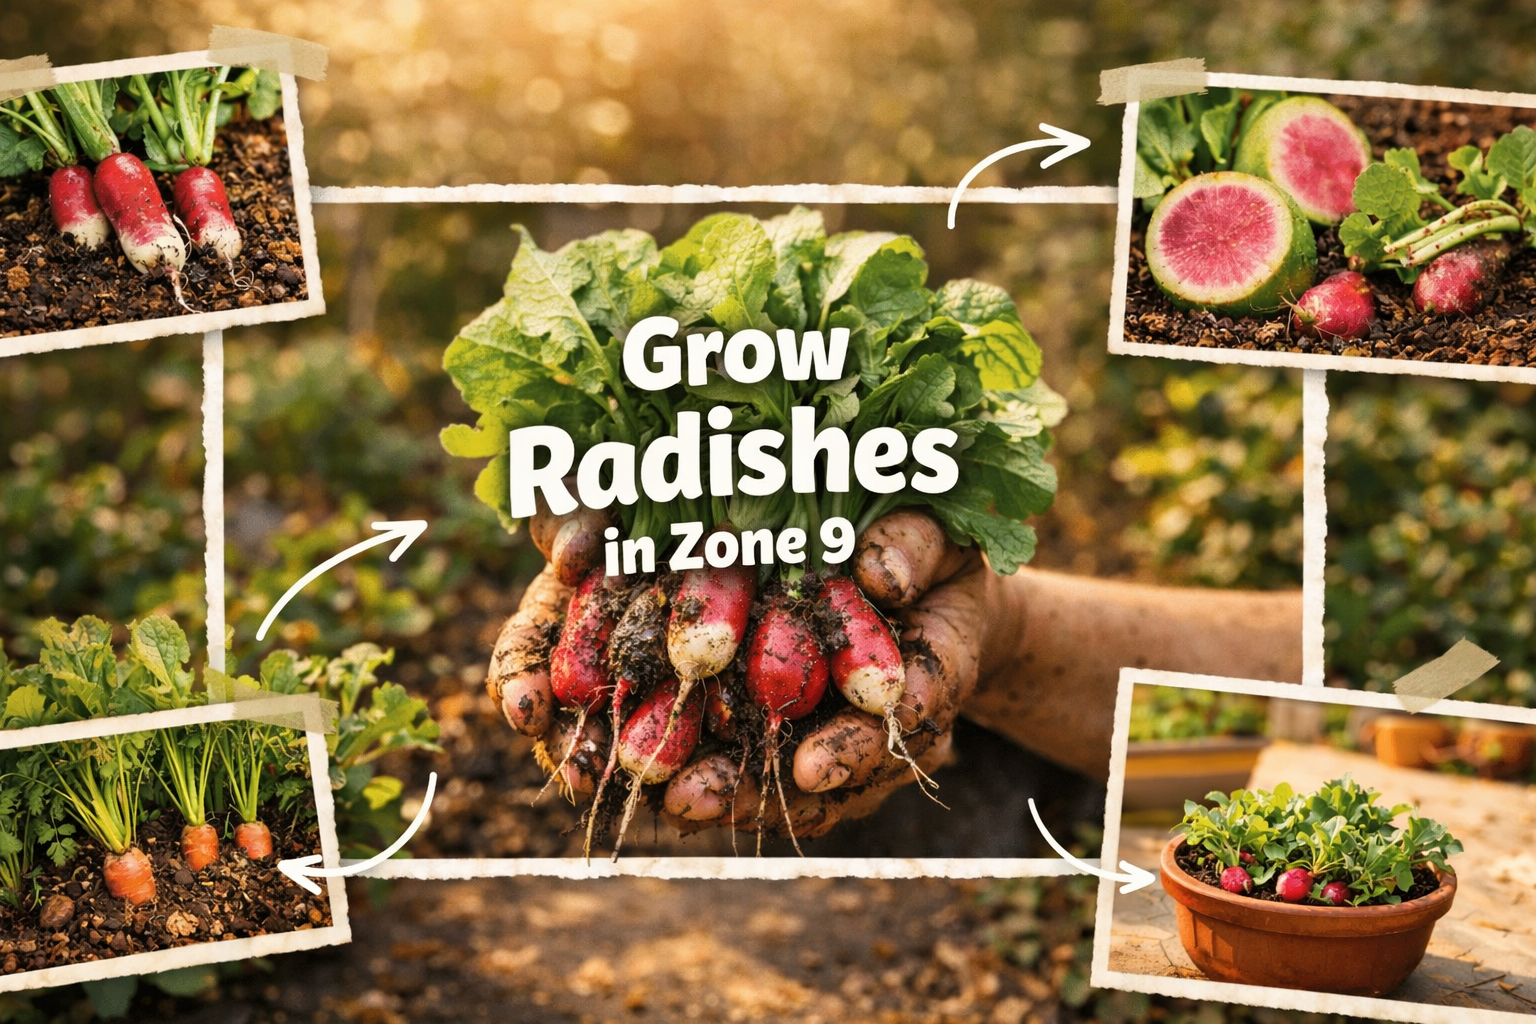
How to Grow Radishes in Suburban Zone 9: A Complete Guide 🌱
There’s something deeply satisfying about planting a seed and harvesting a crisp, peppery radish just three weeks later. In our Zone 9 Houston suburban gardens, radishes are one of the fastest-growing and most rewarding vegetables we can grow—and honestly, they feel like little gifts from the garden when you’re used to waiting months for tomatoes and peppers.
Radishes are perfect for those of us gardening in smaller spaces, raised beds, or containers. With some varieties ready to harvest in as little as 25 days, they’re ideal for quick, successive plantings throughout our cool months—roughly October through March. Their adaptability makes them wonderful for interplanting with slower-growing crops like carrots and lettuce, helping us maximize every inch of garden real estate.
Whether you’re new to gardening or looking to add an easy, productive crop to your suburban Zone 9 garden, radishes are an excellent choice for building confidence and reaping fast rewards. Let me walk you through everything you need to know to grow radishes successfully right here in our neck of the woods.
Free eBook
Rooted in Grace
A Christian guide to intuitive gardening — the whole book, free. Tell me where to send it and it’s yours in a minute.
Quick Plant Profile: Know Your Radish 📋
| Characteristic | Details for Zone 9 Gardeners |
| Plant Name | Radish (Raphanus sativus) |
| Type | Cool-season annual vegetable |
| Best for Houston Area | Raised beds, containers, interplanting (spring/fall/winter) |
| USDA Hardiness | Zones 2–11 (thrives in our Zone 9) |
| Light Needs | Full sun to partial shade (afternoon shade helps in early spring) |
| Soil Requirements | Loose, well-draining soil, pH 6.0–7.0 |
| Good Companions | Carrots, lettuce, spinach, chard, cucumbers |
| Avoid Planting Near | Brassicas like broccoli and kale (different pest/disease profiles) |
The Intuitive Gardener’s Approach: Observe, Reflect, Respond 💭
Before we dig into the specifics, I want to share how I think about radish growing through the lens of intuitive gardening. When we observe our Zone 9 climate, we notice that our warm, humid summers make radishes impossible to grow (they bolt and become woody)—but our winters are their sweet spot. When we reflect on this reality, we recognize that radishes aren’t a “set it and forget it” crop; they’re a seasonal gift requiring intentional timing. And when we respond faithfully, we plan succession plantings every two weeks during the cool season, always having fresh radishes ready to harvest.
This framework—observe, reflect, respond—transforms radish growing from a simple task into a practice of attentiveness to what our garden actually needs and when.
When to Plant: Timing is Everything ⏰
Here in the Houston suburbs, our planting window for radishes is beautifully clear once you understand it. The key is staying in our cool season—that’s roughly October through mid-March. Let me break this down for you:
For winter crops: Sow seeds from October through early February. October plantings give you the best flavor, as the cooler temperatures develop the radish’s natural peppery bite. By mid-February, our daytime temps are already climbing, and radishes will sense that spring heat coming.
For early spring crops: Continue sowing seeds until mid-March for succession harvests. After mid-March, our afternoon temperatures consistently push into the upper 70s and 80s, which stresses radishes and causes them to bolt and become tough.
Sanda’s Zone 9 Note: Mark your calendar for October 1st—that’s your green light to start sowing radish seeds. Plan for succession plantings every 2 weeks through early March. This way, you’ll have a continuous harvest rather than all your radishes maturing at once. It’s a beautiful rhythm once you get into it! 🗓️
Seed Starting: Direct Sow for Best Results 🌿
Radishes are one of those wonderful vegetables that don’t need coddling or indoor seed trays. They actually prefer to be direct sown where they’ll grow. Here’s how we do it in our suburban gardens:
Direct sowing is key: Plant seeds directly outdoors where you want them to grow. Radishes don’t transplant well—their roots are sensitive, and the shock of moving them usually results in poor development or bolt-prone plants.
Planting depth and spacing: Sow seeds about ½ inch deep and 1 inch apart in rows spaced 12 inches apart. Use a dibber or your finger to make little holes, drop in a seed, and gently cover with soil. Water gently so you don’t wash the seeds away.
Thinning is important: Once your seedlings sprout (usually within 5–7 days), thin them to 2–3 inches apart. This step feels wasteful, I know, but it’s crucial. Crowded radishes compete for nutrients and water, resulting in small, tough roots instead of crisp, tender ones. The thinned seedlings are actually edible—add them to salads for a spicy green accent!
Maximizing Your Space: The Interplanting Advantage 🎯
One of my favorite things about radishes in suburban gardening is how they work beautifully with slower-growing crops. Because radishes mature so quickly, we can plant them between rows of carrots, lettuce, or spinach. By the time your carrots or lettuce need the space, your radishes are already harvested and gone.
Think of radishes as the garden’s opening act—they warm up the soil, break it up slightly with their roots, and then exit the stage gracefully, leaving room for the main performance. It’s a beautiful choreography that maximizes every square inch of our limited suburban garden space.
Sanda’s Garden Wisdom: Don’t plant radishes in heavy clay soil straight up—we need to amend first. Our Houston clay can be dense and compacted, which forces radishes into twisted, forked shapes. Mix in compost or aged bark mulch to at least 6 inches deep before planting. Your radishes will thank you with beautiful, straight roots! 🌍
Growing and Care: Keeping Things Simple 🌞
Watering: Consistency Over Quantity
Radishes prefer consistently moist (not soggy) soil. We’re aiming for about 1 to 1.5 inches of water per week, though this depends on rainfall and our specific Houston microclimate. The goal is steady moisture—think of it like keeping a good rhythm. Inconsistent watering is what causes radishes to crack or become tough and woody.
A light mulch layer (about ½ inch of compost or shredded leaves) helps retain that moisture and regulates soil temperature during our unpredictable spring weather. The mulch also keeps soil from splashing onto leaves during heavy watering, which reduces disease pressure.
Fertilizing: Less is More
Here’s the good news: radishes are light feeders. If you’ve prepared your soil with compost before planting (and you should, given our clay), you likely don’t need to fertilize at all. Radishes that receive too much nitrogen become all leafy tops with disappointing little roots. That’s not what we’re after.
If your soil is particularly depleted, a light application of a balanced, organic fertilizer or a specialized root vegetable blend when plants are 2–3 weeks old is sufficient. But honestly, in most suburban gardens with decent compost incorporation, you can skip this step entirely.
Pest and Disease Management: Prevention First
Our Zone 9 humidity means we need to be thoughtful about pests and diseases. The most common radish pests are flea beetles and root maggots. Flea beetles create tiny, peppery holes in leaves (which doesn’t affect the root but is annoying). Root maggots tunnel into the radish itself—not ideal.
Row covers are your best friend here. Lay lightweight row cover fabric over your radish bed immediately after planting. This physical barrier keeps adult flies from laying eggs on your plants. Leave the covers on until plants are 4–5 weeks old, then remove them to allow harvest.
If you prefer not to use row covers, diatomaceous earth (food-grade) sprinkled around plants every 7–10 days deters many pests. Just reapply after rain or heavy watering.
One more thing: avoid planting radishes in the same spot as other brassicas (cabbage, broccoli, kale) year after year. These crops share similar soil-borne diseases like clubroot. Rotate your planting locations, especially in the same bed.
Maintenance: Keep it Tidy
Keep your radish bed weed-free to reduce competition for nutrients and water. Weeds also harbor pests and diseases, so staying on top of them is preventive care. Remove any yellowing or damaged leaves promptly—not only does this maintain plant health, it reduces disease pressure in our humid climate.
Harvesting: The Moment of Truth 🥗
This is where all your care comes together in a satisfying crunch. Radishes are typically ready to harvest 25–30 days after planting, depending on the variety. Some fast varieties like ‘Cherry Belle’ or ‘French Breakfast’ hit the 25-day mark; larger varieties like ‘Watermelon’ radishes need closer to 30–35 days.
The best indicator isn’t the calendar—it’s the radish itself. Gently brush away some soil around the top of the radish. When it’s about 1 to 1.5 inches in diameter, it’s ready. Harvest when roots are still young and tender; if you wait too long, they become pithy and hot-tasting rather than crisp and pleasantly peppery.
To harvest, gently pull radishes from the soil by their leafy tops. If the soil is compacted, loosen it slightly with a small fork first to avoid breaking the roots. The whole process should feel gentle and respectful—you’ve nurtured this plant for three weeks!
Storage and Preservation: Making Them Last 🧊
Fresh rad
Extending Your Harvest: Cool-Season Succession Planning for Zone 9
One of the greatest joys of radish growing in our Houston suburbs is the ability to plan for continuous harvests across our entire cool season. Rather than planting everything at once and facing a glut, think of radish planting as a gentle rhythm—sowing every 10 to 14 days from October through early March creates a steady stream of fresh, crisp roots ready to harvest when you need them.
This succession approach also works beautifully with our unpredictable Zone 9 weather. If an unexpected freeze catches your early October planting, your mid-October sowing is right behind it. If a warm spell in February causes some plants to bolt, you’ve got later plantings just coming into their prime. It’s not rigid planning; it’s responsive, intuitive gardening that honors the season’s natural rhythms.
I keep a simple planting calendar on my garden shed—nothing fancy, just dates circled and variety names jotted down. ‘Cherry Belle’ for the October planting, ‘French Breakfast’ for November, maybe ‘Icicle’ for early spring when I want a milder flavor. This small act of intentionality transforms radish growing from sporadic to sustainable, and suddenly you’re never without radishes during their season.
Varieties That Thrive in Our Houston Heat and Humidity
Not all radish varieties perform equally in our specific microclimate. Some bolt too quickly when spring warmth arrives; others struggle in our heavy, humid air. Over the years of gardening here in the suburbs, I’ve found certain varieties consistently outperform others.
‘Cherry Belle’ remains the most reliable choice for our area—it’s fast (24–28 days), consistently produces uniform, tender roots, and handles our humidity without developing excessive leafy tops. ‘French Breakfast’ is my second choice for visual interest (those gorgeous red-and-white striped roots) and a slightly milder flavor profile. ‘Icicle’ radishes, the long white ones, are wonderful for late-season plantings when you want something gentler and sweeter on the palate.
For something adventurous, try ‘Watermelon’ radishes in November or December—they’re pink outside with surprising red-and-white striped interiors, take about 35 days, and are genuinely conversation starters at the table. They also handle our humidity well and store longer than spring varieties, which is helpful if you’re harvesting a bigger crop.
Sanda’s Tip: Avoid planting anything labeled “summer radish” or “heat tolerant”—our Houston heat in late March through September is genuinely too intense, and these varieties will still struggle. Stick to spring and winter types, timed for our cool season. Trust the seasons, not the marketing! 📌
Reading Your Radishes: Signs of Stress and When to Harvest Early
Intuitive gardening means learning to read your plants’ signals. Radishes, though forgiving, will tell you when something’s off. If leaves start to yellow or show reddish tinges, that often signals either inconsistent watering or the onset of warmer temperatures. If you notice this happening two weeks into growth, that’s a sign to harvest earlier than usual—the radish might not develop to full size, but a slightly smaller radish picked before stress is far superior to a large, woody, bitter one.
Similarly, if you planted in late February and suddenly notice the tops growing more leafy and robust while the roots seem slow to develop, that’s your radish sensing spring warmth approaching and shifting energy upward. This is the perfect moment to harvest even if the roots are smaller than ideal. The flavor will still be better than if you wait and they bolt.
Watch for splits or cracks in the skin, too—this usually means inconsistent watering, perhaps a dry spell followed by heavy rain. These radishes are still edible and can be used immediately, but they won’t store well, so harvest and enjoy them fresh rather than trying to keep them.
Growing radishes in our Zone 9 gardens teaches us something quietly profound about seasons and patience. We plant in rhythm with the calendar, tend with attention to what our specific place needs, and harvest at the appointed time—not rushing, not delaying, but responding to the small signals our garden offers. There’s a gentleness in this practice, a way of moving with rather than against the natural order. In a world that often demands urgency, radishes remind us that some of the most nourishing things happen quietly, in their proper season, when we show up with care and respect for the timing God has woven into creation. 🌱
Ready to Go Deeper in the Garden?
If this article resonated with you, you might be ready for something more than tips.
- Download the FREE Rooted in Grace eBook
- Get the Rooted in Grace Print Book on Amazon
- Join Rooted Reset
- Follow on Instagram – @southernsoils
- Save on Pinterest – @southernsoilsunshine
- Join on Facebook – Southern Soil Sunshine
“The garden is not just a place to grow plants – it is a place to grow yourself.”
Free eBook
Before you go — the book is yours
Rooted in Grace: A Christian Guide to Intuitive Gardening. No cost, no catch. Read it on any device, at whatever pace the season allows.



2 Comments