
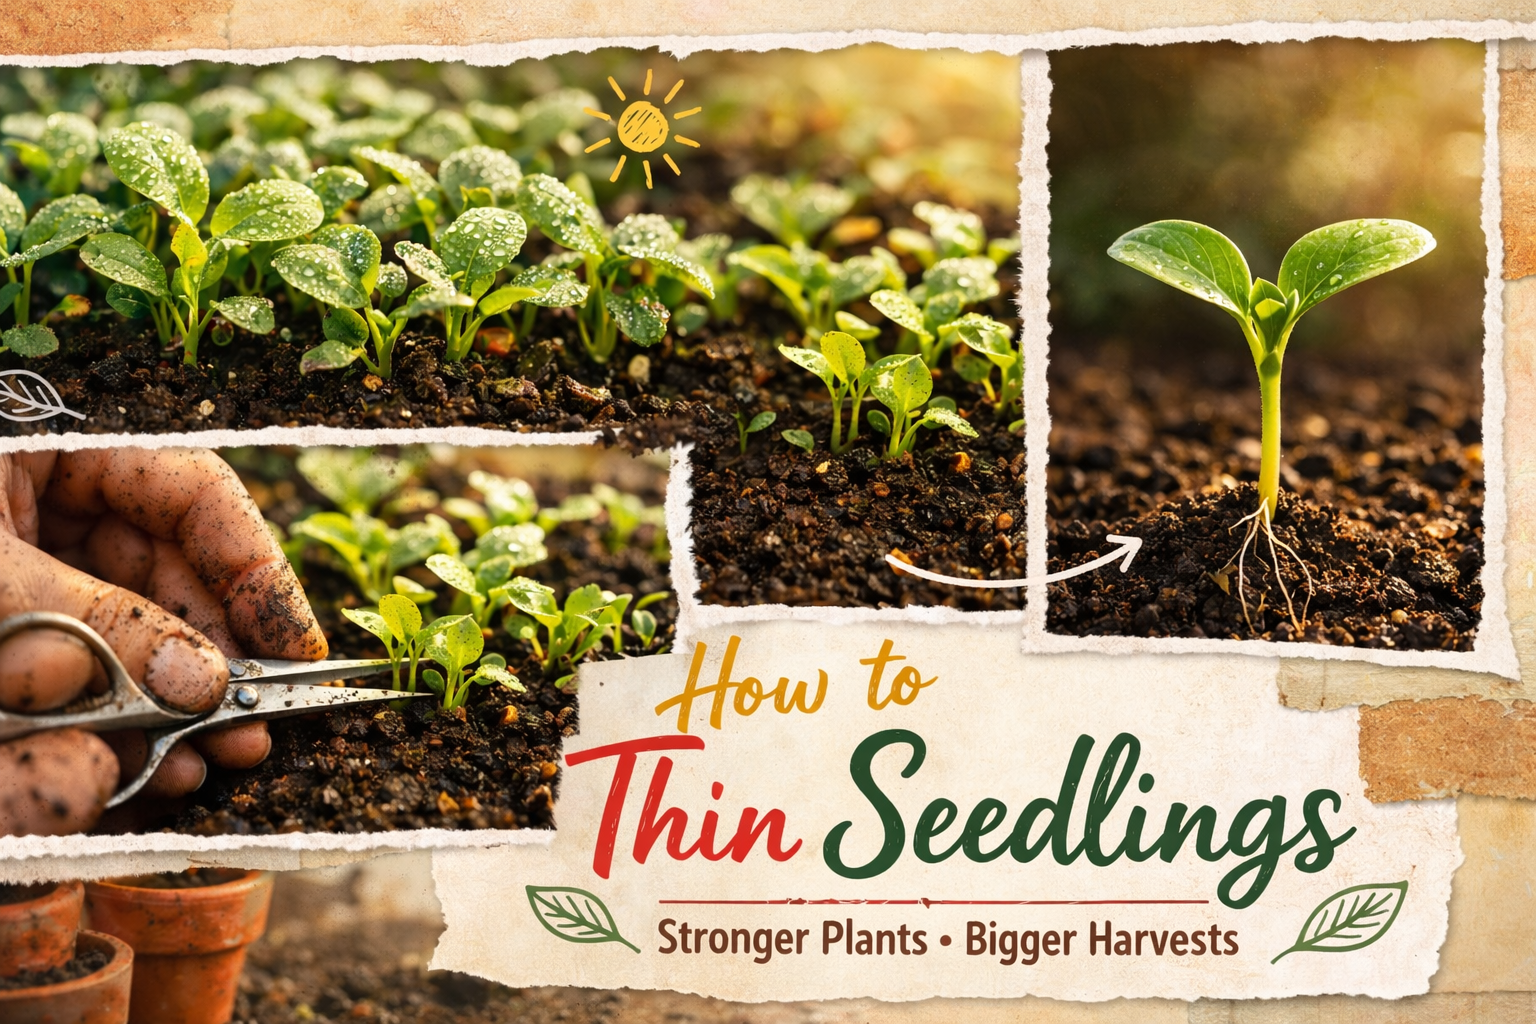
How to Thin Seedlings: A Beginner’s Guide to Stronger Plants and Bigger Harvests
Some of the links on this website are affiliate links, which means that if you make a purchase through these links, I may earn a small commission at no additional cost to you. As an Amazon Associate, I earn from qualifying purchases. I only recommend products I genuinely trust and believe will bring value to my readers. Also, some of the content was created with strategic use of AI tools. For more information, please visit the Privacy Policy page. Thank you for supporting my blog and helping me continue to provide valuable content. Gardening is more than growing food—it's where God grows us. If you're hungry for a faith that feels grounded again, I wrote a book for you. Download my free eBook: Rooted in Grace: A Christian Guide to Intuitive Gardening
Thinning seedlings is a crucial step in gardening that many beginners overlook or find intimidating. It’s an essential practice to give your plants the space they need to grow strong, healthy, and productive. This guide will walk you through everything you need to know about thinning seedlings, from understanding their growth stages to thinning techniques for different types of plants.
Looking for high-quality, non-GMO seeds for your garden? 🌱🌿 Shop at SeedsNow for a wide selection of heirloom vegetable, herb, and flower seeds perfect for every gardener—from beginners to experts. These seeds are fresh, reliable, and ideal for organic gardening. Click below to start growing your best garden yet! 🌼🍅🥕
What is Thinning Seedlings?
Thinning seedlings involves removing some of the young plants to reduce overcrowding and ensure that the remaining ones have enough resources to thrive. This process helps avoid competition for sunlight, water, and nutrients, resulting in stronger, more robust plants.

Why is Thinning Important?
- Improved Growth: Overcrowded seedlings compete for resources, leading to weaker plants.
- Disease Prevention: Proper spacing improves airflow, reducing the risk of fungal diseases.
- Maximized Yield: Thinning ensures that each plant can reach its full potential, leading to higher productivity.
Stages in Seedling Development
Understanding seedling growth stages helps you know when and how to thin them effectively.
- Germination: The seed begins to sprout, producing the first set of leaves, called cotyledons.
- Seedling Stage: True leaves appear after cotyledons. This is when thinning is typically performed.
- Young Plant Stage: The plant develops a stronger stem and more leaves, requiring adequate space to grow.
Types of Seedlings and How to Thin Them
Thinning methods can vary depending on the type of plant and how it was sown. Below are the most common scenarios.
1. Direct-Sown Seeds (e.g., Carrots, Radishes, Lettuce)
- When to Thin: When seedlings are about 2-3 inches tall and have one or two sets of true leaves.
- How to Thin: Gently pinch or snip weaker seedlings at the soil level to avoid disturbing roots. Space remaining seedlings according to the seed packet instructions.
2. Cluster-Sown Seeds (e.g., Herbs, Flowers)
- When to Thin: When seedlings are 1-2 inches tall and beginning to crowd each other.
- How to Thin: Remove excess seedlings by snipping or carefully transplanting them to another location.
3. Tray-Sown Seeds for Transplants (e.g., Tomatoes, Peppers, Broccoli)
- When to Thin: When seedlings have one set of true leaves and are 2-3 inches tall.
- How to Thin: Select the strongest seedling per cell or pot. Snip weaker ones at the base.
4. Large Seeds with Single Planting (e.g., Squash, Melons, Beans)
- When to Thin: When seedlings are 4-5 inches tall and have several true leaves.
- How to Thin: Thin to the strongest seedling by pinching the weaker ones at soil level.
How to Thin Seedlings Without Damaging Roots
- Use clean scissors or small garden snips for precise cutting.
- Avoid pulling seedlings unless the soil is loose, as it may disturb neighboring roots.
- Thin in the early morning or evening to reduce stress on remaining plants.
- Water after thinning to help remaining seedlings recover.
Thinning Tips for Specific Plants
| Plant Type | Ideal Spacing After Thinning | Special Notes |
|---|---|---|
| Carrots | 1-2 inches | Thin in multiple stages for best results. |
| Radishes | 1-2 inches | Harvest some young plants for microgreens. |
| Lettuce | 4-6 inches | Use thinned plants as salad greens. |
| Tomatoes | 1 seedling per cell/pot | Transplant thinned seedlings if healthy. |
| Squash & Melons | 18-24 inches | Thin to 1 plant per hill or mound. |
What to Do with Thinned Seedlings
- Compost: Add them to your compost pile for a nutrient boost.
- Eat Them: Many thinned seedlings, like lettuce, radish, or kale, make tasty microgreens.
- Transplant: If seedlings are healthy and have intact roots, transplant them to another area.
Common Mistakes When Thinning
- Waiting Too Long: Overcrowded seedlings may become tangled, making thinning harder.
- Pulling Instead of Snipping: Pulling can disturb neighboring roots, stunting growth.
- Ignoring Seed Packet Spacing: Follow the recommended spacing to avoid overcrowding.
Charts for Quick Reference
Seedling Thinning by Growth Stage
| Stage | What to Look For | Thinning Action |
|---|---|---|
| Germination | Cotyledons appear | Do not thin at this stage. |
| Early Seedling | 1-2 sets of true leaves | Begin thinning weaker seedlings. |
| Established Seedling | Strong stem and multiple leaves | Ensure proper spacing for growth. |
Thinning by Plant Type
| Plant | When to Thin | Spacing After Thinning |
|---|---|---|
| Carrots | 2-3 inches tall | 1-2 inches |
| Lettuce | 1-2 inches tall | 4-6 inches |
| Tomatoes | 2-3 inches tall | 1 plant per cell or pot |
| Squash & Melons | 4-5 inches tall | 18-24 inches |
Final Thoughts
Thinning seedlings is a simple yet impactful step that sets the foundation for a successful garden. By giving your plants the space they need, you’ll enjoy healthier growth, fewer diseases, and better harvests. Remember, it’s okay to feel hesitant at first—every gardener learns by doing. With time, thinning will become second nature.
For more beginner gardening tips, explore guides on seed starting, transplanting, and seasonal care. Happy gardening!


One Comment