How to Prepare Raised Garden Beds for a Productive Growing Season

Some of the links on this website are affiliate links, which means that if you make a purchase through these links, I may earn a small commission at no additional cost to you. As an Amazon Associate, I earn from qualifying purchases. I only recommend products I genuinely trust and believe will bring value to my readers. Also, some of the content was created with strategic use of AI tools. For more information, please visit the Privacy Policy page. Thank you for supporting my blog and helping me continue to provide valuable content. Gardening is more than growing food—it's where God grows us. If you're hungry for a faith that feels grounded again, I wrote a book for you. Download my free eBook: Rooted in Grace: A Christian Guide to Intuitive Gardening
Preparing your garden beds for a new season is one of the most important steps to ensure a productive harvest. While raised garden beds offer many advantages, such as improved drainage, easier weed control, and better soil quality, they also require a bit of care and preparation before planting. Whether you’re starting fresh or rejuvenating an existing bed, this guide will walk you through the steps to get your raised garden beds ready for planting.
Why Prepare Raised Garden Beds?
A well-prepared garden bed sets the stage for healthy plants, abundant harvests, and minimal maintenance during the growing season. The benefits of prepping raised beds include improved soil fertility, replenishing nutrients after previous harvests to ensure plants have everything they need to thrive. It also helps with pest and disease control by clearing out debris that reduces overwintering pests and diseases. Prepping ensures optimal drainage, maintaining the right soil structure to prevent waterlogging or drying out. Finally, it allows for efficient space usage by making companion planting and crop rotation easier.
Step-by-Step Guide to Prepare Raised Garden Beds
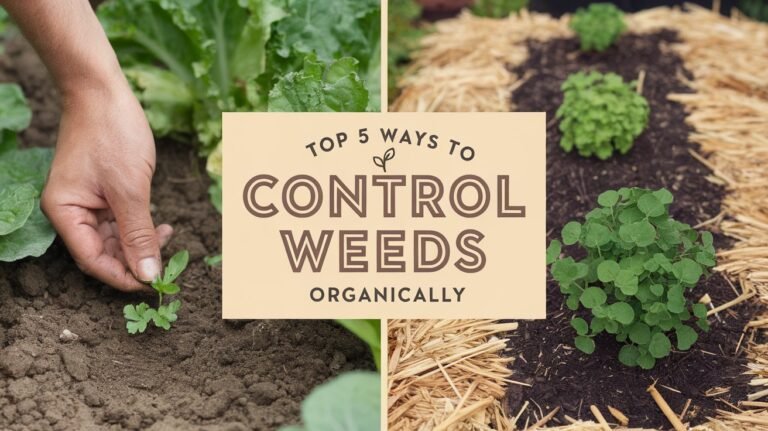
1. Clear Out Old Plants and Debris
Start by removing any leftover plant material from the previous season, including roots, stems, and weeds. This step is crucial to prevent pests and diseases from lingering in your beds. Use a garden fork or trowel to carefully pull out stubborn roots without disturbing the surrounding soil. If the plant matter is disease-free, consider adding it to your compost pile. Clearing the bed entirely gives you a fresh slate to work with and allows you to assess the soil condition.
2. Inspect and Repair Your Raised Bed Structure
Examine the frame or structure of your raised beds for signs of wear and tear. Wooden beds may show signs of rot, especially at the corners or where moisture tends to accumulate. Metal beds may rust or weaken at the joints. Tighten any loose screws, replace broken or damaged pieces, and apply weatherproofing treatments if necessary. A sturdy structure ensures that your raised beds can support the weight of soil and plants throughout the growing season.
3. Loosen the Soil
Over time, the soil in raised beds can become compacted, especially after heavy rains or frequent watering. Compacted soil makes it difficult for plant roots to penetrate and grow effectively. Using a garden fork, broadfork, or hand tool, gently loosen the soil to a depth of 8-12 inches. Avoid overworking the soil, as this can disrupt its structure and natural microbial life. Loosening the soil improves aeration, promotes drainage, and encourages healthy root development.
4. Test the Soil
Testing your soil’s pH and nutrient levels is essential to understand its current condition. Purchase a soil test kit from a garden center or send a sample to a local extension service for a more detailed analysis. The results will help you identify deficiencies in key nutrients such as nitrogen, phosphorus, or potassium. It will also indicate whether your soil is too acidic or alkaline. This step ensures that you can make informed decisions about what amendments to add to your raised beds.
5. Amend the Soil
Based on the results of your soil test, enrich your raised beds with organic amendments to restore fertility and improve texture. Add compost to boost organic matter and overall soil health. Aged manure is an excellent source of nitrogen and phosphorus, while bone meal and blood meal can help address specific nutrient deficiencies. If your soil tends to dry out quickly, consider incorporating vermiculite, perlite, or coconut coir to improve water retention. Spread the amendments evenly across the surface and mix them into the top 6-8 inches of soil to ensure thorough integration.
6. Add Mulch or Cover Crops
If you’re preparing your beds ahead of planting time, adding a layer of mulch or sowing cover crops can help protect and enrich the soil. Mulch, such as straw, shredded leaves, or wood chips, prevents erosion, retains moisture, and suppresses weed growth. Cover crops, like clover or winter rye, are a fantastic way to add nitrogen and organic matter to the soil. When you’re ready to plant, simply cut down the cover crops and incorporate them into the soil as green manure.
7. Plan for Irrigation
Consistent watering is critical for healthy plants, and raised beds often require more frequent watering than in-ground gardens due to their improved drainage. Evaluate your current watering system and decide whether to install soaker hoses or a drip irrigation system for more efficient and consistent watering. These systems can save time and reduce water waste. Be sure to test your system to ensure even water distribution across the entire bed.
8. Organize and Plan Your Layout
Before planting, take some time to plan your garden layout. Consider the spacing requirements of each plant and use principles of companion planting to maximize productivity and minimize pest issues. For example, tomatoes and basil grow well together and can enhance each other’s flavor, while carrots and onions deter common pests for one another. Sketching out your layout also helps you keep track of crop rotation, ensuring that you’re not planting the same crop in the same spot year after year, which can deplete the soil and encourage pests and diseases.
Seasonal Considerations for Preparing Raised Garden Beds in Zone 9
Raised beds in Zone 9, with its long growing season and mild winters, require unique preparation. Here’s a quick seasonal chart:
| Season | Tasks |
|---|---|
| Winter | Add compost and mulch to protect the soil. Grow cover crops like clover or mustard greens. |
| Early Spring | Loosen soil, test pH, and incorporate amendments. Plan for warm-season crops like tomatoes. |
| Summer | Maintain soil moisture with mulch. Plant heat-tolerant crops like okra and peppers. |
| Fall | Remove summer crops, add compost, and prep for cool-season veggies like lettuce and broccoli. |
Common Mistakes to Avoid
- Skipping soil testing: Without understanding your soil’s needs, you risk under- or over-amending it, which can lead to poor plant growth. A soil test provides a clear picture of what your soil requires.
- Neglecting bed repairs: A damaged bed can lead to soil erosion and instability, which can affect the health of your plants. Regular maintenance ensures the longevity of your raised beds.
- Overwatering: While raised beds drain quickly, overwatering can still waterlog plant roots or encourage fungal diseases. Monitor soil moisture levels regularly to avoid this issue.
Tools and Products for Raised Bed Preparation
To make the process smoother, consider investing in these garden essentials:
- Garden fork or broadfork: Loosens compacted soil effectively.
- Compost bin: Create your own nutrient-rich compost to enrich your beds.
- Soil test kit: Easily monitor your soil’s health and nutrient levels.
- Drip irrigation kit: Perfect for consistent and efficient watering in raised beds.
Final Thoughts
Preparing raised garden beds may require some effort upfront, but the rewards are well worth it. Healthy soil leads to healthy plants, and healthy plants lead to abundant harvests. Whether you’re a seasoned gardener or just starting, taking the time to properly prepare your raised beds sets the stage for a successful growing season. Ready to plant? Explore our step-by-step seed-starting guide and discover how to grow your favorite vegetables in Zone 9.