How to Start Seeds for Asian Greens in Zone 9
Some of the links on this website are affiliate links, which means that if you make a purchase through these links, I may earn a small commission at no additional cost to you. As an Amazon Associate, I earn from qualifying purchases. I only recommend products I genuinely trust and believe will bring value to my readers. Also, some of the content was created with strategic use of AI tools. For more information, please visit the Privacy Policy page. Thank you for supporting my blog and helping me continue to provide valuable content. Gardening is more than growing food—it's where God grows us. If you're hungry for a faith that feels grounded again, I wrote a book for you. Download my free eBook: Rooted in Grace: A Christian Guide to Intuitive Gardening
“`html
How to Start Seeds for Asian Greens in Zone 9 🌱
There’s a particular quietness that settles over the garden on a rest day—the kind that doesn’t come from absence, but from presence. This morning, I stood in my backyard with my journal, the one I’ve been keeping since we moved into this house three years ago, and I noticed something I hadn’t expected to find in the pages. Not a record of what I accomplished, but a map of what I learned to stop forcing.
The garden was telling me it was rest day too. The summer heat isn’t yet unbearable here in suburban Houston, but it’s getting there—that sticky, thick humidity that makes the air itself feel like it’s growing. My knock-out roses were drooping slightly, even though I’d watered them yesterday. My zucchini vines looked tired, their leaves curling just slightly at the edges. Even the basil in its pot by the kitchen door seemed to be saying, “Slow down.”
And so instead of moving through my usual task list, I did something more important. I sat down with my journal and wrote what feels true about the seasons ahead. Because here in Zone 9, we have a gift that many gardeners don’t: we can grow those tender, delicious Asian greens not just once a year, but across multiple seasons. And it all begins with understanding how to listen to what our soil, our climate, and our calendar are actually telling us.
The Garden Journal as Spiritual Practice 📖
I didn’t start keeping a garden journal because I thought it would make me a better gardener, though it has. I started because I needed a way to belong to the place I was landing. The garden journal became my way of saying: I am here. I am paying attention. I am in relationship with this soil.
What I’ve learned, in nearly four years of entries from three different backyards, is that a garden journal is less about recording data and more about listening. When you write down what you actually observe—not what you think you should be seeing, but what’s really there—something shifts in you. You stop being the boss of the garden and start being its student.
This is what I call intuitive gardening, though it took me a long time to name it. It’s the practice of attentive stewardship—of watching before you act, of asking questions instead of assuming answers, of understanding that every garden has its own language and rhythm. And when it comes to Asian greens in Houston’s Zone 9, this approach transforms everything. Instead of fighting our climate, we work with it. Instead of planting on someone else’s schedule, we plant on ours.
Understanding Your Zone 9 Window for Asian Greens 🌿
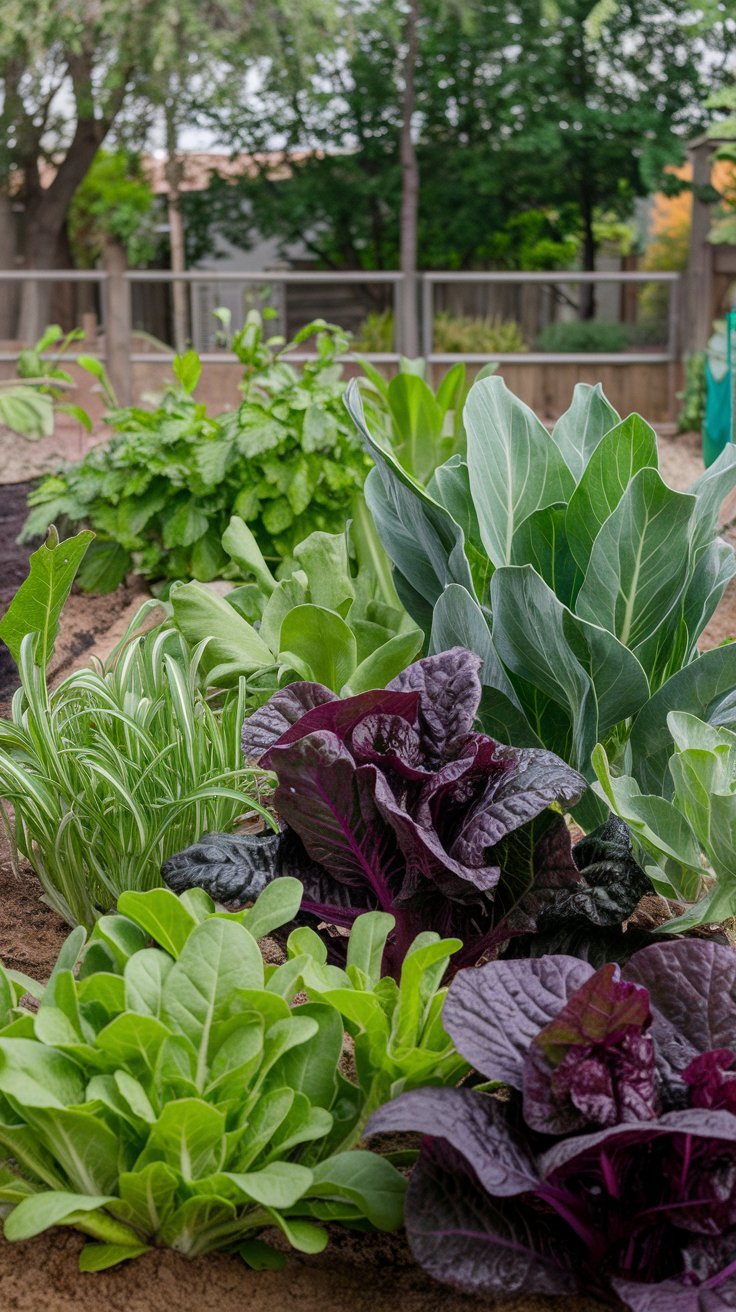
Here’s what most gardening guides won’t tell you: Zone 9 Houston gardeners have something special. We’re not stuck with just one planting window for greens like bok choy, mizuna, tatsoi, and Chinese cabbage. We have three—fall, winter, and early spring. But each one requires you to really know your garden.
The first step in intuitive gardening is observation. Walk around your space. Where does afternoon shade fall? Where do puddles form after rain? Where does the wind move fastest? These aren’t abstract questions—they’ll determine whether your Asian greens thrive or struggle in our thick Houston humidity.
The Intuitive Approach: Observe → Reflect → Respond 🌱
Let me walk you through the framework that’s changed how I approach every seed I start.
Step One: Observe Your Space
Before you buy a single seed packet, spend time with your garden. I mean really spend time. Early morning is best—that’s when you’ll see where moisture lingers, where light breaks through first, where air moves. In Houston’s humidity, air circulation matters more than you’d think. Poor circulation invites powdery mildew and fungal issues, especially with tender greens.
Note in your journal: Do you have a spot that gets morning sun but afternoon shade? That’s gold for Asian greens. Can you access consistent water? Are you protecting the area from harsh afternoon wind? These observations aren’t just nice-to-know—they’re the foundation of successful seed starting.
Step Two: Reflect on What You’re Working With
Houston soil is clay-heavy. I know this sounds like a limitation, and sometimes it is, but it’s also information. Clay holds moisture (helpful for seeds) but can compact and reduce drainage (challenging). Before you start seeds, understand your actual soil.
If you’re starting seeds indoors—which I recommend for a more controlled environment in our intense heat—you won’t be fighting clay. But if you’re direct-seeding (which works beautifully for many Asian greens), you need to amend your bed with 2-3 inches of compost or aged bark mulch to lighten the soil and improve drainage.
Step Three: Respond Faithfully to Conditions
This is where the rubber meets the road. Once you’ve observed and reflected, you respond—not to some generic gardening timeline, but to what’s actually happening in your specific space.
| Asian Green Variety | Best Starting Method | Zone 9 Ideal Sowing Window | Days to Harvest |
|---|---|---|---|
| Bok Choy | Direct seed or transplant | Late Aug–Sept, Jan–Feb | 45–60 days |
| Mizuna | Direct seed (prefers it) | Late Aug–Sept, Jan–Feb | 40–50 days |
| Tatsoi | Direct seed or transplant | Late Aug–Sept, Jan–Feb | 45–60 days |
| Chinese Cabbage | Transplant (less bolting) | Late Aug–Sept, early Feb | 60–90 days |
| Gai Lan (Chinese Broccoli) | Direct seed or transplant | Late Aug–Sept, Jan–Feb | 50–70 days |
Starting Asian Greens Indoors: A Gentle Approach 💧
For most gardeners new to Asian greens, I recommend starting seeds indoors. This gives you control over temperature, moisture, and light—three things our Houston climate can be unpredictable about.
Fill seed trays with a quality seed-starting mix (not garden soil—it’s too heavy). Make it moist but not waterlogged. Place seeds at the depth indicated on your packet, typically just barely covered. Most Asian green seeds are small, so be gentle.
Once seedlings emerge, provide 14-16 hours of bright light daily. A grow light positioned 3-4 inches above the trays works perfectly. As seedlings develop true leaves (the second set), thin them to appropriate spacing or prepare for transplanting.
Water gently and consistently. This is where intuitive gardening really matters. Don’t water on a schedule—water when the soil surface feels dry to your touch. In Houston’s humidity, you need less water than you’d think. Overwatering causes damping off, a fungal issue that kills seedlings practically overnight.
Hardening Off in the Texas Heat ☀️
This is the step many guides gloss over, and it’s crucial in Zone 9. Seedlings started indoors need gradual exposure to outdoor conditions before transplanting. We’re not just talking about sun—we’re talking about wind, temperature fluctuations, and Houston’s intense UV index.
Begin hardening off 7-10 days before transplanting. Place seedlings in a sheltered outdoor spot for 1-2 hours on the first day, gradually increasing exposure. By day 7-10, they should handle full outdoor conditions (but still with afternoon shade protection until they’re established).
Watch your seedlings carefully during this transition. If leaves start looking purple or stressed, they’re experiencing temperature shock—slow down the process. If they’re wilting despite moist soil, they’re getting too much sun or wind. Adjust accordingly. Your intuition matters here more than any rule.
Direct Seeding: The Low-Fuss Option 🌿
Not everyone wants to fuss with seed trays and hardening off. Direct seeding works beautifully for Asian greens, especially mizuna, which absolutely prefers it.
Prepare your garden bed by removing weeds and mixing in 2-3 inches of compost. Create shallow trenches according to seed packet depth (usually ¼ inch for most Asian greens). Space seeds appropriately—mizuna can be closer together, while bok choy needs more room.
Water gently but thoroughly. Then here’s the part that requires intuition: monitor. In Houston’s August-September heat and humidity, you may need to water twice daily to keep the seed bed consistently moist. Check your soil each morning and evening by gently pressing your finger into it. If the top inch feels dry, water. This isn’t laziness—it’s the difference between germination and failure.
Once
🌿 Ready to Go Deeper in the Garden?
If this article resonated with you, you might be ready for something more than tips — you might be ready for
a whole new way of seeing your garden.
- 📖 Download the FREE Rooted in Grace eBook — Intuitive gardening for the faith-filled suburban gardener.
- 📚 Get the Rooted in Grace Print Book on Amazon — A beautiful companion for your garden journal.
- 🌱 Join Rooted Reset — A 5-day gentle reset to slow down, pay attention, and tend what matters most.
- 📌 Follow @southernsoils on Instagram — Daily garden encouragement in your feed.
- 📌 Save & share on Pinterest — Pin this for later and share it with a gardening friend.
- 👥 Join us on Facebook — Connect with a community of faith-filled gardeners.
“The garden is not just a place to grow plants — it is a place to grow yourself.” 🌸