
🧪 Testing Soil Texture with the Mason Jar Method

Some of the links on this website are affiliate links, which means that if you make a purchase through these links, I may earn a small commission at no additional cost to you. As an Amazon Associate, I earn from qualifying purchases. I only recommend products I genuinely trust and believe will bring value to my readers. Also, some of the content was created with strategic use of AI tools. For more information, please visit the Privacy Policy page. Thank you for supporting my blog and helping me continue to provide valuable content. Gardening is more than growing food—it's where God grows us. If you're hungry for a faith that feels grounded again, I wrote a book for you. Download my free eBook: Rooted in Grace: A Christian Guide to Intuitive Gardening
“`html
🧪 Testing Soil Texture with the Mason Jar Method
How a simple jar of water can reveal your soil’s story—and help you grow with confidence in our Houston gardens
🌿 Opening Reflection: What’s Hidden Beneath the Surface
When I first started gardening here in Zone 9, I thought good soil was just about dumping in compost and hoping the Texas heat wouldn’t bake everything to concrete. But as seasons passed—through our humid summers and unpredictable springs—I realized something important: healthy soil starts with knowing what’s already there.
Testing your soil texture is like listening to your garden’s backstory. It’s not flashy, and you won’t see instant results—but it offers clarity. The Mason jar method, in all its simplicity, has become one of my favorite rhythms at the start of a new season. You take a handful of soil, shake it with water, and let it settle. What’s revealed are layers—of sand, silt, clay, and truth. 💚
Because growth starts not with striving, but with understanding.
🌱 What Is Soil Texture—and Why It Matters in Our Zone
Soil texture refers to the proportion of sand, silt, and clay particles in your soil. Here in the Houston suburbs, this matters tremendously because our clay-heavy soils can either be our greatest asset or our biggest challenge—depending on what we understand about them.
These three components influence nearly everything about how your garden behaves:
Drainage and water retention: Critical in our hot, often-flooding climate where heavy rains can overwhelm compacted soil, yet droughts can harden clay into brick.
Root development and oxygen flow: Roots need to breathe, and our dense soils can suffocate them if we don’t understand what we’re working with.
Nutrient availability and microbial life: The living world in your soil—the organisms that feed your plants—depends on texture and structure.
How you amend and fertilize: Once you know your baseline, you can stop guessing and start responding faithfully to what your garden actually needs.
Let me break down the three basic particles:
Sand: Large, gritty, drains quickly—sometimes too quickly in our heat. If your soil is mostly sand, water runs right through before plants can use it.
Silt: Medium-sized, smooth like flour, holds moisture better than sand but still allows drainage.
Clay: Tiny particles, sticky when wet, holds nutrients tightly. We have lots of this in Greater Houston, and it’s not the enemy—once you understand how to work with it.
Sanda’s Zone 9 Note: Houston area soils tend to be clay-heavy with a pH that leans alkaline. When you do your jar test, you might see a thick clay layer—that’s normal here. The key is not fighting it, but amending thoughtfully with organic matter that helps clay particles bind together rather than compact.
🧪 The Mason Jar Soil Texture Test (Step-by-Step)
This is one of my favorite weekend projects, honestly. There’s something grounding about it—getting your hands in the soil, watching science happen in a jar, and gaining real knowledge about your own garden beds.
What you’ll need:
One clean quart-size Mason jar with a tight-fitting lid, one cup of soil from your garden bed (collected from several spots and mixed together), water, one teaspoon of dish soap, a marker or tape, and optionally a ruler for measuring.
How to do it:
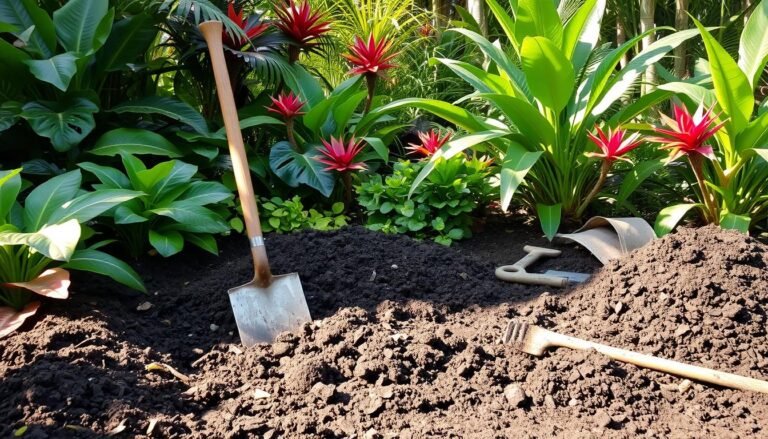
Collect your soil. Dig down 4–6 inches and take a handful from several areas of the bed you want to test. In our clay soils, you might need a little more oomph with your shovel! Mix your samples together well in a bucket.
Remove debris. Sift out rocks, roots, old mulch, and twigs. You want just the soil particles—nothing else. This step matters because it affects your reading.
Add to jar. Fill about one-third of the jar with your cleaned soil sample.
Add water and soap. Fill the jar with water, leaving about one inch at the top. Add one teaspoon of dish soap (the soap helps particles separate more clearly, giving you a truer reading).
Shake vigorously. Put that lid on tight and shake for 1–2 minutes until everything is fully mixed and the soil is completely suspended in the water. This is where the magic starts.
Let it settle. Place it on a flat surface where you won’t bump it. Now comes the beautiful part—watching layers begin to form.
Mark the layers. This is where patience teaches us something. Set a timer:
After 1 minute: Mark the sand layer. Sand is the heaviest and settles first—you’ll see a distinct line where it stops.
After 1 hour: Mark the silt layer. This middle layer takes longer to settle as particles are smaller and lighter.
After 24 hours: Mark the clay layer at the very top. Clay particles are so tiny they stay suspended the longest, and what settles last is your clay content. The water above the clay layer may still be slightly cloudy—that’s fine.
Calculate the percentages (optional): Measure each layer’s height with a ruler. Divide each layer’s height by your total soil height, then multiply by 100. This gives you percentages for sand, silt, and clay. This step is optional but helpful for tracking changes year to year.
Sanda’s Garden Wisdom: Don’t rush this test or take shortcuts. The 24-hour wait teaches patience—something gardeners need anyway. And those full 24 hours give you the most accurate reading. I always set my jars the evening before a Saturday so I can observe the changes over a full day. It’s oddly meditative.
🧬 Interpreting Your Results
Once your layers have settled, here’s how to read what your soil is telling you:
| Soil Texture Class | % Sand | % Silt | % Clay | Feel | Drainage |
| Sandy Loam | 60–70% | 20–30% | Under 20% | Gritty, loose | Fast (may need water retention help) |
| Loam | ~40% | ~40% | ~20% | Soft, crumbly, balanced | Balanced (the sweet spot!) |
| Clay Loam | 20–30% | 20–30% | 40–60% | Sticky, dense, moldable | Slow (common in Houston) |
| Clay | Under 20% | Under 20% | Over 60% | Very sticky, hard when dry | Poor (needs serious amending) |
Most gardens fall somewhere in between these categories, and that’s exactly right. The goal is balance—not perfection. And here’s what I’ve learned: even if your results show heavy clay, that’s not a failure. It’s information. It’s your garden speaking to you.
🛠 What to Do With Your Results
If your soil is too sandy: Add compost, coconut coir, and worm castings to improve water retention. In our climate, sandy soils dry out quickly under the Texas sun, so these amendments help hold moisture where roots can access it. Plan to amend annually in spring.
If your soil is too clay-heavy: Add compost (the best amendment for clay), gypsum to improve structure, and coarse sand (not fine sand—big difference!) to loosen the soil. Clay itself isn’t bad—it holds nutrients. But compacted clay restricts root growth and drainage. The key is working it in gently, not tilling aggressively.
If your soil is balanced loam: Maintain it with regular compost additions and gentle cultivation. You’re in a good place! Keep doing what’s working.
Important caveat: Avoid over-tilling, which breaks soil structure and harms the microbial life that makes soil truly alive. When you amend, work compost in gently by hand or with a broadfork if possible. Let nature do some of the work.
Sanda’s Tip: Do your jar test in fall (September/October) or early spring (February/March) so you have time to amend before planting season. In Zone 9, we have a longer gardening window, which is a gift—use it to let amendments settle and integrate before you plant.
✨ The Soul Side of Soil Testing
I’ve come to love this method because it mirrors so much of what I believe about growth—both in gardens and in life. We can’t build lasting growth on assumptions or wishes. We need to observe what’s actually there, reflect on what it means, and then respond faithfully.
The Mason jar method requires patience. It teaches you to wait, to watch
Ready to Go Deeper in the Garden?
If this article resonated with you, you might be ready for something more than tips.
- Download the FREE Rooted in Grace eBook – rootedingrace.me/rooted-in-grace-ebook
- Get the Print Book on Amazon – amzn.to/4efVU3D
- Join Rooted Reset – rootedingrace.me/rooted-reset
- Follow on Instagram – @southernsoils
- Save on Pinterest – @southernsoilsunshine
- Join on Facebook – Southern Soil Sunshine
“The garden is not just a place to grow plants – it is a place to grow yourself.”


2 Comments