
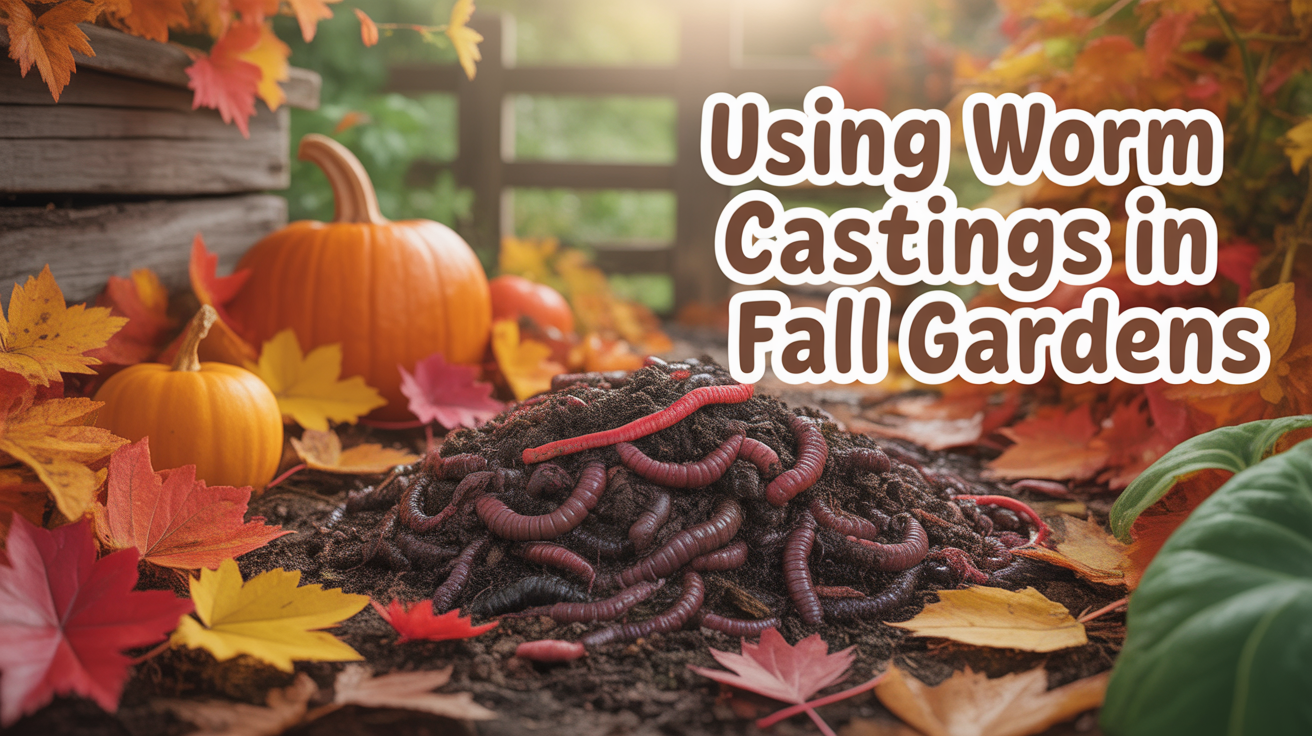
Using Worm Castings in Fall Gardens
🪱 A Gentle Start: Feeding the Soil, Feeding the Soul
Fall gardening in Houston invites us to slow down, take stock, and prepare for the season ahead. Worm castings—nature’s slow, steady gift—remind us that transformation often happens quietly. Kitchen scraps and garden debris pass through the humble worm, becoming black, crumbly castings that feed the soil in ways we can’t always see right away.
In life and in gardening, small, unseen processes can yield the richest results. As we prepare our fall beds here in Zone 9, using worm castings is a way of honoring both the soil’s need for nourishment and the Creator’s design for renewal. There’s something sacred about feeding the earth that feeds us—it’s stewardship in its most tangible form.
Free eBook
Rooted in Grace
A Christian guide to intuitive gardening — the whole book, free. Tell me where to send it and it’s yours in a minute.
🌱 Why Worm Castings Are Ideal for Fall in Zone 9
Worm castings (vermicast) are packed with plant-available nutrients, beneficial microbes, and organic matter. Fall is an especially strategic time to use them in our Houston gardens because our soil is emerging from the intense heat of summer, and our fall and winter crops are just beginning their season. Here’s why this matters for us:
Sanda’s Zone 9 Note: In Houston, our fall garden season runs from September through February. Worm castings applied now give our cool-season crops the gentle nutrition they need to thrive without the risk of burning tender seedlings. Unlike synthetic fertilizers, castings release nutrients slowly as soil microbes warm during the day and cool at night—perfect for our fluctuating fall temperatures.
Let me share what makes castings so valuable for our specific growing conditions:
Boosts Fall Crops 🥬 – Our Zone 9 fall crops (leafy greens, brassicas, and root vegetables) need consistent, gentle nutrition. Worm castings provide exactly that without the nitrogen burn you’d risk with chemical fertilizers. In Houston’s alkaline clay soil, the humic acids in castings also help plants access nutrients more efficiently.
Enriches Soil for Spring 🌿 – November and December are the perfect months to build soil fertility for next spring. Castings work slowly through winter, establishing microbial colonies that will explode with activity when soil temperatures warm in March. This is foundational work that pays dividends for months to come.
Improves Soil Structure 🪨 – If you’re gardening in Houston’s challenging clay or sandy soil (both are common in the suburbs), worm castings are a game-changer. The humus they add helps clay soil drain better and helps sandy soil retain moisture. Over time, this improves your soil’s ability to hold nutrients.
Suppresses Plant Diseases 🦠 – Our humid Houston climate creates conditions for fungal issues. The beneficial microbes in worm castings help outcompete pathogens naturally. This is especially valuable for fall brassicas, which can struggle with disease pressure.
Works in Cooler Soil ❄️ – Even as temperatures drop in December and January, worm castings remain available to plant roots. The microbial life slows but doesn’t stop, ensuring steady nutrition throughout our mild winters.
📋 Step-by-Step: Using Worm Castings in Your Fall Garden
Step 1: Clear and Prepare Beds
Late August and early September is when we remove spent summer crops and clear out the heat-loving plants that have exhausted themselves. Pull those tomatoes, peppers, and okra. Remove weeds and debris. Take a moment to observe your beds—what worked well this summer? Where did you struggle? This reflection helps you know where to add extra nutrients.
Once cleared, loosen the soil with a garden fork to improve aeration before adding castings. In Houston’s compacted soil, this aeration step is crucial. You’re creating pathways for root growth and allowing air and water to penetrate.
Step 2: Decide How to Apply
You have flexibility with worm castings. Choose the method that fits your garden and schedule:
Top Dressing: Sprinkle a ¼–½ inch layer over the soil around plants. This is the easiest method and works well for established plantings. The castings sit on the surface, and fall rains and soil activity gradually incorporate them. Perfect for mulching around herbs and perennials.
Soil Incorporation: Mix 1 part castings to 3 parts soil in planting areas before setting transplants. This is ideal when preparing new beds or amending planting holes. It gives roots immediate access to the nutrition and microbial life.
Compost Tea: Brew a liquid extract to drench roots or spray leaves. This method is faster-acting and wonderful for boosting established plants mid-season. We’ll cover this in detail below.
Sanda’s Tip: Don’t mix worm castings with chlorinated water if making tea. In Houston, let tap water sit overnight to allow chlorine to dissipate, or use collected rainwater. Our Texas sun does the work for us if you leave it out during the day. Chlorine can damage the delicate microbial life that makes castings valuable.
Step 3: Feed Fall Crops
Here’s where the real magic happens—feeding the specific crops you’re growing:
Leafy Greens: Spinach, kale, lettuce, and chard are our stars in Houston fall gardens. Apply a thin layer (about ¼ inch) of worm castings around each plant once they’re established. These greens are hungry feeders, and castings provide steady nitrogen without pushing them too fast. You want steady, tender growth, not aggressive, bitter leaves.
Brassicas: Broccoli, cabbage, and cauliflower need nutrient-rich soil to form quality heads. Work castings into the top few inches of soil near the transplants as you set them out. These crops appreciate the consistent feeding that castings provide over the 60–90 days they’re growing.
Root Crops: Carrots, beets, and radishes develop best in loose, well-amended soil. Mix castings directly into the planting row to promote steady, balanced growth. The humus in castings keeps the soil soft and friable, which is essential for straight carrots and smooth beets.
Step 4: Boost Perennial Beds
This is often overlooked, but fall is the perfect time to care for your established herbs, berry bushes, and ornamental perennials. Spread a thin layer of worm castings around each plant before mulching. The nutrients will filter into the root zone over the winter months, feeding the plant when it needs it most—during dormancy recovery and spring emergence. Think of it as feeding the plant’s future.
Step 5: Prepare Spring Beds Now
If you have empty beds—spaces where you’re not planting fall crops—this is your opportunity to build fertility for spring. Add a ½ inch layer of worm castings, cover with mulch (shredded leaves work beautifully), and let microbial life work over the winter. By spring, the soil will be noticeably richer and more alive. This is playing the long game, and it pays.
🧪 Making Worm Casting Tea for Fall
A liquid drench delivers nutrients quickly and can be sprayed directly on leaves for disease suppression. This method is wonderful when you want fast results or need to treat multiple plants efficiently.
Basic Recipe
| Ingredient | Amount | Purpose |
|---|---|---|
| Worm castings | 1 cup | Main nutrient source |
| Non-chlorinated water | 1 gallon | Carries nutrients to roots |
| Unsulfured molasses (optional) | 1 tablespoon | Feeds beneficial microbes |
Instructions for Brewing
Step One: Place your worm castings in a mesh bag (an old stocking works perfectly, or a fine-mesh produce bag). This keeps the solids contained while allowing the nutrients to steep into the water.
Step Two: Submerge the bag in your gallon of water. If you have an aquarium pump, use it to aerate the mixture—the bubbling adds oxygen that beneficial microbes love. If you don’t have a pump, stir the mixture vigorously several times daily. Aeration is important because it encourages microbial activity.
Step Three: Let it steep for 12–24 hours. Twelve hours is minimum; 24 hours is ideal if your schedule allows. You’re essentially making a nutrient-rich “soup” that microbes are actively reproducing in.
Step Four: Use immediately to water plants at the root zone or as a foliar spray (spraying directly on leaves). Fresh tea is most potent. If you’ve added molasses, the microbes are well-fed and active. Apply in early morning or late evening if using as a foliar spray.
Sanda’s Tip: Make worm casting tea in a 5-gallon bucket if you have multiple beds to treat. The same ratio applies: 5 cups castings to 5 gallons water. In Houston’s cool fall weather (October through December), the brew stays fresh longer. Winter is actually ideal tea-making season because microbial activity is steady without temperature extremes.
🛠 Tips for Getting the Most Out of Worm Castings
Storage Matters: Store castings in a cool, dark place—never let them dry out completely. If you’ve sourced castings from a vermicomposting bin, keep them slightly moist (like a wrung-out sponge). Keep them out of direct sunlight, which can kill beneficial microbes. A covered container in a shaded corner of your garage or shed works perfectly.
Freshness Counts: Use fresh castings within 6 months for best microbial activity. Over time, the beneficial microbes naturally decline. Think of old castings as still valuable for organic matter, but newer castings are more nutritionally “alive.”
Avoid Overapplication: Worm castings are concentrated—more isn’t always better. A common mistake is piling castings around plants thinking “more nutrition.” Actually, excess castings can tie up nutrients or create imbalances. Stick to the ¼–½ inch top-dressing guideline. Observe how your plants respond. If they’re thriving, you’ve got the amount right.
Combine with Compost: For the best soil-building results, use castings alongside regular compost. Castings bring concentrated nutrients and microbes;
Understanding Houston’s Unique Soil Challenges with Worm Castings
Our Houston suburban soils present particular challenges that worm castings address beautifully. Many of us are gardening in either dense clay (especially in areas closer to the bayous) or sandy, nutrient-poor soil (common in the northern suburbs). Both extremes can leave our fall crops struggling, no matter how much we water or fuss over them.
Clay soil in our area tends toward alkalinity—that’s just the nature of our Texas earth. This alkalinity can lock up nutrients like iron, manganese, and zinc, making them unavailable to plant roots even when they’re present in the soil. Worm castings contain humic acids that work like tiny chelators, helping to unlock these bound nutrients and make them accessible. It’s a gentle, biological solution rather than forcing pH changes through sulfur amendments, which can take years to show results in Houston clay.
Sandy soils, by contrast, struggle to hold nutrients at all. Water and nutrients leach right through. Here’s where the magic of worm castings truly shines: the organic matter they add actually improves water and nutrient retention. Over successive seasons of using castings, sandy soils become more “sticky”—not compacted, but more cohesive. Your fall vegetables spend less time thirsty and hungry between waterings.
What’s particularly beautiful about worm castings in our climate is that they work year-round, but fall application sets up a cascade of benefits. As our soil temperature gradually cools from September through November, microbial life in castings shifts into a different mode—less explosive growth, more steady, persistent feeding. This matches perfectly with how our cool-season crops want to grow. There’s no forcing anything; it’s working with the natural rhythm of our Zone 9 seasons.
When to Avoid or Modify Worm Casting Application
While worm castings are wonderful, there are moments when we need to be thoughtful about how and when we use them. Understanding these nuances helps us garden with wisdom rather than just following a formula.
If you’ve had persistent fungal issues in a particular bed—say, powdery mildew on squash last summer or root rot in an overly wet spot—don’t just add castings and hope for the best. First address the underlying problem. If it’s drainage, add compost and work on raised beds or mounding. If it’s air circulation, plan your spacing differently next season. Castings can help suppress disease, but they’re not a cure-all for poor growing conditions. Think of them as one tool in a larger practice of observation and care.
Also, if you’re transitioning newly cleared beds and you notice they’re genuinely depleted—perhaps you’ve grown intensively there all summer—you might benefit from adding castings along with a broader compost application rather than castings alone. Sometimes we need both the concentrated nutrition of castings and the bulk organic matter that regular compost provides. A 50/50 blend of quality compost and worm castings, worked into the top 4–6 inches, creates beautiful soil for fall planting.
Sanda’s Garden Wisdom: Here in Houston, we sometimes have unexpected warm snaps in September or even October. If you’re applying castings and then temperatures spike back to 85°F+, your newly transplanted cool-season crops can actually bolt or struggle. Apply castings a few days before you transplant, allowing soil microbes time to activate. Or wait until temperatures have stabilized below 75°F before your main casting application. Working with our weather pattern, not against it, yields better results.
Building a Vermicomposting Practice to Sustain Your Own Supply
Many of us wonder if we should start our own worm bin rather than buying castings. The short answer: it’s a beautiful practice if you have the space and patience, but don’t feel obligated. A small bin can supply some of your casting needs, though it won’t likely supply all of them if you have multiple garden beds.
If vermicomposting calls to you, fall is actually an excellent time to start. A simple bin—even a plastic storage container with drainage holes drilled in the bottom—can house red wigglers. Feed them your kitchen scraps (vegetable trimmings, coffee grounds, crushed eggshells), and in 4–6 months, you’ll have your first harvest of castings. In Houston’s mild climate, your worm bin can live outside year-round, though you’ll want to protect it from extreme heat in summer and keep it
Ready to Go Deeper in the Garden?
If this article resonated with you, you might be ready for something more than tips.
- Download the FREE Rooted in Grace eBook
- Get the Rooted in Grace Print Book on Amazon
- Join Rooted Reset
- Follow on Instagram – @southernsoils
- Save on Pinterest – @southernsoilsunshine
- Join on Facebook – Southern Soil Sunshine
“The garden is not just a place to grow plants – it is a place to grow yourself.”
Free eBook
Before you go — the book is yours
Rooted in Grace: A Christian Guide to Intuitive Gardening. No cost, no catch. Read it on any device, at whatever pace the season allows.


6 Comments