Using Netting to Protect Fall Seedlings
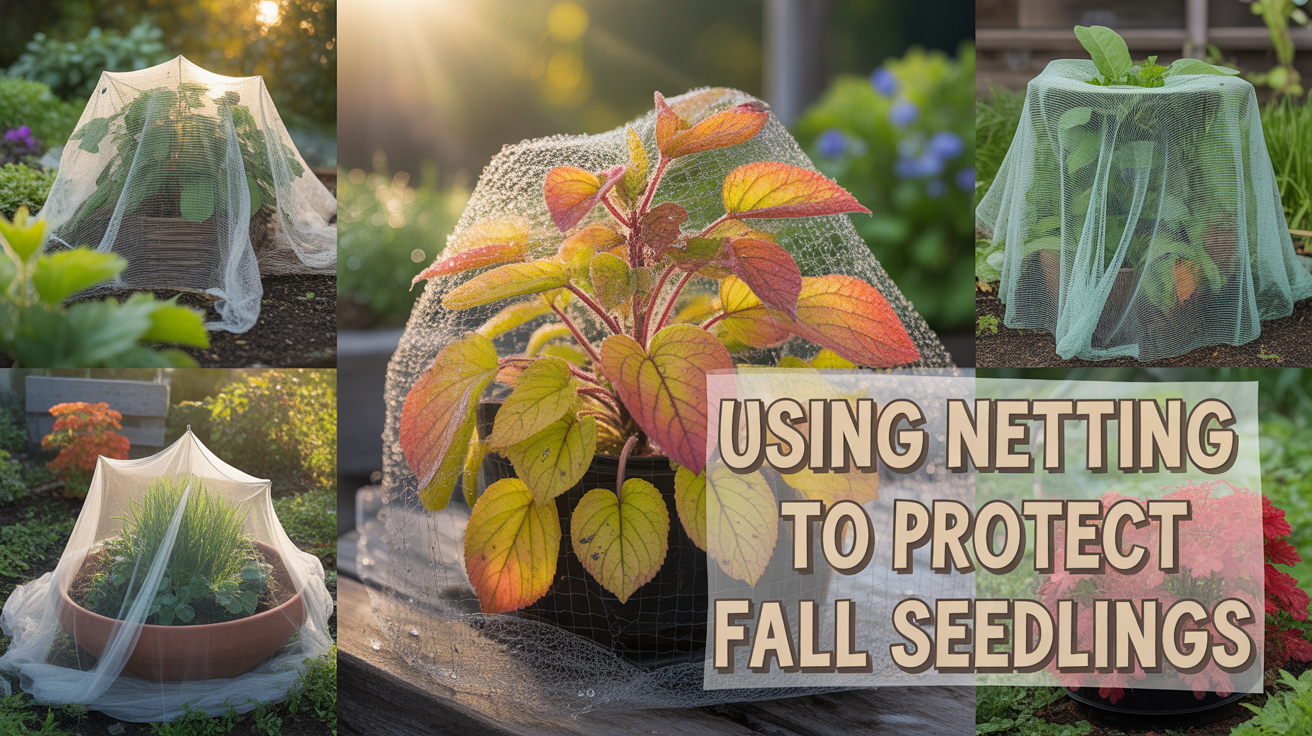
Using Netting to Protect Fall Seedlings: A Zone 9 Gardener’s Guide to Guarding the Tender Beginnings 🌿
The earliest weeks of a plant’s life are also its most fragile. Here in Zone 9, when we’re sowing our fall seedlings in August and September, they face an army of threats: hungry insects that thrive in our lingering warmth, pecking birds, curious pets, and the unpredictable weather patterns we know all too well. I’ve watched carefully planted beds get decimated in days—and I’ve also watched them flourish with just a little intentional protection.
One of the simplest and most effective ways to safeguard your seedlings is with garden netting. More flexible than row covers and more lightweight than hardware cloth, netting acts as a gentle shield. It gives seedlings a chance to root deeply and grow steadily into healthy plants without becoming lunch for every critter in the neighborhood. In our Houston suburban climate, where the growing season stretches long and the pest pressure stays high, netting can be the difference between a thriving fall garden and heartbreak.
In this guide, we’ll explore how to use netting to protect fall seedlings in Zone 9, where temperatures remain warm well into late autumn, and why this small act of care and observation can transform your garden into a place of abundance rather than loss.
Free eBook
Rooted in Grace
A Christian guide to intuitive gardening — the whole book, free. Tell me where to send it and it’s yours in a minute.
Understanding What Your Fall Seedlings Face 🧑🌾
Before we talk about solutions, let’s observe what we’re actually protecting against. This is the first step of intuitive gardening—really seeing what’s happening in our space.
Seedlings are small targets in a big world, and in Zone 9, that world is particularly active. The warm temperatures that let us extend our growing season also mean that insects, birds, and other creatures stay active longer. When I’m out in my garden at dawn, I notice:
Insects are relentless. Cabbage worms, flea beetles, and aphids absolutely thrive in our lingering warmth. I’ve seen a single flea beetle population devastate a young brassica bed in less than a week. These pests particularly target our fall crops—kale, broccoli, cabbage, and mustard greens.
Birds are another story entirely. Sparrows, doves, and even the occasional mockingbird seem to view freshly sown beds as all-you-can-eat buffets. If you have backyard chickens like some of my neighbors, they’re equally enthusiastic about tender seedlings.
Rodents and critters add another layer of challenge. Rabbits, squirrels, and neighborhood pets can trample or nibble seedlings, sometimes out of curiosity and sometimes because they’re genuinely hungry.
Weather extremes are part of our Zone 9 reality too. September downpours can flatten tiny seedlings, and gusty autumn winds can dry them out quickly. Without some protection, a bed you carefully sowed may look empty within days.
Sanda’s Zone 9 Note: Our Houston humidity and warmth create a perfect storm for pest activity that extends longer than in cooler zones. What might be a 4-week issue in Zone 6 can stretch to 8-10 weeks here. That’s why netting isn’t just nice to have—it’s practically essential for fall seedling success.
Types of Garden Netting and When to Use Each One 🥅
Not all netting is created equal. Understanding your options helps you respond faithfully to what your garden actually needs.
| Netting Type | Mesh Size | Best For | Zone 9 Advantage |
| Insect Netting | 0.8–1mm fine mesh | Cabbage worms, flea beetles, aphids | Blocks pests during our extended warm season; allows air/light/rain through |
| Bird Netting | 15–20mm mesh | Birds and larger pests | Perfect for brassicas, peas, and leafy greens; let’s birds peck but can’t land safely |
| Deer/Critter Netting | Heavy-duty mesh, variable size | Larger animals like deer or rabbits | Best installed vertically; works for neighborhood dogs and wandering wildlife |
| Shade Netting | Varies (30–50% shade) | Doesn’t block pests but reduces sunlight | Ideal for seedlings germinating during hot early fall when soil temps are still 85°F+ |
For most of us gardening in Zone 9 Houston suburbs, I recommend insect netting for your first line of defense. It’s lightweight, affordable, and handles the pest pressure that will hit your beds hardest. Pair it with bird netting for vulnerable crops like your broccoli and cabbage starts, and you’re in good shape.
How to Install Netting So It Actually Works 🌱
Installation is where intuitive gardening meets practical care. The goal isn’t just to throw netting over your bed—it’s to create a protective system that lets your plants thrive while excluding unwanted visitors.
Step 1: Frame It Properly
Use hoops, stakes, or PVC arches to hold netting above plants. This is important—pressing netting directly onto seedlings can damage them and create a humid microclimate where disease thrives. I use flexible PVC hoops spaced about 2 feet apart over a 4-by-8-foot bed. They last for years. The hoops should sit about 6-8 inches above your seedlings to give them growing room.
Step 2: Anchor the Edges Securely
This is where most people slip up. No gaps along the ground—that’s where insects and small animals will find their way in. I use garden staples (the landscape fabric kind) to secure the netting edges into the soil every 12 inches or so. Some gardeners prefer soil trenches—burying the edge about 2 inches deep. Either way works, but consistency matters.
Step 3: Design for Access
Think ahead about how you’ll water and weed. I always set up my netting so one long side can be lifted or rolled back easily. This lets me get in for hand-weeding and inspection without removing the entire cover. When you’re checking for problems—and you will be checking regularly—easy access is a blessing.
Step 4: Adjust as Plants Grow
Your netting system isn’t static. As seedlings mature into sturdier plants with true leaves, you’ll need to raise or expand your setup. By the time plants are 4-6 weeks old and starting to look like real plants, they’re tougher and can handle more exposure. I gradually raise my hoops and eventually remove netting entirely for hardier greens like kale.
Sanda’s Garden Wisdom: Don’t leave netting on too long. I’ve seen gardeners keep protective netting on mature plants and accidentally create pest habitat instead of preventing it. The netting itself can trap spider mites and encourage mold in our humid climate. Remove netting once plants are established (about 6-8 weeks for most crops), or sooner if you see signs of moisture buildup.
Watering and Care Under Netting 💧
One of the beautiful things about garden netting is that you don’t have to remove it every time you water. Rain and irrigation pass right through. However, in our Zone 9 humidity, I do pay extra attention to moisture management.
Use drip irrigation or soaker hoses under your netted tunnels when possible. This delivers water directly to the soil without creating the humid conditions that encourage disease. If you prefer overhead watering, use a mist setting rather than heavy streams—this prevents soil compaction and reduces the risk of moisture sitting on leaves.
Here’s what I’ve learned through observation and reflection: check frequently for areas where moisture is trapped under the netting, particularly in our humid Houston climate. If you notice water beading up on the inside of the netting on warm mornings, you may need to improve air circulation by tilting the netting slightly or opening it for a few hours on particularly humid days.
Integrated Pest Protection: Netting Isn’t Enough Alone 🐛
Netting works best when paired with other prevention practices—this is where faithful response to what we observe really matters.
Light mulching around (but not touching) seedlings helps prevent soil-borne diseases and can deter some crawling insects. I use about 1 inch of straw, keeping it an inch away from the seedling stem.
Companion planting creates natural deterrents. Nasturtiums attract certain pests away from brassicas, and marigolds help repel flea beetles. Plant these around your netted beds.
Row crop rotation prevents pest buildup. Don’t plant your fall brassicas in the exact same spot where you grew them in spring. Move them to a different bed to break pest life cycles.
Regular inspection is the gardener’s secret weapon. I walk my beds every couple of days during peak growing season. If I spot a problem early—pest damage, disease, or pest insects—I can respond before it becomes an emergency. This observation-reflection-response cycle is what intuitive gardening is all about.
Healthy soil grows strong plants, and strong plants resist pests better. Work compost into your beds before sowing. In Zone 9, where we can amend almost year-round, this is a gift.
Quick Reference: Netting Protection Timeline for Zone 9 Fall Crops 📅
| Crop | Plant Date (Zone 9) | Netting Type | Duration Under Netting |
| Cabbage/Broccoli |
Understanding Your Netting Options Beyond the Basics
While we touched on netting types in the main guide, there’s real nuance in choosing what works for your specific seedlings and your Houston microclimate. I’ve learned this through seasons of trial and honest reflection about what actually protects versus what just looks protective.
Insect netting with its fine mesh works brilliantly for stopping cabbage worms and flea beetles, but here’s something I discovered the hard way: in our humid Zone 9 climate, fine mesh can trap moisture underneath on warm mornings, creating conditions where powdery mildew loves to settle in. This is particularly true if you have poor air movement in your garden space. The solution isn’t to avoid fine mesh—it’s to use it intentionally and remove it sooner rather than later, or to tilt it slightly for air passage on humid days.
Bird netting has a different personality. The larger mesh lets beneficial insects move through and air circulates well, which our climate appreciates. But birds can sometimes get tangled in it if it’s not installed properly with adequate height above plants. I’ve had to carefully free a mockingbird before, and it taught me to always give that extra clearance and check regularly for any visitors caught in the mesh.
What many Houston gardeners don’t realize is that we have a unique advantage with shade netting during our fall transition. Our early September seedlings often germinate in soil temps still climbing toward 85-90°F on hot days. A 30-40% shade net placed directly over beds during germination (before seedlings emerge) can drop soil temperature by 5-8 degrees and improve germination rates for temperamental crops like lettuce and spinach. Once seedlings are up and growing, you can switch to insect or bird netting. This two-stage approach is something I’ve seen very few gardeners do, but it’s genuinely transformative for fall crop success here.
Recognizing When Netting Has Done Its Job—And When It’s Time to Let Go
There’s a spiritual lesson woven through gardening that we don’t often talk about: knowing when to release protection is just as important as knowing when to provide it. I spent my first few years as a gardener leaving netting on too long, thinking more protection meant more safety. It didn’t. It actually created different problems.
Around week 6-8 of growth (which brings us from late August/early September through mid-October for most fall crops), your seedlings transition from vulnerable babies to more resilient young plants. This is when your netting work is complete, and holding on becomes counterproductive. Here’s what I’ve observed: plants that stay under netting too long don’t develop the robust leaf structure they need. They get leggy, pale, and actually more pest-prone because they’re weaker. It’s counterintuitive, but hardship—exposure to mild wind, fluctuating moisture, direct sunlight—actually strengthens plants.
Watch for these signs that netting has graduated from protection to hindrance: leaves reaching the netting, visible new growth that’s healthy and thick, stems becoming sturdy enough that you have to apply noticeable pressure to bend them, and the absence of any pest damage for 7-10 days straight. When you see these markers, it’s time to remove the netting gradually. I typically lift one side for a few days, letting plants adjust to more light and air. Then I remove it entirely. This gradual hardening-off respects the plants’ readiness while acknowledging they still need a gentle transition.
There’s wisdom in this rhythm that extends beyond gardening. We protect what’s vulnerable, but we also trust growth. We observe carefully, we respond appropriately, and we know when to step back and let the world do its work on our plants. Sometimes the most faithful thing we can do is release our grip.
Troubleshooting Common Netting Problems in Our Houston Climate
Zone 9 humidity brings its own set of challenges when using netting, and I want to be honest about the problems I’ve encountered so you can avoid them. This is where observation and willingness to adjust matter most.
The most common issue I see is fungal problems developing under netting during our wet spells. When we get an August rainstorm or a September downpour, moisture gets trapped under the mesh, and if air isn’t circulating well, powdery mildew or damping-off can establish itself quickly. My solution: tilt netting slightly on one side to allow east-west air movement even during rain. This simple adjustment—raising one edge by 2-3 inches and letting air flow through—has nearly eliminated this problem for me. It’s not perfect, but it’s dramatically better than a sealed tunnel.
Another challenge is netting tearing or degrading faster than expected. Our Texas sun is intense, and many economy netting products break down within a season. I’ve shifted to investing in UV-stabilized netting, which costs a bit more upfront but lasts 3-4 years instead of one. Over time, it’s actually more economical and less wasteful. When I look at my tattered netting from year one versus the still-intact pieces from year three, it feels like a small way of respecting the resources we’ve been given to steward.
Pests occasionally find their way under netting anyway, particularly if you have gaps along the edges or if the netting was installed while an infestation was already present. This is why inspection is non-negotiable. I check under my netting at least twice weekly, looking for clusters of eggs on leaf undersides, discolored patches, or webbing.
🛒 Shop This Post
What actually keeps fall seedlings alive under Zone 9 pest pressure. Buy mesh fine enough the first time and you will not be replacing it in October.
- Garden Netting (10 x 33 ft) General-purpose barrier netting. Nearly six thousand reviews, and it survives more than one season.
- Fine Mesh Insect Netting The 0.8-1mm mesh is what stops flea beetles and cabbage worms. Bird netting will not.
- Garden Hoops for Raised Beds (36 pc) Keeps netting off the leaves. Fabric pressed onto seedlings cooks them in a Houston September.
- Galvanized Landscape Staples (50 pk) Anchoring is the step people skip. One gap at the soil line and the cover is decorative.
- Lock-Grip Cover Clips (50 pc) Pin netting to hoops so you can lift one side to harvest without dismantling the whole thing.
- R&M Organics Compost Netting protects seedlings; compost is what makes them grow fast enough to outrun the pests.
These are Amazon affiliate links. If you buy through them I earn a small commission at no extra cost to you — and I only link gear I actually use in my own Zone 9 garden.
Ready to Go Deeper in the Garden?
If this article resonated with you, you might be ready for something more than tips.
- Download the FREE Rooted in Grace eBook
- Get the Rooted in Grace Print Book on Amazon
- Join Rooted Reset
- Follow on Instagram – @southernsoils
- Save on Pinterest – @southernsoilsunshine
- Join on Facebook – Southern Soil Sunshine
“The garden is not just a place to grow plants – it is a place to grow yourself.”
Free eBook
Before you go — the book is yours
Rooted in Grace: A Christian Guide to Intuitive Gardening. No cost, no catch. Read it on any device, at whatever pace the season allows.