5 Unique Layouts for a Small Spring Vegetable Garden

5 Unique Layouts for a Small Spring Vegetable Garden in Zone 9 🌱
There’s something sacred about planning a garden, isn’t there? When I sit down with my worn garden notebook each February, thinking about what I’ll grow in the coming months, I’m not just plotting vegetables—I’m dreaming about nourishment, growth, and the small miracles that happen when we tend the soil with intention.
If you’re like me, working with limited space here in the Houston suburbs, you know that designing a spring vegetable garden requires both creativity and a willingness to observe what your particular corner of Zone 9 needs. Whether you’re working with a tiny backyard, a patio corner, or even a balcony that gets that precious afternoon shade, these five layouts will help you maximize every inch while creating something that’s both productive and beautiful.
The beauty of small-space gardening isn’t about what you’re missing—it’s about what you can intentionally cultivate. Let’s explore these designs together and find the one that speaks to your garden’s unique story. 💚
Free eBook
Rooted in Grace
A Christian guide to intuitive gardening — the whole book, free. Tell me where to send it and it’s yours in a minute.
The Square-Foot Garden Layout: Organized Abundance
The square-foot method has been a game-changer for so many gardeners I know, and I think you’ll understand why once you experience it. This layout divides your growing space into equal one-foot-by-one-foot sections—like a checkerboard—with each square dedicated to a specific crop. It’s beautifully systematic without being rigid, which I deeply appreciate.
In our Zone 9 spring season (February through April), this method shines because it helps you keep track of what needs succession planting and what’s thriving. The contained nature of each square also makes watering more precise, which matters tremendously during our unpredictable spring weather patterns.
How to Create Your Square-Foot Garden
Start with a raised bed—ideally about 4 feet by 4 feet, which gives you sixteen squares to work with. If you’re building from scratch, untreated cedar or composite materials work beautifully in our climate. Fill it with a quality soil mix (I use a blend of compost, peat moss, and vermiculite). Then, using string or thin wood strips, create your grid by dividing the bed into four sections both directions, giving you your one-foot squares.
The real magic happens when you plant: one tomato per square, four lettuce plants per square, nine beets per square. Each crop gets exactly what it needs in exactly the space it needs.
Sanda’s Tip: In Zone 9, February is your sweet spot for planting cool-season crops. Plant your spring square-foot garden by mid-February so your greens and root vegetables have 6-8 weeks before our heat arrives. By late April, you’ll be ready to transition to heat-loving crops for summer.
Ideal Plants for Spring Square-Foot Gardening
Leafy greens like lettuce, spinach, and arugula are perfect for this method—they’re forgiving and grow quickly. Radishes give you that satisfying harvest in just 25 days. Carrots, beets, and bush beans all thrive in the contained structure. Swiss chard is another favorite of mine because it produces for weeks and handles our transition into warmer weather better than most greens.
Benefits You’ll Experience
This layout maximizes your planting efficiency—you’re not wasting space or water. It simplifies crop rotation because you can literally rotate which crop goes in each square season to season. The raised bed nature of it protects against soil-borne diseases that can linger in our heavy Houston clay. And honestly? There’s something deeply satisfying about the order and visibility of it all.
The Spiral Garden Design: Beauty Meets Function 🌀
If the square-foot garden is the organized gardener’s dream, the spiral garden is poetry made tangible. This stunning design spirals upward in a compact footprint, creating different microclimates as you go higher. It’s not just functional—it becomes a focal point in your garden space.
Creating Your Spiral Structure
Build your spiral using materials that speak to your garden’s aesthetic. Stack rocks, weathered bricks, or salvaged wood in a spiral pattern, starting with a wide base (about 3-4 feet in diameter) and narrowing as you ascend to a central peak about 2-3 feet high. The gaps between materials create natural drainage channels, which is crucial in our spring season when rain can be unpredictable.
Fill the spiral with layers: drainage material at the base (broken pottery shards or gravel), then a rich soil mix that includes compost. This is where that intuitive gardening approach comes in—as you build, pause and observe. Is the spiral stable? Does the soil layer feel right under your hands?
Sanda’s Zone 9 Note: Our Houston spring rains can be intense! Make sure your spiral has excellent drainage. If you’re building in a heavy clay area, consider adding a layer of sand beneath your spiral base to help water move through. Watch the first few rains carefully to see how water flows—this is your garden teaching you.
Strategic Plant Placement
Here’s where the spiral’s intelligence becomes clear. The upper levels, which dry out faster and get more direct sun, are perfect for Mediterranean herbs like basil and thyme—they actually prefer these conditions. The lower, more moist levels are ideal for shade-tolerant greens like lettuce, spinach, and Swiss chard. Strawberries cascade beautifully from mid-levels.
The spiral naturally creates zones, and by observing your specific spiral’s conditions, you respond by placing plants where they’ll truly flourish.
Why Gardeners Love This Design
Enhanced drainage means better root health. The height makes watering and harvesting easier on your back. It creates genuine visual interest in your garden—guests always ask about it. And the microclimates it creates mean you can grow a surprising variety in a small footprint. It’s companion planting through design.
The Keyhole Garden Layout: Access with Abundance 🔑
The keyhole garden holds a special place in my heart because it solves a problem I see constantly in small-space gardening: you create a beautiful raised bed, and then you can’t quite reach the center without stepping into it or stretching awkwardly. The keyhole design beautifully addresses this.
Understanding the Keyhole Structure
Imagine a circular raised bed (about 4-5 feet in diameter) with a wedge-shaped notch cut from one side—that notch is your “keyhole,” your access path. At the very center of the circle, build a small composting basket or cylinder (about 12-18 inches in diameter). Fill the surrounding growing space with rich soil, and you’ve created something truly special.
The composting basket isn’t just functional—it’s a continuous nutrient source. Kitchen scraps decompose there, and their nutrients gradually seep into the surrounding soil where your vegetables are rooted. It’s a closed-loop system, and there’s something deeply faith-affirming about participating in that kind of natural cycle.
Perfect Plants for Keyhole Gardens
The larger outer circle is ideal for tomato plants, peppers, and compact squash varieties that appreciate the warmth our Houston springs eventually bring. Herbs circle around nicely too. The keyhole access means you can tend everything without ever damaging your plants.
Sanda’s Garden Wisdom: For our Houston clay, build your keyhole bed at least 18-24 inches deep. Layer cardboard or newspaper beneath to suppress the clay underneath, then fill with quality garden soil mixed with compost. This gives your roots room to grow strong and healthy.
The Central Composting Advantage
You’re never more than an arm’s reach from your compost basket. Coffee grounds, vegetable scraps, shredded leaves—they all have a home. This creates a living, breathing connection between your kitchen and garden. No transporting heavy compost bins; no wondering where to put kitchen waste. Everything feeds the garden directly.
Container Clusters: Flexibility and Freedom 🪴
Not every gardener has access to ground soil, and not every gardener wants to be confined to a fixed bed location. Container gardening gives you complete freedom, and when you cluster containers thoughtfully, you create something that’s both practical and beautiful.
Designing Your Container Clusters
The key to beautiful container gardening is intentional variety. Mix pot sizes—combine a few large containers (for tomatoes or peppers) with medium pots (for herbs) and smaller containers (for radishes or lettuces). Arrange them by height, creating a pyramid effect where taller plants don’t shade shorter ones. Group them by watering needs: sun-lovers together, shade-tolerant plants together.
In our Zone 9 spring, you might notice that containers in direct afternoon sun need watering more frequently than those in morning-sun locations. That’s your cue to observe and adjust placement as needed. This flexibility is container gardening’s superpower.
Ideal Vegetables for Container Growing
Cherry tomatoes thrive in containers, producing abundantly for months. Herbs—basil, parsley, cilantro, thyme—seem designed for pots. Bell peppers, smaller hot peppers, and even compact squash varieties do beautifully. Radishes and smaller root vegetables mature quickly in containers. Lettuce and other greens practically celebrate being in pots.
Soil Quality Matters Most
Since containers concentrate your plants’ root systems in limited soil, use quality potting mix rather than garden soil. Add compost or worm castings to enrich it. Self-watering containers help during our variable spring weather. Drainage holes are non-negotiable—every single container needs them.
Sanda’s Zone 9 Note: Container soil dries out faster than in-ground soil, especially in our Houston sun. Check soil moisture daily during spring—stick your finger an inch into the soil. If it’s dry, water deeply. Shallow, frequent watering encourages shallow roots; deep watering encourages stronger plants.
Container Gardening Benefits
You can move containers to follow the sun or escape unexpected late frosts. Soil-borne diseases become less of a concern since you’re using fresh potting mix each season. You have complete control over soil quality and amendments. And honestly, there’s something joyful about being able to rearrange your garden whenever the mood strikes.
Vertical Growing: Reaching Toward the Sky 📈
If you’re working with genuine spatial constraints—a small balcony, a narrow side yard, or patio space that’s more square footage than square inches—vertical gardening becomes your secret weapon. You’re not fighting for ground space; you’re embracing the vertical dimension.
Vertical Growing Methods That Work in Zone 9
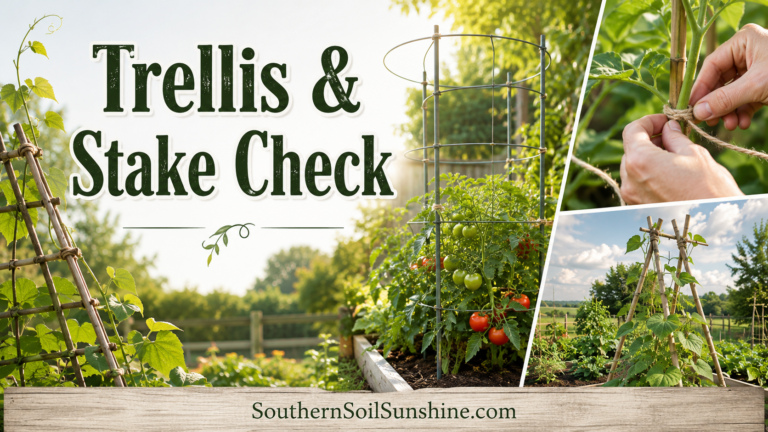
Trellises are the foundation. Build sturdy trellises for pole beans, peas, and vining crops—they’ll spiral upward and produce abundantly. Wall-mounted planters, stacked vertically, create a living wall of greens and herbs. Hanging baskets catch precious overhead space. Tiered plant stands maximize limited footprint. Even a simple ladder becomes a plant stand when you place pots on each rung.
The key is choosing crops that naturally grow vertically or adapting crops through pruning and training. Tomatoes, especially indeterminate varieties, will climb a trellis if you train them. Beans seem designed for vertical growing. Cucumbers vine beautifully upward.
Creating Vertical Microclimates
Here’s something gardeners sometimes miss: vertical gardens create their own microclimate zones. The top section gets more direct sun and dries faster. The bottom section stays slightly more moist and gets afternoon shade. By observing these zones, you can strategically place plants. Sun-loving basil at the top, shade-tolerant lettuce at the bottom. This is responsive, intuitive gardening.
Irrigation Considerations for Vertical Setups
Watering Challenges in Vertical Setups
Vertical gardens require thoughtful water management. When you stack pots or planters, water from upper containers can run down to lower ones—which sounds helpful until it doesn’t, because some plants get overwatered while others stay dry. The best approach? Hand-water deliberately, watering only the soil in each individual container. Drip irrigation systems with individual lines to each pot eliminate guesswork entirely and are worth the investment if you’re going serious with vertical gardening.
Sanda’s Tip: In our Houston spring, evaporation happens quickly on vertical south-facing walls. Check your vertical gardens more frequently than you’d check in-ground beds. Early morning is ideal—catch plants before the heat of the day stresses them, and you’ll notice any moisture issues before they become problems.
Best Vertical Crops for Zone 9 Spring
Sugar snap peas and snow peas climb eagerly and produce for weeks in our cooler spring months. Green beans (pole varieties) are prolific vertical growers. Cucumbers thrive on trellises, producing more fruit when their energy goes up rather than spreading out. Herbs like basil, oregano, and thyme flourish in wall-mounted planters. Lettuce and other greens grow contentedly in tiered arrangements where they get dappled light rather than intense afternoon sun.
The Spiritual Practice of Vertical Growth
There’s something quietly profound about vertical gardening. You’re not trying to sprawl outward; you’re reaching upward with intention. Each layer of growth depends on proper foundation and support. It requires you to think three-dimensionally about your space, to see potential where you thought limitation existed. In many ways, vertical gardening mirrors how we grow spiritually—not always by expanding our circumstances, but by deepening what we already tend, by building upward from a secure foundation, by learning to reach toward light with whatever space we’ve been given. 💚
Ready to Go Deeper in the Garden?
If this article resonated with you, you might be ready for something more than tips.
- Download the FREE Rooted in Grace eBook
- Get the Rooted in Grace Print Book on Amazon
- Join Rooted Reset
- Follow on Instagram – @southernsoils
- Save on Pinterest – @southernsoilsunshine
- Join on Facebook – Southern Soil Sunshine
“The garden is not just a place to grow plants – it is a place to grow yourself.”
Free eBook
Before you go — the book is yours
Rooted in Grace: A Christian Guide to Intuitive Gardening. No cost, no catch. Read it on any device, at whatever pace the season allows.