19 DIY Projects for Spring Break on Your Homestead

Some of the links on this website are affiliate links, which means that if you make a purchase through these links, I may earn a small commission at no additional cost to you. As an Amazon Associate, I earn from qualifying purchases. I only recommend products I genuinely trust and believe will bring value to my readers. Also, some of the content was created with strategic use of AI tools. For more information, please visit the Privacy Policy page. Thank you for supporting my blog and helping me continue to provide valuable content. Gardening is more than growing food—it's where God grows us. If you're hungry for a faith that feels grounded again, I wrote a book for you. Download my free eBook: Rooted in Grace: A Christian Guide to Intuitive Gardening
Spring is here, and it’s the perfect time to add a little flair to your suburban homestead with some DIY projects! From vibrant outdoor decor to clever gardening hacks, I’ve rounded up 19 fun and practical ideas that will have you roll up your sleeves and get your hands dirty (in the best way possible). Let’s turn that backyard into a haven of creativity and productivity—you’ll be surprised at what a little imagination can do!
1. Build A Raised Herb Spiral Or Container Garden

Creating a raised herb spiral or container garden is a fantastic way to add some greenery to your suburban homestead. Picture this: a spiral garden filled with fresh herbs, right in your backyard. It’s not just visually appealing, but it’s also practical!
In the image, you can see a beautifully designed spiral garden. It’s made up of layers that help plants thrive. The spiral shape allows for different microclimates, meaning you can grow a variety of herbs, each with its own needs. I love the idea of walking around it and picking fresh basil or cilantro for dinner!
To get started, gather some materials. You’ll need boards to create the spiral shape, soil, and of course, your favorite herbs. It’s a simple project that can turn into a family affair. Imagine kids helping to plant seeds while chatting about what they want to make with the herbs. The laughter alone is worth it!
Not only does this project beautify your space, but it also encourages healthy eating. There’s something special about cooking with herbs you’ve grown yourself. Plus, having a garden gives you a reason to spend more time outdoors. Who doesn’t enjoy some fresh air and sunshine? So, grab your gardening gloves and let’s get our hands dirty!
2. Start A Butterfly Or Pollinator-Friendly Garden

Creating a butterfly or pollinator-friendly garden is a fantastic way to enjoy spring. This image captures the essence of such a garden, bursting with colors and life. The vibrant flowers attract butterflies and bees, which are essential for pollination.
The sign declaring ‘Pollinator Garden’ is a charming touch. It sets the stage for what this space represents. I can almost hear the gentle buzz of bees and the soft flutter of wings. Imagine having your morning coffee surrounded by this beauty!
As you plant your garden, think about incorporating native flowers. They tend to attract local pollinators better than exotic plants. Flowers like coneflowers, zinnias, and sunflowers can really bring your garden to life!
Creating a space for pollinators isn’t just rewarding; it’s beneficial for the environment too. You’ll be contributing to a healthier ecosystem while enjoying the lovely sights and sounds of nature right in your backyard.
3. DIY Vertical Garden Wall
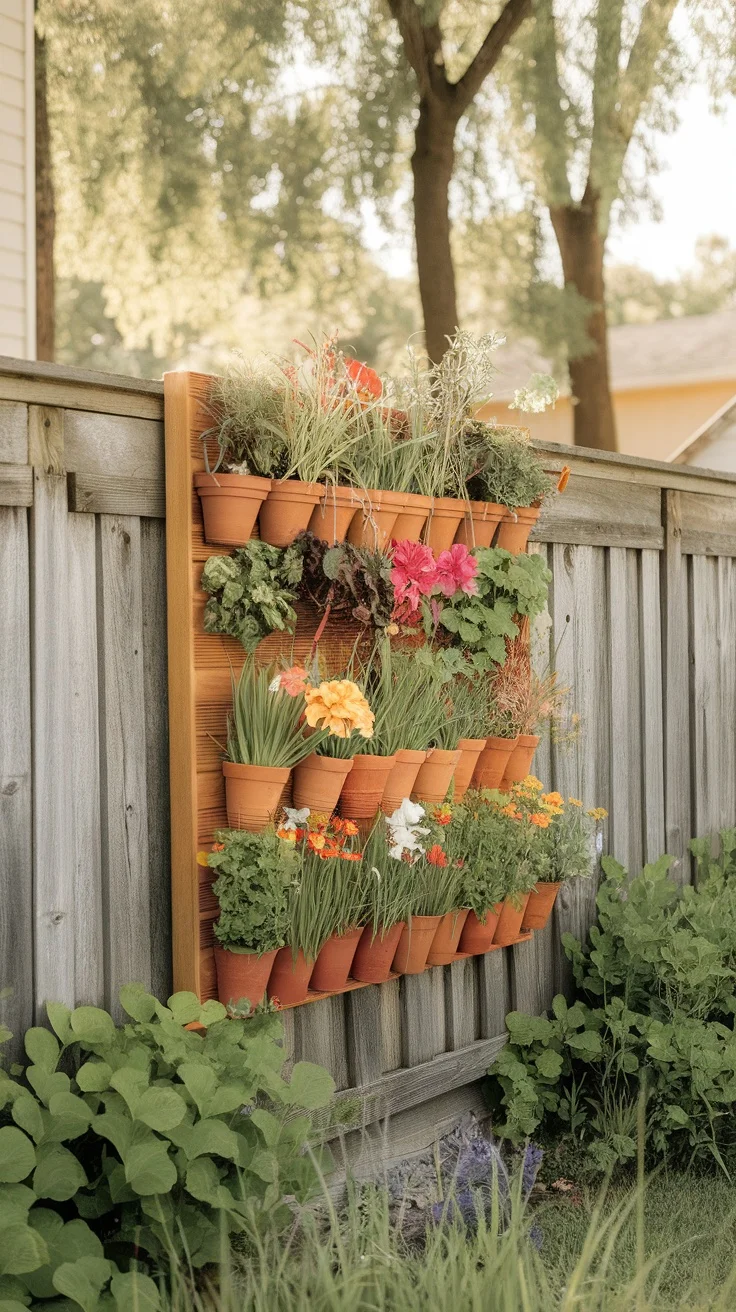
If you’re looking to spice up your outdoor space, a DIY vertical garden wall is the way to go! This image shows a stunning example of how you can turn an ordinary fence into a lush green masterpiece. With colorful flowers and vibrant herbs spilling out of terracotta pots, it’s hard not to smile when you see it.
Creating a vertical garden is not just for aesthetics. It’s a great way to maximize your gardening space, especially if you live in a suburb with limited yard space. You can grow everything from herbs for your kitchen to beautiful flowers that attract butterflies. Imagine grabbing fresh basil right from your wall while cooking!
Setting this up is easier than you might think. Start by building a sturdy frame that can hold the pots. Then, fill those pots with your favorite plants, and hang them in a pattern that pleases your eyes. I promise you will feel like a gardening pro when you see your vibrant wall come to life!
Not to mention, a vertical garden is a conversation starter. Friends and neighbors will definitely want to know how you pulled it off. So, grab your tools and get ready to create something beautiful!
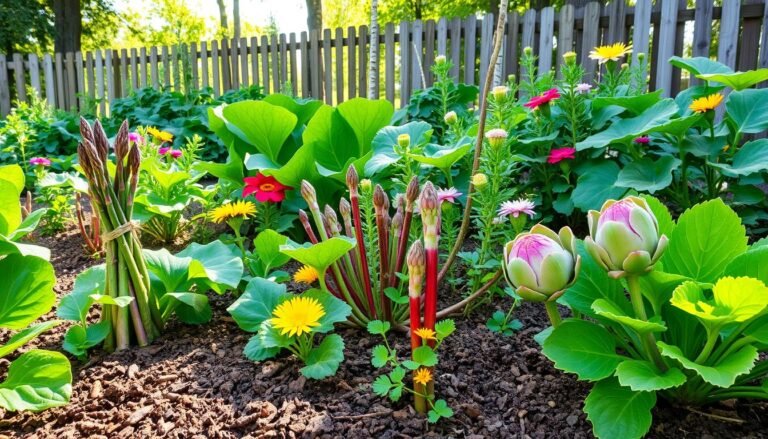
4. Create A No-Dig Garden Bed
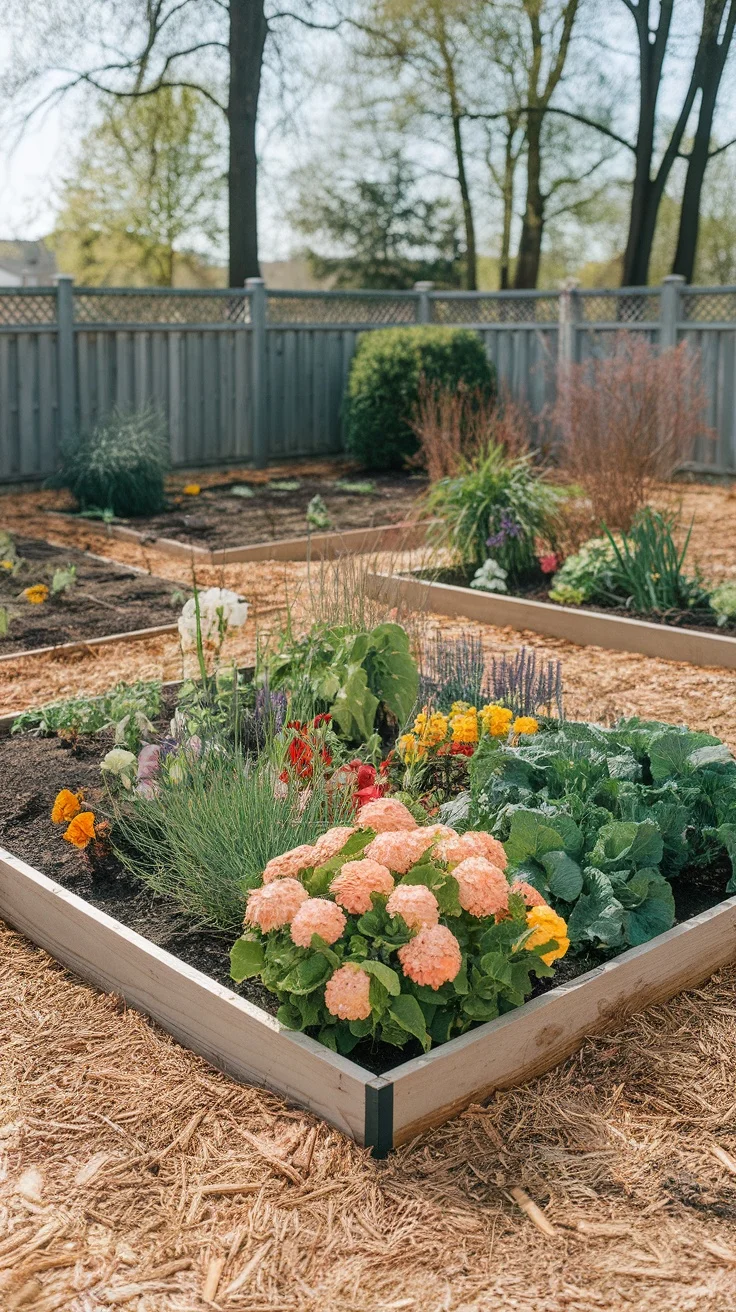
No-dig gardening is a fantastic way to grow your veggies and flowers without breaking your back. Just look at that beautiful garden bed! The vibrant colors of the flowers pop against the lush green leaves, creating a lovely scene that screams spring.
Starting a no-dig garden bed is simple. You lay down layers of organic material right on top of the grass or soil. This method keeps the soil structure intact, allowing for worms and beneficial microbes to thrive. Plus, it saves you from the hassle of digging. Can I get a ‘heck yes’ to that?
In the image, you can see a well-organized garden bed. The flowers and plants are neatly arranged, showcasing the beauty of nature. You might notice the wood frame around the bed. This not only keeps everything tidy but also keeps the soil contained, making it easier to manage your little patch of paradise.
To get started, gather materials like cardboard, straw, leaves, and kitchen scraps. Stack them up, add some compost, and let nature do its thing. I promise, it’s rewarding to watch your plants flourish without all that digging. Who knew gardening could be so easy and pretty?
So, if you’re itching to get your hands dirty this spring, this no-dig method might just be the perfect fit. Let’s make our suburban homesteads bloom!
5. Install A Rainwater Collection System

Picture this: a bright spring day, the flowers blooming, and your very own rainwater collection system working away! The image shows a cheerful blue barrel nestled among colorful blooms, ready to catch every drop of precious rainwater. This simple setup not only looks charming but also saves water for your garden and helps the environment.
Installing a rainwater collection system is pretty straightforward. You just need a good barrel (like the one in the image), a downspout from your roof, and a few connectors. When it rains, the water flows from your roof into the barrel, and you can use it to keep your plants happy. Trust me, your garden will love you for it!
One of the best parts about this project is the savings. Not only will it cut down on your water bill, but you can also feel good about using rainwater instead of tap water. And let’s face it, nothing beats the satisfaction of watering your plants with free water from the sky!
Plus, there’s something special about seeing your rain barrel fill up. It’s like nature’s gift, and it makes being eco-friendly feel a little more fun. So grab your tools, get your barrel, and let’s make your suburban homestead even more sustainable!
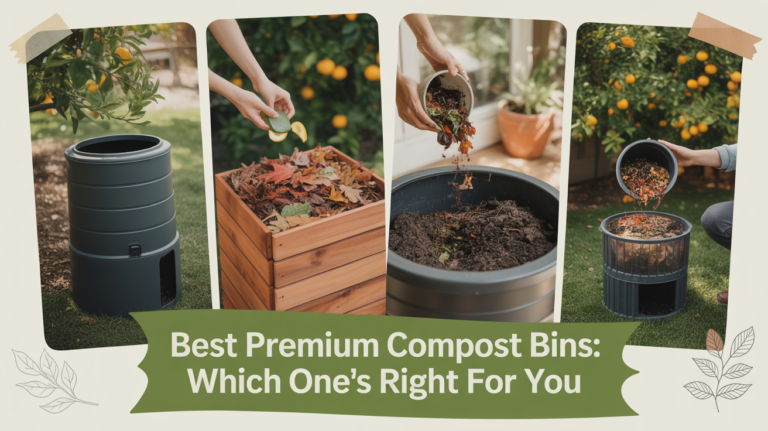
6. Build A Small Composting Station
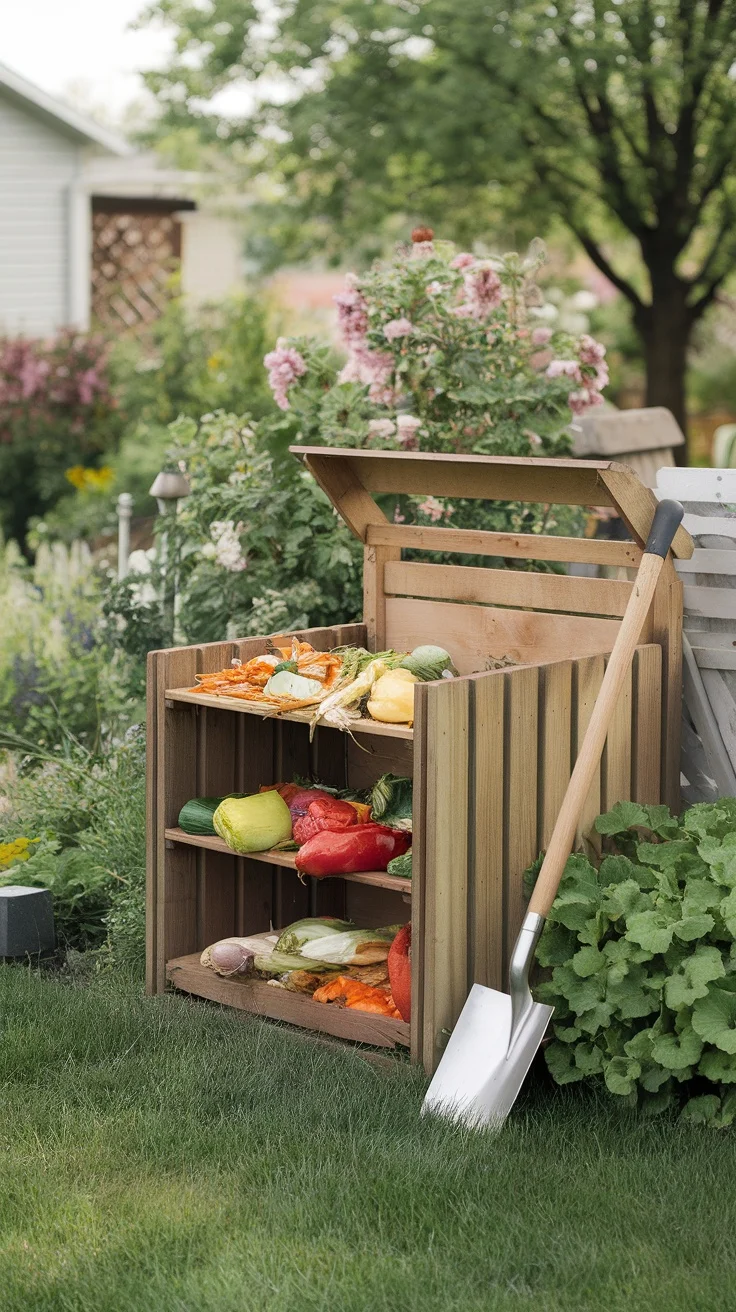
Building a small composting station is a fantastic way to recycle kitchen scraps and yard waste. The image shows a charming wooden compost bin filled with colorful vegetable scraps, sitting in a lovely garden. Just look at all those vibrant colors! You’re not just creating rich soil; you’re also giving those leftovers a second chance at life.
Starting your compost is easier than you might think. Find a sunny spot in your yard for your compost bin. Any structure will do, but having one like the one in the picture makes it easier to manage your compost. Toss in fruit peels, vegetable scraps, coffee grounds, and yard trimmings. The key here is to balance green (nitrogen-rich) and brown (carbon-rich) materials.
Don’t forget to turn your compost every few weeks. It’s a bit like giving it a little love and attention. You’ll be amazed at how quickly it breaks down into nutrient-rich compost. Plus, every time you add to it, you can give yourself a little pat on the back for reducing waste. Composting feels good, and your garden will thank you!
7. Grow A Salad Garden In Containers
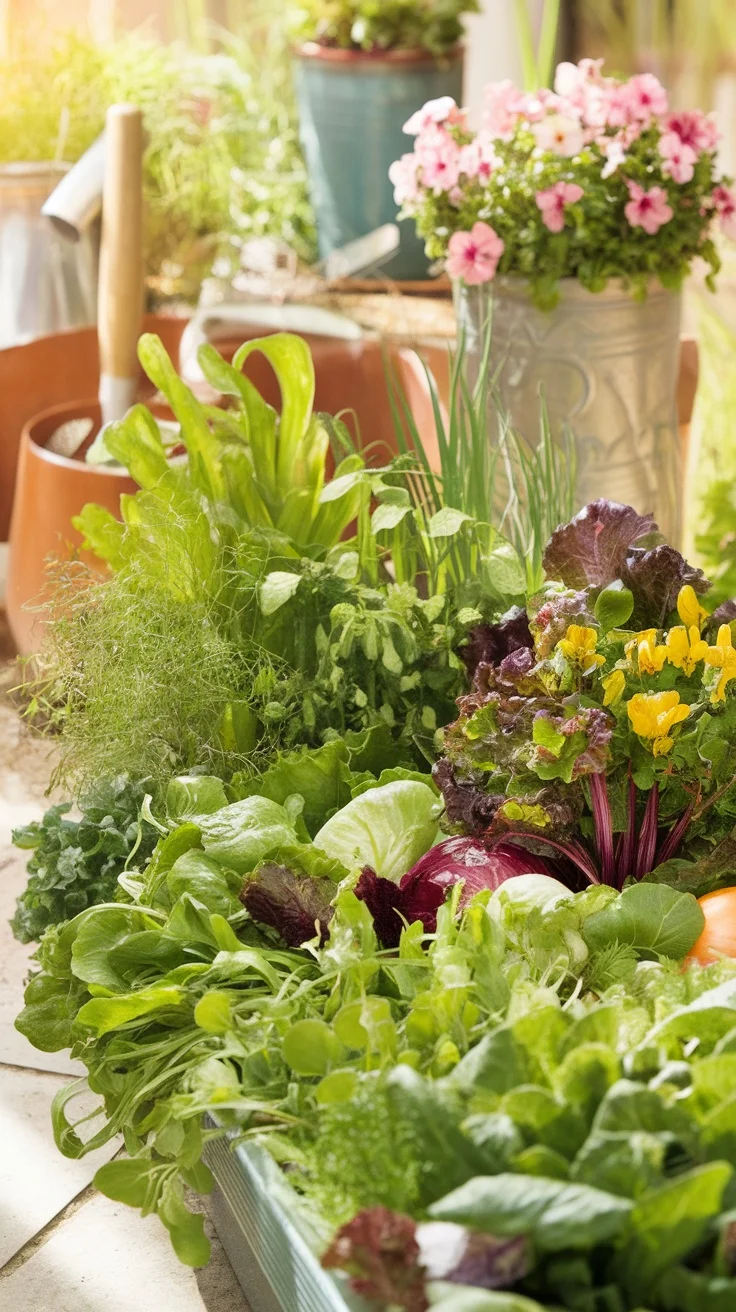
Picture this: a vibrant salad garden right on your patio or balcony. Yes, it’s possible! Growing your own salad ingredients in containers is a fantastic way to enjoy fresh greens while adding a splash of color to your outdoor space.
In the image, you can see an array of leafy greens all lovingly tucked into their pots. From crisp lettuce to aromatic herbs, these plants look like they’re ready for a salad party! The beauty of container gardening is that you can mix and match your favorites, whether it’s romaine, arugula, or a sprinkle of chives. Who wouldn’t want to munch on fresh, home-grown greens?
Getting started is easy. I recommend choosing containers that are at least 12 inches deep to give your plants room to grow. Use high-quality potting soil and ensure good drainage. If you’re feeling fancy, throw in some colorful flowers for added charm!
Don’t forget to water your plants regularly, especially as warmer weather approaches. And trust me, there’s nothing like the satisfaction of enjoying a salad made from your own garden. Just imagine, the crunch of freshly picked lettuce drizzled with olive oil and a dash of vinegar. Yum!
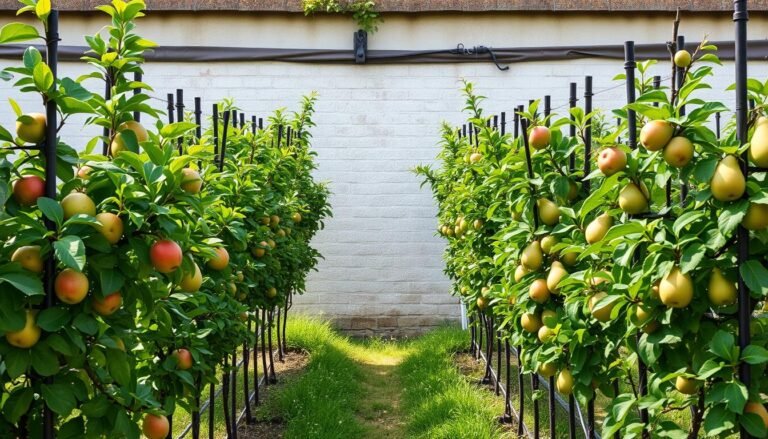
8. Plant An Edible Hedge Or Privacy Screen

There’s something magical about walking past a hedge filled with delicious fruits and flowers. Just look at this vibrant and lush edible hedge! It not only offers a burst of color to your yard but also provides a tasty harvest throughout the seasons.
Imagine snacking on fresh fruits right from your backyard while enjoying some much-needed privacy. A well-planted edible hedge can act as a natural privacy screen, keeping nosy neighbors at bay while adding beauty to your space.
To get started, consider plants like berry bushes, dwarf apple trees, or even edible flowers. These not only look great but are also easy to maintain. I love the idea of planting a mix that attracts pollinators, adding life to your garden.
If you’re feeling adventurous, you can even try growing herbs among the greenery. How fun would it be to pluck fresh basil for your next pasta dish? Plus, it’s a great way to maximize your gardening space!
9. Make A Diy Mason Jar Herb Garden For The Kitchen

A DIY mason jar herb garden is a fun and practical project for any kitchen. Just look at that lovely jar filled with fresh herbs! It’s not just about the beauty, though; having fresh herbs on hand can really amp up your cooking game. Imagine snipping off some basil for a homemade pasta sauce or adding a sprinkle of thyme to your roasted veggies.
Creating your own herb garden is easy and can be done in just a few steps. First, gather some mason jars, potting soil, and your favorite herb seeds or small plants. I love using basil, parsley, and thyme because they’re super versatile and easy to grow.
Once you have everything ready, fill the jars with soil, plant your herbs, and give them a little water. Place them on a sunny windowsill where they can soak up that glorious sunlight. I promise, watching them grow is incredibly satisfying! Plus, your kitchen will smell amazing.
This project not only beautifies your space but also gives you access to fresh flavors. It’s a win-win! So grab those jars and get planting; your taste buds will thank you later!
10. Ferment Vegetables Or Make Pickles
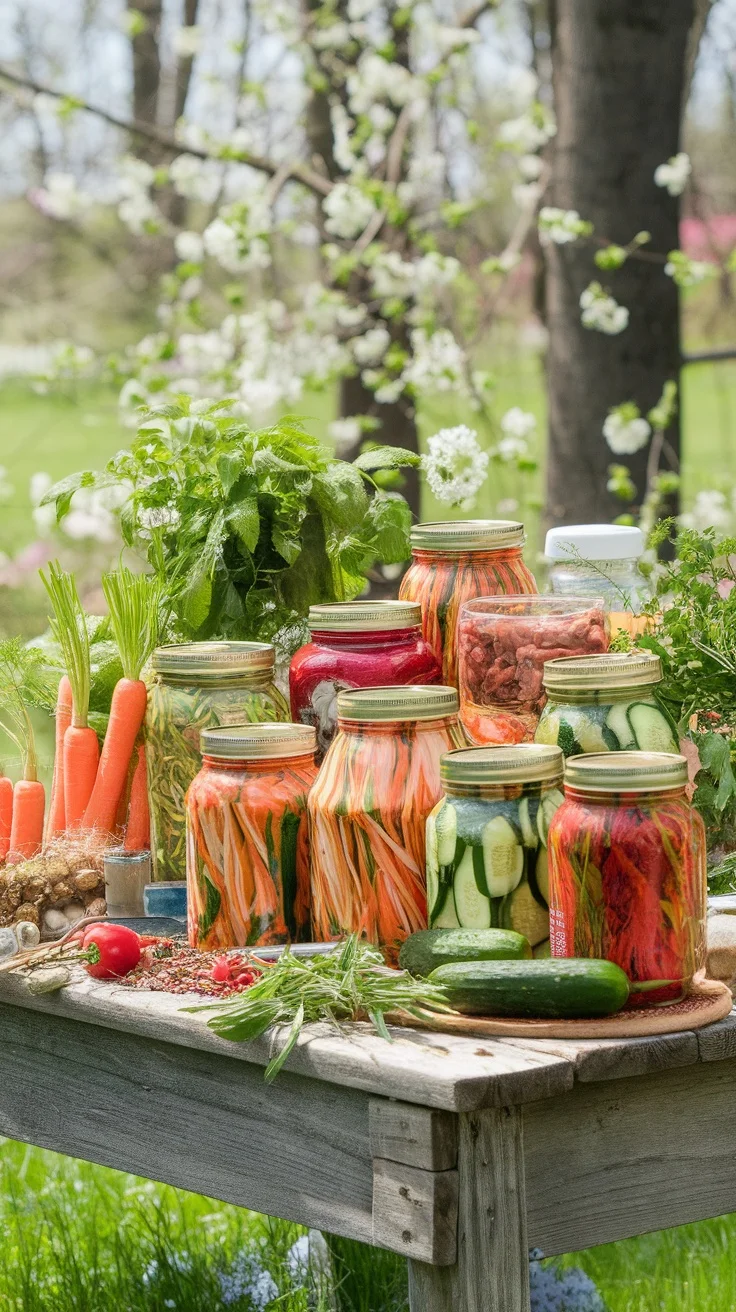
Spring is the perfect time to embrace the crunch of fresh vegetables. The image captures a vibrant assortment of pickled veggies and jars filled with colorful ferments, all set against a backdrop of blooming trees. It’s enough to make anyone excited about getting hands-on in the kitchen!
Fermenting vegetables or making pickles isn’t just a fun project—it’s a way to preserve those farm-fresh flavors right from your backyard. You can experiment with whatever veggies you love. Think cucumbers, carrots, and radishes, all packed with zesty spices. You’ll be amazed at how easy it is to transform simple produce into tangy delights!
To get started, all you need are some fresh veggies, a few basic ingredients, and some jars. Here’s a quick rundown:
- Ingredients:Fresh veggies, water, salt, garlic, spices (like dill or red pepper flakes), and optional vinegar.
Steps:
- Wash and chop your veggies into desired sizes.
- Mix water and salt to create a brine.
- Pack the veggies tightly into jars, adding garlic and spices as you go.
- Pour the brine over the veggies, leaving some space at the top.
- Seal the jars and let them sit at room temperature for a few days, then refrigerate.
Trust me, your future self will thank you when you crack open those jars for a delicious snack or side dish!
11. Make A DIY Sourdough Starter Or Bake Rustic Bread

There’s something magical about making bread at home. This image captures that cozy kitchen vibe, filled with the warmth of fresh loaves cooling on a rack. The rustic breads look inviting, don’t they? They almost beckon you to take a slice while they’re still warm.
You might notice jars of flour and other ingredients sitting on the table, hinting at the fun of mixing and kneading dough. Starting a sourdough starter can be a rewarding project. It’s like raising a little dough pet that needs nurturing. With just flour and water, you can create a bubbly concoction, perfect for baking.
To kick things off, all you need is some flour, water, and time. Mix equal parts of each in a jar, cover it loosely, and let it sit. Feed it daily with more flour and water, and soon you’ll have a lively starter ready to elevate your breads.
Once your starter is bubbling away, the next step is baking. Combine it with flour, salt, and water, let the dough rise, and bake it to golden perfection. The smell of freshly baked bread will fill your home, making it feel extra special.
So, grab your favorite apron, and don’t forget to take a few pictures. Your kitchen will not only be the heart of your home, but it will also be the star of your social media feed!
12. Make Homemade Herbal Salves Or Infused Oils

The kitchen is a great place to create your own herbal salves or infused oils. Picture a cozy countertop, bathed in natural light, adorned with fresh herbs and jars of oils. That’s where the magic happens. I can almost smell the earthy aroma wafting through the air!
Start by gathering your favorite herbs. You can use things like rosemary, thyme, or even some flowers. The beauty of this DIY project is that you can blend your personal favorites. Chop them up and toss them into a clean jar with a good-quality oil like olive or coconut. Fill it up, and let it steep for a few weeks. It’s like giving the herbs a nice little vacation in oil!
When you’re ready to make salves, you’ll need your infused oil, beeswax, and any essential oils you’d like to add. Melt the beeswax and infused oil together, pour it into a small container, and wait for it to cool. Voila! You have a lovely herbal salve that can soothe dry skin or be used in small gifts. Who wouldn’t appreciate a handmade product?
13. DIY Beeswax Wraps Or Reusable Cloth Napkins

Spring is the perfect time to spruce up your home with some eco-friendly projects. One of my personal favorites is making beeswax wraps or reusable cloth napkins. It’s fun, it’s practical, and it adds a splash of color to your kitchen. Just look at that setup! You can see vibrant fabrics and cheerful blooms, creating a cozy atmosphere.
In the image, there are various sizes of beeswax wraps beautifully arranged alongside cloth napkins. Those wraps not only keep your food fresh but also reduce plastic waste. I love that they come in so many colors and patterns. It’s like a little art project every time you make one!
If you decide to jump in, you’ll need some cotton fabric, beeswax, jojoba oil, and pine resin. Cut the fabric into your desired shapes, melt the beeswax with the oil and resin, and then brush it onto your fabric. Finally, let it cool, and voilà! You have your very own beeswax wraps. It’s a simple process, and you can even get the kids involved.
As for cloth napkins, they’re just as easy to make. You can use any fabric you love—just cut it into squares and sew the edges. It’s a great way to use up scraps, and they make every meal feel a little more special. Plus, every time I use them, I feel a bit like a sustainability superhero!
This spring, why not give these projects a go? Not only will you have some stylish kitchen items, but you’ll also be doing your part for the environment. And trust me, nothing feels better than creating something useful with your own two hands!
14. Organize A Spring Pantry Refresh
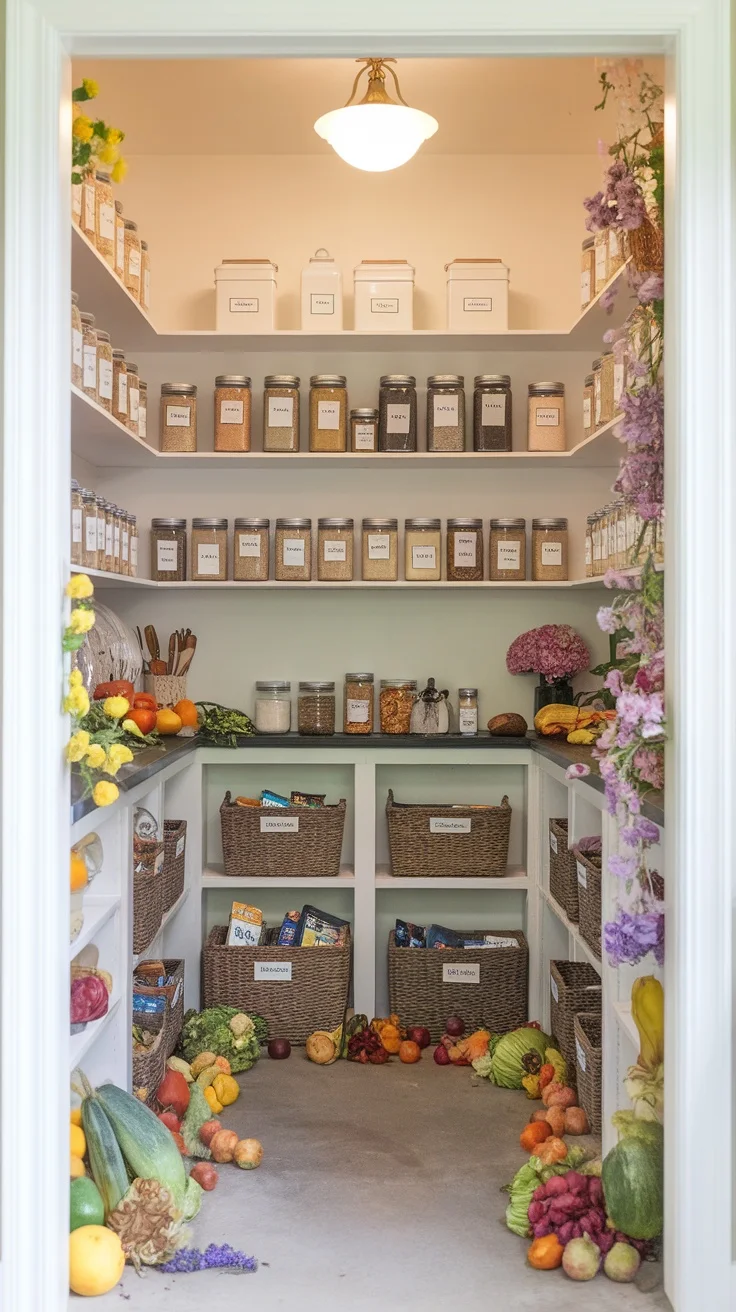
Spring is the perfect time to give your pantry a little love. Imagine opening your pantry doors and being greeted by a tidy, well-organized space. This image captures just that! It shows a bright and cheerful pantry filled with labeled jars and baskets, making everything easy to find.
Start by emptying your pantry and taking stock of what you have. I often find things I forgot I bought, like that giant jar of quinoa I bought on a whim. It’s a great reminder to use up what we have before buying more.
Next, give the shelves a good wipe down. Nobody wants to store food on dusty shelves. Once everything is clean, it’s time to put things back. Group similar items together—baking supplies, snacks, and canned goods all deserve their own space. I love using clear jars for spices and grains; it makes everything look so appealing!
Finally, don’t forget to add a personal touch. A few fresh herbs or a small vase of flowers can brighten up the space. Trust me, every time you open that pantry door, you’ll feel a little happier seeing such a lovely setup.
15. Build A Simple Cold Frame Or Mini Greenhouse

Imagine stepping into your backyard and being greeted by a charming mini greenhouse, just like the one in the image. This little structure is perfect for nurturing seedlings and protecting your plants from unpredictable weather. The glass panels let in sunlight while keeping them cozy inside.
Building a simple cold frame is a rewarding project. You can start with materials you might already have, making it friendly on the wallet. All you need is some wood, old windows, or even a few bricks, like those seen here, to create a sturdy base.
Once you’ve got your frame set up, think about what you want to grow. You can start your herbs or maybe some early vegetables to enjoy later in the season. Picture yourself sipping lemonade in the spring while watching your plants thrive!
16. Create A Backyard Fire Pit & Outdoor Gathering Space

Just picture this: a cozy evening, friends gathered around a crackling fire pit, laughter filling the air. The image of a beautiful backyard fire pit surrounded by comfy seating totally captures this vibe. It’s warm, inviting, and oh-so-perfect for those spring nights. Set against a backdrop of twinkling lights and blooming flowers, this space is a little slice of heaven right in your backyard.
Setting up a fire pit is easier than you might think. You can choose a pre-made model or build your own from stones or bricks. I once made one with some leftover bricks from a project, and let me tell you, it felt like I’d just unlocked the secret to life. Seriously! The first s’mores of the season were a huge hit.
Don’t forget the seating! Comfortable chairs with soft cushions make a big difference. I added some throw pillows, and just like that, it turned into the comfiest spot ever. So, gather your loved ones, roast some marshmallows, and enjoy the great outdoors right at home!
17. Make DIY Birdhouses Or A Bird Bath
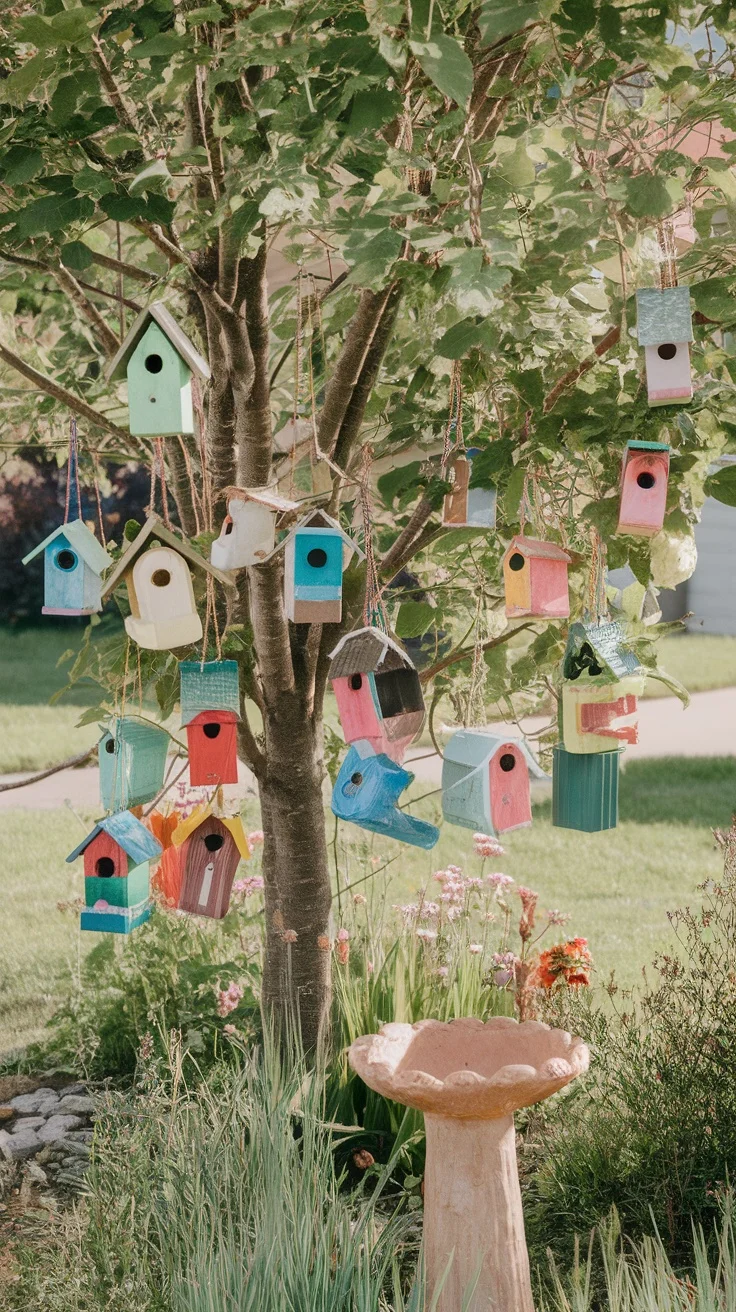
Spring is the perfect time to spruce up your garden with colorful DIY birdhouses and a charming bird bath. Just look at this delightful scene! A tree adorned with an array of whimsical birdhouses brings life and color to any yard.
Creating birdhouses can be a fun weekend project. You can use wood, paint, and even recycled materials. Grab your kids or friends, and let your creativity soar! The best part? You can customize them in any color to match your style.
As for the bird bath, it’s a great way to attract feathered friends. A simple clay dish or an old fountain can be transformed into a perfect splash pad for birds. Just fill it with fresh water and add some stones for a rustic touch.
18. Start A DIY Worm Composting Bin (Vermicomposting)

Worm composting, or vermicomposting, is a fun and eco-friendly project perfect for spring. The image shows a DIY worm bin stacked high with fresh organic waste and happy worms wiggling around. It’s an easy way to recycle kitchen scraps and create nutrient-rich compost for your plants.
In this DIY project, you’ll need a few plastic bins with lids, some shredded newspaper, and, of course, red wigglers (the stars of the show). Layer the shredded paper at the bottom for bedding, add your worms, and toss in some fruit peels or vegetable scraps. Remember, worms love a balanced diet!
Keep your bin in a cool, dark place, and make sure it stays moist—not soggy, just like the perfect sponge. You’ll be amazed at how quickly they turn your scraps into black gold. Trust me, your garden will thank you!
19. Upcycle & Repurpose Old Furniture For Outdoor Use

Spring is here, and it’s the perfect time to breathe new life into old furniture! Take a look at that charming table and chairs in the image. They look like they’ve seen better days but have so much potential! With a little creativity, you can transform them into a delightful outdoor setup.
Imagine sipping coffee at that rustic table while surrounded by your blooming garden. The faded paint and worn wood tell a story, and with a bit of sandpaper and some bright outdoor paint, you can give them a fresh start. I can already picture those chairs in vibrant colors, bringing a pop of joy to your outdoor space.
One fun idea is to place potted plants right on the table or use it to display your favorite gardening books. You could even cover the table with a colorful tablecloth for those weekend brunches outside. Trust me, everyone will want to hang out at your cozy spot!
So, don’t let those old pieces gather dust in the garage. Grab your paintbrush and get to work! Upcycling furniture is not just eco-friendly; it’s also a great way to express your personal style. Plus, the satisfaction of creating something beautiful from the old is unmatched!