
🛡️ How to Plan a Row Cover System for Fall
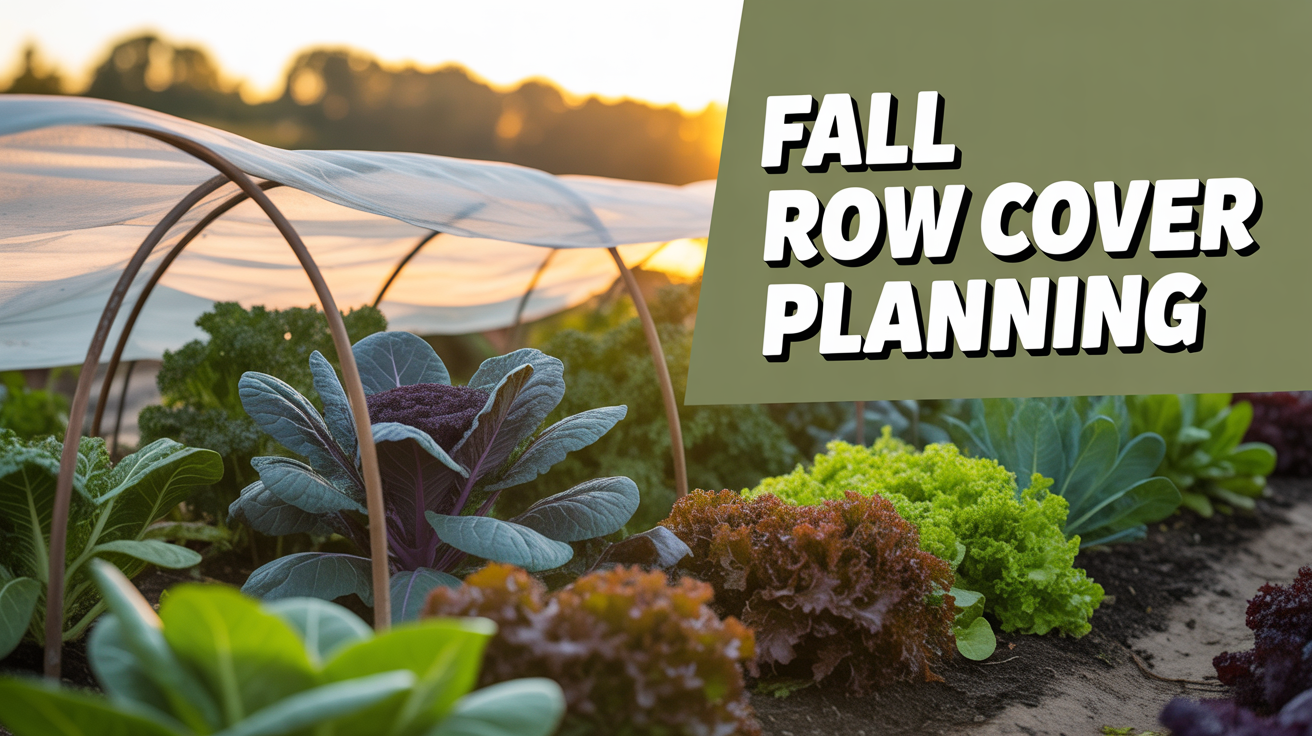
🛡️ How to Plan a Row Cover System for Fall
Protect your cool-season crops from pests, cold snaps, and surprise storms—without smothering your garden in the process.
Free eBook
Rooted in Grace
A Christian guide to intuitive gardening — the whole book, free. Tell me where to send it and it’s yours in a minute.
🌿 Opening Reflection: Gentle Protection, Faithful Provision
Fall gardening in Zone 9 is a genuine gift—but it comes with real unpredictability. One week we’re still sweating through 85°F afternoons. The next? A cold front swoops in, heavy rain batters the seedlings, or a pest swarm decides your broccoli looks like an all-you-can-eat buffet.
That’s where row cover systems come in. They’re like a cozy, breathable blanket for your plants—offering protection without pressure, shelter without separation from the world. I’ve learned over the years that the best garden tools aren’t the fanciest ones; they’re the faithful ones. A good row cover system works quietly, asking nothing of you but to check in now and then, and it rewards you with thriving crops when everything else feels uncertain.
This guide will walk you through how to plan and install a row cover system that works for your space, crops, and our unpredictable Houston-area climate—so your fall garden can thrive with both protection and peace. 🌱
❓ What Is a Row Cover, Really?
A row cover is a lightweight, breathable fabric draped over crops to create a physical barrier between your plants and the outdoor elements. But here’s the thing—it’s not a wall. It’s more like a protective veil. Light gets through. Air circulates. Water can penetrate if you need it to. It’s one of my favorite tools because it works with nature, not against it.
A good row cover system does several things at once:
Blocks pests like aphids, cabbage moths, flea beetles, and loopers from laying eggs on your greens and brassicas. In our Houston fall, this is crucial because those populations can explode.
Protects from frost and cold snaps by trapping just enough warmth to prevent damage during those surprise freezes we get in December.
Shields from harsh sun or wind, especially important when you’re transitioning from summer heat to fall planting and your seedlings need time to acclimate.
Maintains gentle warmth and moisture around your plants, creating a microclimate that encourages growth.
🧑🌾 Why Zone 9 Fall Gardens Need Row Covers
Our fall gardens face a unique set of challenges that most gardening guides don’t quite capture. We’re not in the Deep South’s cold zones, but we’re not tropical either. We live in this in-between space where the weather can’t make up its mind—and that’s where row covers become indispensable.
Lingering late-summer heat can bolt your lettuce before it gets established. Sudden cold snaps (especially in late November and December) can damage tender seedlings or knock back your harvest. Heavy rain and occasional hail beat up young plants. And our pest pressure—loopers, aphids, flea beetles, and cabbage moths—is relentless because our season is so long.
Sanda’s Zone 9 Note: In Houston, we typically start using row covers around mid-August (for heat shading) through February (for frost protection). That’s a much longer season than most gardeners realize. Planning for this extended timeline changes everything about how you design your system.
Row covers let you:
Block bugs from laying eggs on your brassicas and greens, which means fewer loopers, fewer holes, fewer frustrations in October.
Provide slight warmth to help crops mature before a cold snap, extending your harvest by weeks.
Allow later planting with less stress because you’re managing temperature and pest variables.
Protect seedlings during early transitions when they’re most vulnerable to heat, sun, and insects.
📅 When to Use Row Cover in Zone 9
Timing is everything in fall gardening. Let me break down how row cover use shifts throughout our extended season:
| Season | Typical Dates (Zone 9) | Primary Use |
| Early Fall | Mid-August to September | Shade cloth (50–70%) to block heat; insect netting to block pests |
| Mid Fall | October to early November | Lightweight row cover (Agribon 15–19) for seedlings and new plantings |
| Late Fall | Late November to December | Medium-weight row cover (1.0–1.5 oz) for frost protection and warmth retention |
| Overwintering | January to February | Medium to heavy cover (1.5+ oz) for light freezes and frost damage prevention |
Sanda’s Tip: In Zone 9, stick with light or medium-weight row covers (0.5–1.0 oz/sq yd) for most of the season. We rarely get the prolonged freezes that require heavy frost cloth. Save money and complexity by choosing the right weight for our climate, not someone else’s.
🧺 Materials You’ll Need for a Simple Row Cover System
Building a row cover system doesn’t require much, and that’s one of its greatest gifts. You can start simple and expand over time.
Frame Options
PVC pipes (½” or ¾”) are affordable, lightweight, and easy to work with. For a 4×8 bed, they’re perfect. Galvanized wire hoops offer a cleaner look and store flat. Rebar and electrical conduit create a more permanent structure if you’re planning to keep covers on longer beds. Fiberglass rods are durable and bendable, though pricier upfront.
Fabric Options
Lightweight row cover (Agribon 15 or 19) is your workhorse for fall. It lets through 85–90% of light, blocks most pests, and provides a few degrees of frost protection. Insect netting (fine mesh) is better for early fall when you’re mainly fighting bugs. Shade cloth (50–70%) is essential for August and September when heat is the real enemy.
Tools and Anchors
Garden staples or landscape pins hold fabric to the frame. Clips, clamps, or spring ties secure edges and allow for easy venting. Bricks, sandbags, boards, or landscape pins anchor edges to the ground so wind doesn’t lift your cover and expose your plants.
Sanda’s Garden Wisdom: Don’t cheap out on anchors. I’ve learned this the hard way. One Houston wind gust can lift an improperly secured cover, defeating the purpose entirely. Invest in good clips and sturdy ground anchors. Your effort will be worth it.
📐 Step-by-Step: How to Plan and Build Your System
Step 1: Measure Your Bed
Know your width and length before you buy materials. This determines how much fabric you need and how many hoops or frames. For a standard 4×8 raised bed, I typically use 5 hoops spaced 2 feet apart. For longer beds, space them every 3 feet for stability.
Step 2: Choose Your Frame Type
For small beds (4×8 or smaller), PVC hoops inserted into rebar works beautifully. For longer beds or more permanent installations, bent conduit gives you a smoother, more professional look. The frame needs to be sturdy enough to hold fabric and withstand wind—this matters in Houston where we get those sudden gusts.
Aim for a height of 18–24 inches. This is plenty for most fall greens and brassicas. Taller isn’t always better; it just makes wind more likely to catch and lift your cover.
Step 3: Cut Your Fabric
Add 12–18 inches of overhang on all sides beyond your frame. This overhang gets anchored to the ground and prevents gaps where pests can slip in or wind can lift the cover.
Step 4: Install Hoops or Frame
Push hoops into the soil or slide them onto rebar stakes already in place. Make sure they’re symmetrical and secure. A wobbly frame makes it hard to drape fabric evenly and leaves gaps.
Step 5: Drape and Secure the Fabric
Lay the row cover gently over the frame. Clip or staple one side first, then work your way around. Pull it snug but not tight—fabric needs a little give for wind movement. Anchor all edges with pins, boards, or sandbags, making sure no gaps exist where pests can enter or wind can lift the cover.
❄️ Venting and Removing: The Intuitive Part
Here’s where observation matters. Even breathable row covers can trap heat, especially early in fall or on sunny days. Too much trapped heat can bolt greens, stress seedlings, or encourage fungal issues.
I check my covers every few days, especially in September and October. If the temperature under the cover is noticeably warmer than outside air, I lift one or both edges slightly to vent. On very hot days, I might remove the cover entirely during the day and replace it in late afternoon.
By late November, when frost is the real concern, I’m less aggressive about venting unless it’s a warm day. The goal shifts from cooling to protecting.
Sanda’s Tip: Use a simple soil thermometer under your cover to guide venting decisions. If soil temperature
🌡️ Understanding Weight and Frost Protection in Zone 9
One of the biggest misconceptions I encounter is that heavier row covers always mean better protection. In Zone 9, that’s not quite true—and understanding the nuance will save you money and storage space.
Row cover weight is measured in ounces per square yard. A lightweight cover (0.55 oz) provides about 2–4 degrees of frost protection. Medium weight (1.0–1.5 oz) adds 4–8 degrees. Heavy covers (2.0+ oz) can protect against 8–10 degrees of frost. Here’s the thing: our Houston cold snaps rarely dip below the mid-20s Fahrenheit, and they’re typically brief. A medium-weight cover (1.0–1.5 oz) handles 90% of our December and January freeze events beautifully, while being easier to handle, store, and work with than heavy cloth.
I’ve watched gardeners invest in expensive heavy frost cloth meant for Minnesota winters, only to use it three times in five years. Instead, I layer strategically. A medium-weight row cover over plants that are already somewhat cold-hardy (like kale, spinach, and chard) is usually all we need. On the rare night when the forecast predicts a hard freeze below 20°F, I’ll add a second lightweight layer or drape an old blanket over the row cover itself for that single night.
This approach keeps your system flexible, affordable, and perfectly suited to our actual climate rather than an imagined harsher one.
🪲 The Pest-Pressure Timeline: When Bugs Peak in Houston Fall
Not all fall pests arrive at the same time, and knowing the timeline helps you plan when row cover is essential versus when you might have breathing room. This is especially important because covering crops all season long can actually create microclimate issues—excess humidity, fungal spots, bolting—if you’re not thoughtful about timing.
In mid-August through September, flea beetles and cabbage moths are your main concern. These pests are aggressive when it’s still warm, and they can devastate young seedlings in days. This is when I’m most militant about keeping row cover in place, especially over any brassicas or tender leafy greens. I check daily for gaps and make sure edges are heavily anchored.
By October, as temperatures cool, flea beetle pressure drops significantly. Cabbage moths and loopers are still present, but they’re less voracious. This is when I might remove cover on some crops during the day for air circulation and sunshine, replacing it in late afternoon. Spinach, arugula, and lettuce can often handle this schedule without much damage.
Late November through February, the pest pressure shifts almost entirely to frost and cold. Loopers may still be around, but they’re sluggish and less of a threat. Keeping cover on now is more about temperature management than pest blocking. I’ll often switch to a medium-weight cloth and leave it on continuously unless we get an unusually warm day.
This staggered approach means you’re not fighting unnecessary battles. You’re protecting when it matters most and allowing your plants to breathe when they can safely do so.
🔧 Making Your System Reusable: Planning for Year After Year
One reason I love row covers is their longevity. A quality lightweight cover fabric lasts 4–5 seasons with proper care. Hoops and frames can last decades. But that only happens if you build your system with reusability in mind from the start.
Choose frame materials that won’t rust or degrade. Galvanized rebar, PVC, and stainless steel clips are worth the small extra cost. Aluminum hoops and conduit are excellent investments if you’re planning to use row covers regularly. Avoid bare steel rebar or unpainted wood, which deteriorate quickly in our humid climate.
When storing fabric between seasons, fold it loosely (don’t crumple it), let it dry completely, and store it in a cool, dark place like a shed or garage. Never leave it crumpled in a pile through the off-season; UV light and moisture will break down the fibers faster than regular use ever would.
I’ve developed a simple system: I label my frames by size (4×8, 2×4, etc.) with outdoor paint marker, stack them flat in a corner of my garage, and keep my fabric in large Ziploc bags labeled by weight. When August rolls around, I know exactly what I have and where it is. No guessing, no hunting through piles.
| Component | Expected Lifespan | Storage Tip |
| Lightweight row cover fabric | 4–5 years (regular use) | Fold loosely; store dry in labeled bags |





One Comment