Lazy Sourdough Croissant Loaf with Shaved Frozen Butter
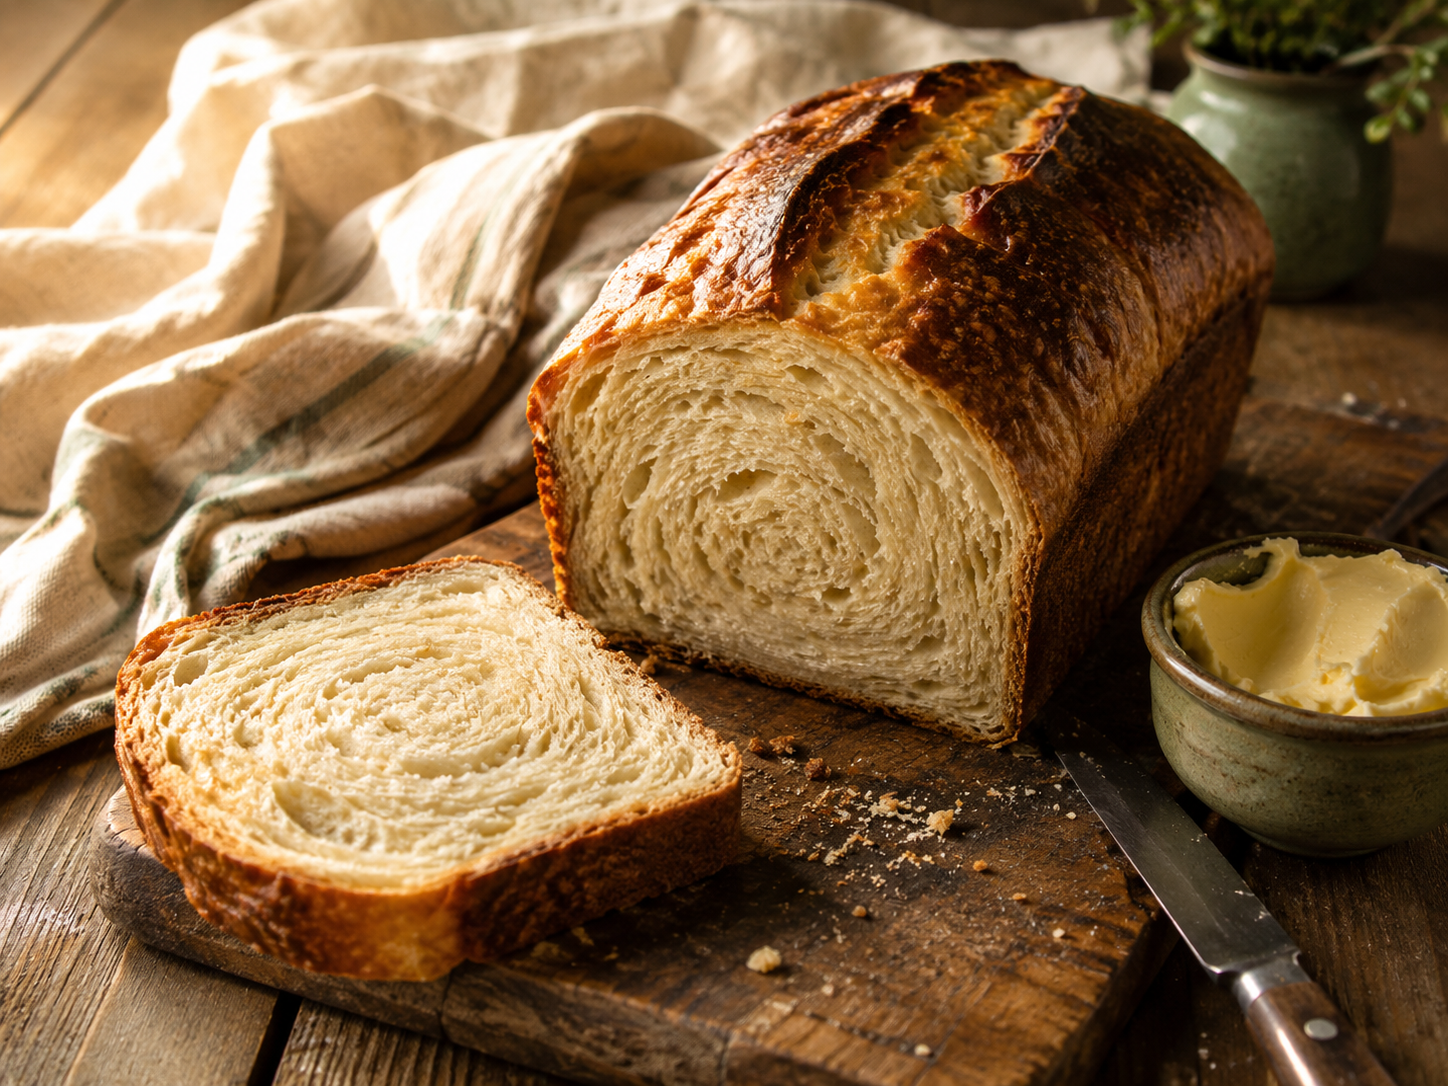
There is a version of me that laminates dough properly. She has a cool marble counter, a rolling pin that stays cold, and a kitchen that does not sit at 78 degrees in July with the oven already on. I have never met her.
What I have instead is a box grater, a stick of butter that has been in the freezer since Tuesday, and about forty-five minutes of patience. That turns out to be enough. Grating frozen butter straight into the dough gets you most of what lamination gives you — those thin, separate layers that pull apart in sheets — without ever rolling a butter block or fighting a pastry that has gone soft on you halfway through.
This is the loaf I make when I want croissant texture and I am not willing to lose an afternoon to it. It is sourdough, so it takes time, but almost none of that time is yours.
Why the frozen-butter shortcut works, especially down here
Traditional lamination depends on keeping a solid sheet of butter cold enough to stay separate from the dough while you roll it. In a Gulf Coast kitchen that is a real fight. The butter warms, it smears into the dough, and instead of layers you get brioche. Good brioche, but not what you were after.
Grated frozen butter changes the problem. The shreds are small enough that they stay solid through the folds, and they are already distributed — you are not trying to keep one large cold thing cold. Every shred becomes its own little pocket of steam in the oven, and steam is what pushes the layers apart.
It is more forgiving, it is faster, and it does not care that your kitchen is warm.
Keep growing
A slower way to garden
My free eBook, Rooted in Grace, is about tending well rather than tending fast — written for Christian women in ordinary backyards.
Free eBook
Rooted in Grace
A Christian guide to intuitive gardening — the whole book, free. Tell me where to send it and it’s yours in a minute.
What you need
For the dough
- 100g active sourdough starter, 100% hydration
- 240g whole milk, warmed to just above room temperature
- 25g sugar
- 350g all-purpose flour
- 7g salt
For the butter layer
- 170g unsalted butter, frozen solid
- 1 tablespoon flour for tossing the shreds — optional, but it keeps them from clumping
Weigh everything. Sourdough is forgiving about a lot of things but not about a cup of flour that was packed differently than last time.
The timeline
Two ways to run this, depending on your day:
- Same day. Mix in the morning, bulk ferment 4 to 6 hours, laminate and shape mid-afternoon, final proof 4 to 6 hours, bake in the evening.
- Overnight. Mix in the evening, bulk ferment in the refrigerator overnight, laminate and shape the next morning, proof, and bake. This is the one I use in summer — the cold ferment keeps the dough manageable when the kitchen is warm.
How to make it
- Mix the dough. Whisk the starter, warm milk, and sugar together until smooth. Add the flour and salt and stir until it comes together shaggy. Cover and rest 30 minutes.
- Build strength. Over the next hour, do 2 to 3 gentle stretch-and-folds, about 20 minutes apart. Then let it bulk ferment 4 to 6 hours at room temperature, or overnight in the refrigerator.
- Prepare the butter. Freeze the butter at least an hour, until it is genuinely hard. Grate it on the large holes of a box grater, toss the shreds with the tablespoon of flour, and put them straight back in the refrigerator until you need them. Do not let them sit out.
- Laminate. Roll the dough into a rectangle about 9 by 14 inches. Scatter half the grated butter over the bottom two-thirds. Fold it like a letter — top third down over the middle, then the bottom third up over that. Chill 20 to 30 minutes. Repeat once or twice more with the rest of the butter, chilling between each fold.
- Shape. Roll the dough out to roughly 9 by 12 inches, then roll it up tightly from the short end, like a cinnamon roll. Set it seam-side down in a parchment-lined loaf pan. Brush the top with egg wash or melted butter if you want a deeper color.
- Final proof. Cover loosely and let it rise 4 to 6 hours at room temperature, or overnight in the refrigerator. It is ready when it looks noticeably puffy and jiggles slightly when you nudge the pan.
- Bake. Preheat to 400°F. Score the top deeply — deeper than feels right — so the steam has somewhere to go. Bake 35 to 40 minutes until deep golden. If it is browning too fast, tent it with foil. Cool completely before you slice it, which is the hardest instruction in this entire post.
What I have learned making this
- Cold dough, cold butter. That is the whole thing. If the dough starts feeling soft or greasy at any point, stop and put it back in the refrigerator for twenty minutes. Nothing is lost.
- Score deeper than you think. An under-scored loaf bursts at the side seam and the layers pull apart in the wrong direction.
- Do not skip the chill between folds. It feels like it is slowing you down. It is the difference between layers and a swirl.
- Slicing it warm collapses it. The interior is still setting. Give it an hour.
Making it your own
The layers are a good place to hide things. Cinnamon sugar between the folds turns this into something close to a morning bun. Grated sharp cheddar and a little black pepper go the other direction entirely. In late summer I have folded in chopped rosemary from the bed by the back door, which is the version my family asks for.
Storing it
- Wrapped at room temperature, 2 to 3 days.
- Airtight in the refrigerator, up to 5 days.
- Sliced, wrapped, and frozen, about a month.
- To bring it back: toast it, or warm the whole loaf at 300°F for 8 to 10 minutes. The layers crisp up again.
What I Reach For to Make This Loaf
None of this is specialty equipment. It is the handful of things that live in my kitchen and come out every time I make this.
The whole method depends on this. Large holes, and a handle solid enough that frozen butter does not fight you.
Sourdough is a weight recipe. Measuring flour by cup is where most disappointing loaves begin.
Thin pans scorch the bottom before the middle sets. Heavier metal bakes this evenly.
For lifting and folding laminated dough without stretching or tearing it. Your hands are too warm for this job.
Tapered, no handles, so you can feel how the dough is behaving underneath. Handled pins hide that from you.
As an Amazon Associate I earn from qualifying purchases, at no extra cost to you. I only point you toward things I would actually use in my own kitchen.
If you make it, I would love to know how it went — especially the version you invent for your own kitchen.
Keep Reading
More slow bread, and the garden that feeds it.
Free eBook
Before you go — the book is yours
Rooted in Grace: A Christian Guide to Intuitive Gardening. No cost, no catch. Read it on any device, at whatever pace the season allows.