How to Sketch a Simple Garden Map
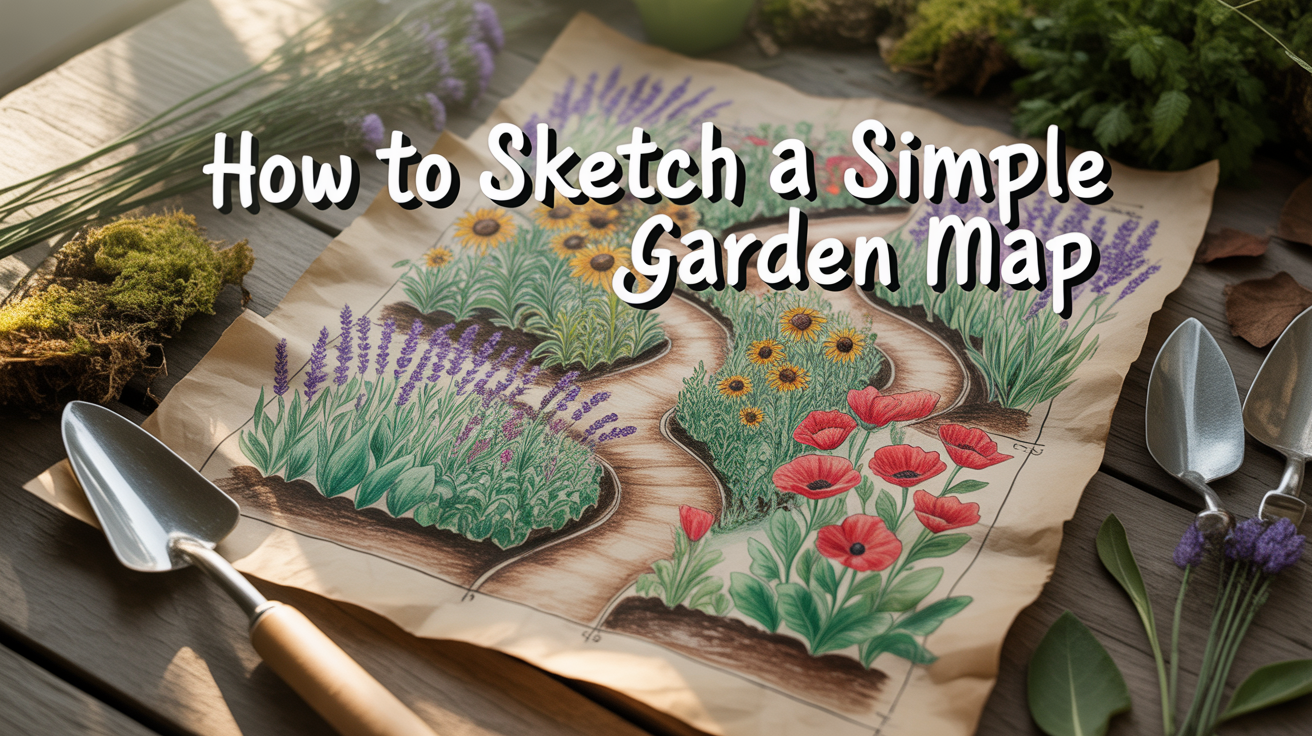
How to Sketch a Simple Garden Map: Order, Creativity & Southern Wisdom 🌱
When I was younger, I thought garden maps were for the Pinterest-perfect crowd or those obsessive gardeners with color-coded everything. But over the years—especially living here in Zone 9 where our growing season practically never stops—I realized something quietly powerful: a simple sketch can save you months of confusion, spark genuine creativity, and actually transform how you garden.
A map doesn’t need to be artistic. It doesn’t need straight lines or perfect scale. It just needs to be yours—a reflection of your actual space and your real intentions for it.
Why a Map Matters in Our Zone 9 World
Here in the Houston suburbs, we’re blessed (and sometimes challenged!) by our ability to plant practically year-round. That means we’re juggling fall crops while spring ones are wrapping up. We’re thinking about succession planting in February while other zones are still under snow. Without a map, it’s easy to lose track of where last summer’s tomatoes lived, whether this bed is ready for legumes, or if you’ve already used up your best pepper spot for three seasons running.
More than practical, though, sketching a garden map becomes something sacred. It’s an act of slowing down—of laying your pencil on paper and really seeing your space. It’s contemplative. In a world that moves too fast, a garden map invites us to pause, observe, and dream. There’s something beautifully spiritual about that rhythm: observing our space, reflecting on what we’ve learned, and responding faithfully to what our gardens are teaching us.
Sanda’s Tip: Garden mapping reminds me how God orders creation—with clear patterns, defined seasons, and room for both structure and surprise. When we sketch our gardens, we participate in that same creative rhythm. It’s orderly, yes, but never rigid.
Free eBook
Rooted in Grace
A Christian guide to intuitive gardening — the whole book, free. Tell me where to send it and it’s yours in a minute.
What You’ll Actually Need (Spoiler: Not Much!)
Here’s the beautiful part—you don’t need fancy supplies or special apps to create a useful garden map. Let me tell you what’s worked beautifully for me:
| Supply | Why It Helps | Must-Have or Nice-to-Have? |
| Paper (plain, graph, or journal) | Graph paper helps with proportions; journal keeps it with your gardening notes | Must-Have |
| Pencil & eraser | Flexibility! You’ll change your mind, and that’s okay | Must-Have |
| Ruler or straight edge | Makes garden beds look proportional without stress | Nice-to-Have |
| Colored pencils or markers | Helps you see crop families and rotation patterns at a glance | Nice-to-Have |
| Garden journal | Tuck your map inside to track notes, dates, and what worked | Nice-to-Have (but I love it!) |
Now, digital tools have their place—spreadsheets and garden apps can be wonderfully organized. But there’s something grounding about pencil on paper, something that slows your mind down and connects you to the earth you’re planning for. I keep mine in a weathered garden journal, and honestly, that act of opening it and sketching brings me such peace. 🌿
Steps to Sketch Your Map: Let’s Keep It Simple
1. Outline Your Growing Space
Start by drawing the actual shape of your beds, containers, or garden area. If you have raised beds, sketch rectangles. If you garden in containers on a patio (very popular here in suburban Houston!), draw circles or squares to represent each one. Don’t stress about perfect scale—just keep the proportions roughly right so you can see relationships between spaces.
2. Add Your Landmarks
Now mark the things that stay put: fences, trees, the shed, your water spigot, the compost bin. In Zone 9, this matters more than you might think. That big oak tree provides afternoon shade in summer—essential for lettuce and greens—but it also drops a ton of debris and competes for water. Mark it so you remember. Same with the south-facing fence wall—that’s your hot spot, perfect for heat-lovers like okra and pepper.
3. Label Your Bed Dimensions
Write down the actual measurements of each bed. “4×8 raised bed,” “12-inch pots,” “3×3 in-ground bed.” This helps you remember planting density when you’re planning next season. A 4×8 bed holds way more than a 2×3, and that matters when you’re thinking about succession planting.
4. Mark What’s Growing Right Now
Write in what you currently have planted. Be specific: “Tomato ‘San Marzano'” tells you more next year than just “tomato.” Include the planting date if you can—this becomes gold information for succession planning in our year-round Zone 9 climate.
5. Add Notes About What You’ve Learned
This is where the map becomes your teacher. Note problems: “Powdery mildew on squash—needs more air circulation.” Celebrate wins: “Kale thrived even in our August heat!” Remember quirks: “This corner stays wet after rain—good for moisture-loving plants.” These notes are your garden’s wisdom, written down so you don’t forget.
6. Leave Room for Dreams
Don’t fill every space. Draw arrows pointing to empty spots for next season’s experiments. Leave margins where you can write “maybe basil here?” or “test zone for shade-tolerant herbs.” Your map is alive, not fixed.
Sanda’s Zone 9 Note: Don’t map out your entire year at once! In Zone 9, we plant in waves. Map the current season, then update your map every 6-8 weeks as you rotate crops. This keeps you connected to what’s actually happening in your garden instead of following a plan that might not fit your real conditions.
Color Coding & Simple Symbols: Making Patterns Visible
If you grab some colored pencils, you unlock a beautiful way to see your garden’s patterns. Color-coding doesn’t have to be complicated—it just helps your eye spot rotations and families at a glance.
A simple color system: Green for leafy crops (lettuce, kale, spinach, chard). Yellow or orange for fruiting crops (tomatoes, peppers, squash, beans). Brown for root crops (carrots, beets, turnips, onions). Purple or pink for flowers and pollinator plants. Blue for perennial herbs or water features.
You can also add simple symbols. I use a little flower (✿) for ornamental plantings, a star (★) for perennials that stay put, and an arrow (→) to show succession plantings. Nothing fancy—just visual shortcuts that help you understand your garden at a glance.
Seasonal Mapping for Our Year-Round Zone 9 Growing
This is where mapping becomes especially powerful for us Houston gardeners. Unlike northern zones that have one clear growing season, we have four distinct planting windows. Creating a separate map for each season keeps you from getting overwhelmed and helps you see rotation patterns clearly.
| Season | Typical Timing | Key Zone 9 Crops |
| Fall | August-October planting | Kale, carrots, lettuce, spinach, broccoli, cabbage, garlic |
| Winter | November-January plantings & harvests | Peas, onions, beets, Swiss chard, mizuna, mâche |
| Spring | February-April planting | Tomatoes, peppers, beans, squash, basil, eggplant |
| Summer | May-July plantings (heat-focused) | Okra, sweet potatoes, Southern peas, heat-tolerant herbs, Armenian cucumber |
By creating four maps throughout the year, you can clearly see: Did I plant tomatoes in that same bed last spring? Is this the third year for peppers in that corner? What did I plant after the garlic came out? These questions become answerable, and that prevents disease buildup and keeps your soil balanced.
Sanda’s Garden Wisdom: Keep your seasonal maps in order—Summer map, Fall map, Winter map, Spring map—tucked together in your journal. Flip back through them in January while planning spring plantings. You’ll remember exactly where things grew and what happened next. It’s like reading your garden’s story.
Sketching as Reflection & Prayer 🙏
Here’s what I’ve discovered: the act of mapping is more than functional. It’s reflective. It’s almost meditative.
As you sketch, notice the empty spaces. Where might you plant something new? Where does your garden feel crowded? Sometimes empty space
Reading Your Map Like a Garden Journal: Patterns That Teach
Once you’ve sketched your map and lived with it for a few weeks, something wonderful happens—it starts to speak to you. Not in words, exactly, but in patterns that emerge when you look back and see what actually happened versus what you planned.
This is where the real learning lives. If you’ve mapped across a few seasons, you’ll notice things like: “That northeast corner always produces the healthiest greens—cooler, better draining.” Or: “Whenever I plant beans in the south bed, they thrive by July, but they struggle if I plant them in March because of our humid springs.” These aren’t failures; they’re your garden teaching you its personality.
Here in Zone 9, our soil and weather patterns are distinct enough that generic gardening advice often misses the mark. But your maps? They tell the true story of your specific microclimate, your soil type, your neighbor’s oak tree shade, the way water pools after our spring rains. When you look back at maps from previous years, you’re not just remembering—you’re recognizing patterns that only emerge over time.
I keep my old maps in a folder, and honestly, they’ve become more valuable to me than any gardening book. They’re the documentation of my own learning. Last year, I sketched that the tomatoes in bed three struggled with early blight. This year, that map reminded me to rotate them to bed one and give that spot a season’s rest. The map prevented a problem before it started.
The gift of keeping maps is that you stop repeating the same mistakes. You start building on what works. Your garden becomes more intentional, more in harmony with its own conditions—and that feels like stewardship.
Mapping with Imperfection: Permission to Change Your Mind
One thing I want to gently emphasize: your map isn’t a contract. It’s not a rigid plan you’re bound to follow. In fact, I’ve found that the gardeners who get most frustrated with mapping are the ones who treat it like gospel—as though deviating from the plan means failure.
Real gardening isn’t like that, especially in our climate where weather shifts dramatically and plants sometimes surprise us. Your seedlings might not germinate as planned. A pest might show up and claim your intended crop. You might spot a plant sale and fall in love with something you didn’t budget for. That’s not chaos—that’s life meeting planning, and it’s beautiful.
The map is your starting point, your gentle guide. It creates enough structure to help you think clearly, but it leaves room for intuition and responsiveness. Some of my best gardens have come from abandoning the plan halfway through and trying something different instead.
Sanda’s Tip: Treat your map like a pencil sketch, not a pen drawing. Use pencil deliberately. When you need to change something, erase it and redraw. That physical act reminds you that flexibility is part of the plan. Your garden will teach you as you go; the map just helps you listen better.
Building Crop Rotation Without Overwhelm: A Houston Gardener’s Approach
Let me be honest—crop rotation can feel like advanced mathematics when you’re juggling multiple plantings per year. But your map makes it manageable, even elegant.
The reason rotation matters is that certain plant families deplete specific nutrients and can leave behind disease spores. In Zone 9, where we plant nearly year-round, skipping rotation quickly leads to tired soil and recurring problems. But because we have so many planting windows, we also have real opportunities to rotate thoughtfully.
A simple approach: divide your main garden beds into three or four zones on your map, and label them A, B, C (or North, South, East, West—whatever feels intuitive). Then use your seasonal maps to track what family went where each season.
A basic three-year rotation might look like this: Year One: Zone A grows tomatoes/peppers (nightshades), Zone B grows beans (legumes), Zone C grows lettuce/greens (brassicas). Year Two: Zone A gets the legumes, Zone B gets the brassicas, Zone C gets the nightshades. Year Three: Everything shifts again. By Year Four, enough time has passed that nightshades can safely return to Zone A without disease pressure.
In our Houston climate, you can compress this. Because we plant in shorter succession cycles, a bed might genuinely rest or host a cover crop more frequently than northern gardeners experience. That’s actually an advantage—your soil rebuilds faster. But you still need to track where things grew, and that’s what your map does.
The real secret? Don’t overthink it. Your map doesn’t need a perfect rotation system drawn out five years in advance. It just needs to answer one question when you’re about to plant: “Where did this family grow last?” If you can look back two or three maps and see a different location, you’re rotating well enough. The soil will thank you.
Sanda’s Zone 9 Note: In our heat and humidity, soil-borne diseases can develop faster than in northern zones. This makes rotation even more valuable for us. But it also means don’t leave a bed fallow for a whole year—our growing season is too long. Instead, plant a cover crop or a different plant family. Keeping the soil occupied (just with different crops) prevents disease spores from thriving in empty, undisturbed soil.
The Quiet Gift of Keeping Records: When Your Map Becomes Memory
There’s something deeply satisfying about flipping back through old garden maps and remembering seasons past. You see the year that the spring was so dry that your squash struggled. The fall when the tomato crop was absolutely abundant. The winter you tried that new variety of kale and decided to grow it every year now.
Your maps become a memory garden themselves. They’re visual proof of growth—not just plants growing, but you growing as a gardener. Looking back, you can see how your confidence grew. How your understanding of your own land deepened. How you learned to work with your climate instead of against it.
When I show new gardeners my maps, they sometimes look at me like I’m
Ready to Go Deeper in the Garden?
If this article resonated with you, you might be ready for something more than tips.
- Download the FREE Rooted in Grace eBook
- Get the Rooted in Grace Print Book on Amazon
- Join Rooted Reset
- Follow on Instagram – @southernsoils
- Save on Pinterest – @southernsoilsunshine
- Join on Facebook – Southern Soil Sunshine
“The garden is not just a place to grow plants – it is a place to grow yourself.”
Free eBook
Before you go — the book is yours
Rooted in Grace: A Christian Guide to Intuitive Gardening. No cost, no catch. Read it on any device, at whatever pace the season allows.