3 Easy and Affordable DIY Ideas to Decorate Your Front Yard
Three Easy & Affordable DIY Ideas to Decorate Your Front Yard This Season 🎄
December has a way of quieting the garden and brightening the doorstep. The leaves settle, the soil rests, and yet—the porch lights glow, the mailbox gets a ribbon, and the front walk suddenly feels like a welcome home again. Here in Zone 9, we’re blessed with milder winters that let us enjoy our outdoor spaces a little longer, and that’s exactly when simple, handmade beauty shines brightest.
I’m convinced that the most meaningful decorations are the ones with fingerprints on them. A child’s bow tied a little off-center, a bit of ribbon from last year’s stash, a branch cut from the backyard—these carry a warmth that store-bought tinsel simply can’t match. This is the season I love most for creating together, for letting beauty be simple and honest and present.
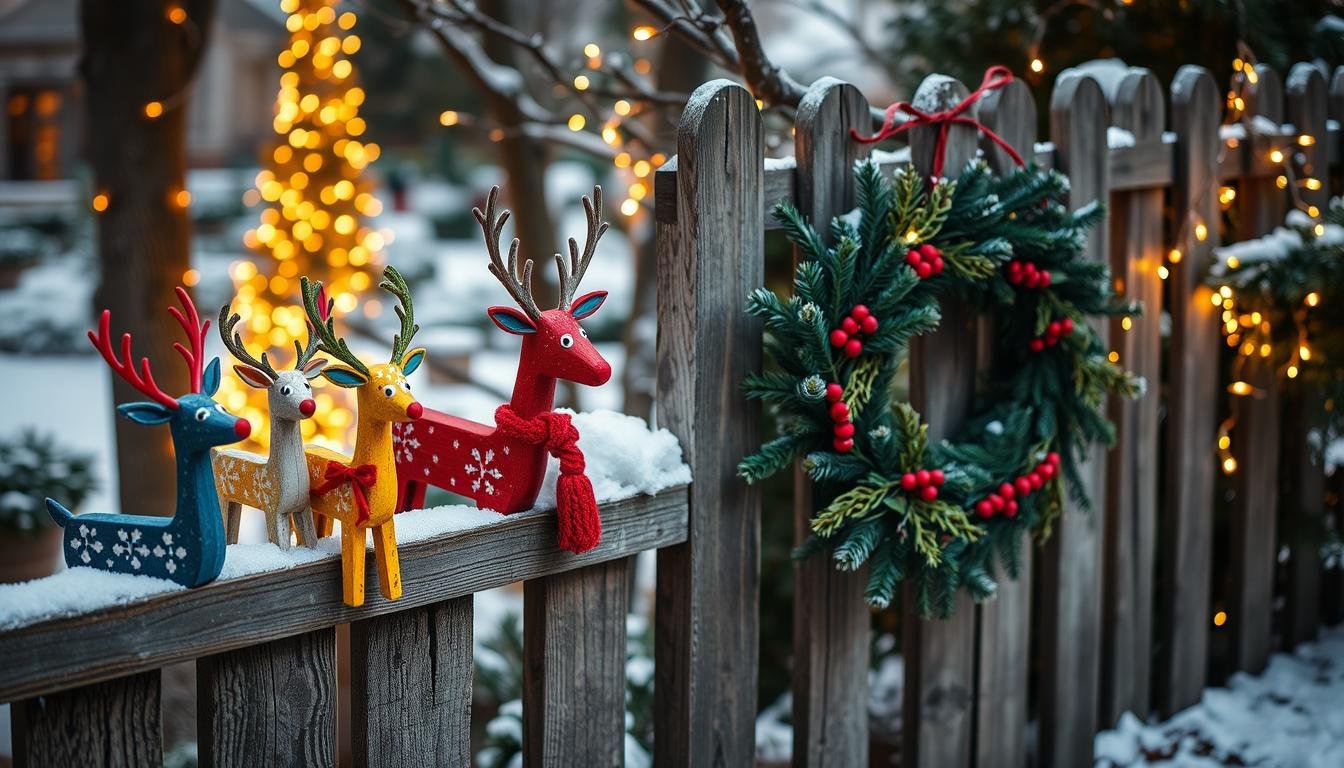
If you’re craving that cozy glow without spending a fortune (and if you’re like me, you want projects you can finish before dinnertime 😊), this is for you. I’m sharing three festive, family-friendly outdoor decorations that bring big charm on a small budget: rustic wooden log reindeer, pool-noodle lollipop stakes, and light-up gift boxes. They’re quick to create, easy to customize, and just right for lining a walkway, flanking your steps, or greeting guests by the mailbox. Each project can be made for just a few dollars—often free if you have scrap wood, branch trimmings, or spare ribbon tucked away.
Free eBook
Rooted in Grace
A Christian guide to intuitive gardening — the whole book, free. Tell me where to send it and it’s yours in a minute.
A Note on Heart + Budget 🤎
I’m a firm believer that the most memorable decorations are the ones created together. Being there, laughing at the glue strings, sipping cocoa on the porch, and letting light spill into the early December dusk—that’s what December is really about. These DIYs aren’t about perfection; they’re about presence.
I’ve noted time and cost for each project and added weather, safety, and placement tips specific to our Zone 9 climate so your yard looks festive without fuss through the whole season. Our Houston-area freeze dates typically run through mid-December, so these outdoor projects are perfectly timed for the holidays.
DIY 1: Wooden Log Reindeer 🦌
Why You’ll Love It
Rustic, charming, and practically free if you’ve got access to branches or a downed limb from the yard. These little reindeer look adorable by the steps or tucked under a porch tree. Tie on a scarf and add a red nose for instant personality. In our Zone 9 gardens, we’re often blessed with plenty of fallen branches and pruning trimmings—this is a perfect way to repurpose what nature gives us.
Supplies You’ll Need
| Item | Notes |
| 1 medium log (body) | 4–6 inches long, from fallen branches |
| 1 smaller log (head) | 2–3 inches long |
| 4 sturdy branch pieces (legs) | 3–4 inches each, pencil-thick |
| 2 thinner branches (antlers) | Wispy twigs work beautifully |
| Short dowel or wood screw | Joins head to body |
| Drill with 3/8″–1/2″ bit | Hand saw or miter saw |
| Wood glue (optional) | Exterior sealer (optional) |
| Ribbon, scarf, or scrap fabric | Red button, felt, or paint for nose |
Time: 45–90 minutes | Cost: Free–$15 (depending on what you have on hand)
Step-by-Step Instructions
Shape the body and head. Start by trimming one flat side on each log so they sit level on the ground. This is easier than it sounds—a miter saw makes quick work of it, but a hand saw works too. Take your time here; a level base means your reindeer won’t look tipsy when it’s standing in your garden bed.
Add the legs. Drill four angled holes under the body—imagine the stance of a real deer, with legs slightly splayed for stability. The holes should angle down and slightly outward. Press-fit your leg branches into these holes. If they feel loose, add a dab of wood glue or secure them with a small screw drilled from inside the body (the body hides the hardware beautifully).
Attach the head. Drill a pilot hole at the front of the body and the back of the head. Join them with a dowel or a small screw. This connection is key to your reindeer’s sturdiness, especially during our occasional December windstorms here in the Houston area.
Add antlers. Drill two small holes at the top of the head and insert your twig antlers. A dab of wood glue holds them steady. The more natural and asymmetrical they look, the more character your reindeer will have.
Dress the deer. Tie on a mini scarf—plaid flannel or a cozy knit looks perfect—and add a red nose using a button glued on, felt, or a dab of red paint. If you want extra weather protection through our humid Zone 9 winters, seal lightly with an exterior-safe sealer. However, I often skip this step and let the wood weather naturally; there’s something beautiful about the patina that develops.
Sanda’s Zone 9 Note: Our Houston-area humidity can soften untreated wood over time, especially if your reindeer gets direct rain exposure. If you want yours to last multiple seasons, a quick coat of exterior polyurethane after assembly is worth the five minutes it takes. Store in a covered area or garage during our heavy rain months (May–September) to extend the life of your creation.
Styling Ideas
Make a family of reindeer: one tall papa deer, one mama deer of medium height, and a baby fawn with shorter legs. Arrange them in a line leading up your front walk, or create a little herd clustered near your mailbox. Add a tiny bell, plaid ribbon, or a sprig of cedar (which grows beautifully in Zone 9!) behind one ear for extra charm. Stage them near a mailbox with a bundle of kindling and a vintage lantern for cozy curb appeal that says, “Welcome home.” 🏡
DIY 2: Pool-Noodle Lollipop Stakes 🍭
Why You’ll Love It
This project is pure joy and laughter—it’s colorful, whimsical, and takes maybe twenty minutes total. Pool noodles are cheap, come in every color you can imagine, and can be cut into cheerful lollipop shapes that brighten any garden bed or porch corner. Kids absolutely love helping with this one, and the finished stakes add instant personality to your front yard.
Supplies You’ll Need
One or two inexpensive pool noodles (dollar stores often have them for $1–2 after Labor Day), a serrated kitchen knife or hand saw, paint or permanent markers in your favorite colors (optional), and stakes or garden wire to anchor them. That’s it!
Time: 20–30 minutes | Cost: $2–$8
Step-by-Step Instructions
Cut your lollipops. Using a serrated knife (a bread knife works great), cut the pool noodle into rounds about 2–3 inches thick. Each round becomes the “candy” of your lollipop. Cut a 12–18 inch stake from the remaining noodle to serve as the stick. If you want to get fancy, cut each round in half and create a swirl pattern, but honestly, the simple round looks just as charming.
Paint or decorate. This is where creativity blooms. Paint each noodle round in festive colors—candy red, mint green, cream, or go wild with stripes and swirls. Permanent markers work beautifully if you want to skip the paint. Let dry completely before moving to the next step.
Assemble. Insert your noodle stake through the center of each round to create the lollipop effect. If the stake is too loose, wrap a bit of waterproof tape around the base of the stake before inserting. Secure the whole thing into a garden bed, flower pot, or planter box using a garden stake or wire if needed.
Sanda’s Garden Wisdom: In our Zone 9 heat and humidity, pool noodle colors can fade if left in direct sun for months. If you’re planning to keep these out through the holidays and into early January, consider placing them in areas with afternoon shade, or refresh the paint in mid-January if they’re looking tired. Our intense UV exposure is no joke, even in winter!
Styling Ideas
Create a “candy lane” by lining your front walk with lollipops in graduated colors. Plant them in terra-cotta pots for easy repositioning, or stake them directly into garden beds. Mix heights by cutting some noodles longer than others. Add small bells or ribbon bows near the base of each stake. These are especially charming flanking a front gate or creating a festive border around a holiday wreath display.
DIY 3: Light-Up Gift Boxes 🎁
Why You’ll Love It
There’s something magical about a glowing gift box sitting on your front step. This project feels fancy but is surprisingly simple. You’re essentially stacking painted cardboard boxes and tucking battery-operated lights inside. The effect is warm, inviting, and utterly charming. In our December evenings, when dusk falls around 5:30 p.m., these lights create the perfect transition from day to night.
Supplies You’ll Need
Three to five cardboard boxes in varying sizes (ask at grocery stores—they often have them free or nearly free), kraft paper or wrapping paper, hot glue gun, battery-operated string lights or LED candles, and ribbon or bows for decoration.
Time: 30–45 minutes | Cost: $5–$15 (mostly for lights and paper)
Step-by-Step Instructions
Prepare your boxes. Stack your boxes in descending size order—largest on
The Gift of Slowing Down: Why Simple Matters
You know what I’ve noticed after years of decorating this front yard? The most beautiful moments aren’t the ones that photograph best—they’re the ones where time feels like it slows down. When you’re standing on a December afternoon, hands sticky with glue, laughing at a slightly lopsided reindeer, or painting pool noodles with your child while the light turns golden… that’s when the real decoration happens. Not on the porch, but in the heart.
There’s a whisper of grace in choosing handmade over hassle, in deciding that good-enough is actually perfect. When we create with intention in our gardens—even something as simple as stacking gift boxes or tying a ribbon—we’re saying yes to presence. Yes to slowing down. Yes to letting others see our fingerprints on the things we offer them. In Zone 9, where our growing season is long and our winters are mild, we’re given a gift: the chance to tend our outdoor spaces almost year-round. These December projects are an invitation to tend not just the garden, but the quiet, generous part of ourselves that knows beauty doesn’t need to be expensive or perfect. It just needs to be real.
Weathering the Season: Zone 9 December Realities
Here’s something we don’t always talk about with Houston-area front-yard decorating: our December weather is wonderfully mild, but it’s also unpredictable. One week you’re in a light jacket, the next week there’s an unexpected freeze warning. Your DIY decorations need to hold up to that—and they will, if you’re thoughtful about placement and materials.
All three of these projects can handle our Zone 9 winters beautifully, but placement matters. The wooden reindeer, for instance, can weather a light freeze without issue. However, if you know a hard freeze is coming (and our Houston area typically sees our coldest dips in early January rather than December), consider moving them to a covered porch or garage temporarily. The pool-noodle lollipops are even heartier—foam handles cold and moisture just fine. The light-up gift boxes, though, should be moved indoors if heavy rain is forecast. Our December rains aren’t usually torrential, but moisture sitting inside a cardboard box can soften the structure over time.
The beauty of these affordable projects is that if weather takes a toll on one of them, you haven’t lost a fortune. You’ve invested time and creativity, which is far more valuable—and also far more repairable. A reindeer that gets weathered? Even more charming. A lollipop that fades? Repaint it in January for a quick refresh. A gift box that softens? Build a new one. This is the rhythm of a real garden life, where we work with seasons rather than against them, and where impermanence teaches us to appreciate what we have right now.
Making It Personal: The Stories Your Yard Tells
One last thought before you head to gather your supplies: these projects are really about inviting others into your story. Your front yard is the first thing your mailman sees, the first thing a neighbor notices when they drive by, the first thing a guest remembers about your home. When you’ve made something with your own hands—when there’s a visible seam or a slightly wonky antler or a paint drip on a lollipop—you’re saying to the world: “This is made with love, not bought with money.”
That’s powerful. In our culture that celebrates the slick and the store-bought, the handmade front yard becomes a quiet act of resistance and generosity. It says: “I have time for beauty. I have hands willing to create. I believe my people are worth the effort.” Your Zone 9 garden, even in December‘s quiet season, becomes a place where others feel welcomed and seen. And isn’t that what the holidays are really about?
Ready to Go Deeper in the Garden?
If this article resonated with you, you might be ready for something more than tips.
- Download the FREE Rooted in Grace eBook
- Get the Rooted in Grace Print Book on Amazon
- Join Rooted Reset
- Follow on Instagram – @southernsoils
- Save on Pinterest – @southernsoilsunshine
- Join on Facebook – Southern Soil Sunshine
“The garden is not just a place to grow plants – it is a place to grow yourself.”
Free eBook
Before you go — the book is yours
Rooted in Grace: A Christian Guide to Intuitive Gardening. No cost, no catch. Read it on any device, at whatever pace the season allows.